PINCER
For the final battle of our first 6mm Flames of War
mini-campaign I expanded the company list points values to 2,000 points each
and very efficiently painted up some new miniatures. I once again took control
of the DAK Panzerkompanie and AR led the Commonwealth’s British Armoured
Squadron.
Here are the expanded 2,000 point lists:
Panzerkompanie
HQ
2x Panzer IV F2
Combat Platoons
3x Panzer IV F2
4x Panzer III L (extra armour and a better 5cm gun)
3 Panzer II F
Divisional Support
Schutzen Spah Pl. (4xmotorcycle mounted MG teams)
Afrika Schutzen Pl. (with 6xMG teams and an 8cm mortar)
Nebelwerfer battery with 4x 15cm Nebelwefers
Priority Bf.109E
I pretty much chose the Panzer IIs because I wanted so badly
to paint them up and the motorcycle recon platoon for no other reason than I
wanted to see how mobile they would be.
Heavy Armoured
Company
HQ
2x Sherman II
Combat Platoons
3x Sherman II (with .50cal AA MG)
3x Grant (with AA MG)
1 Sherman II and 2x Grant (with AA MG)
Weapons Platoons
3x Stuart with AA MG
Divisional Support
Motor Pl. (with light mortar and 2x AT Rifles and sticky
bombs)
3x Scout Bren Carriers
Royal Horse Arty battery (4x 25pdr guns)
Limited Kittyhawk
My choices for the Commonwealth forces were constrained
mainly by time and available miniatures. I’d probably prefer to have additional
artillery but tanks were faster to prepare.
Let’s get on with the …
Battle Summary
Deployment
AR went onto the offensive with his Heavy Armoured Squadron while
my Panzerkompanie switched to the defensive, with reinforcements coming in from
the left and right flanks of my position (forming a kind of pincer-like effect..)
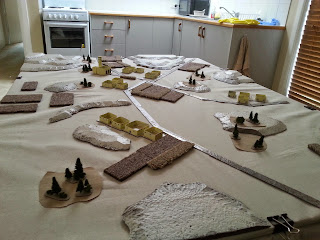
 |
| The battlefield. |
The central crossroads and some particularly valuable
cropland by the roadside were selected as the objective locations. AR deployed
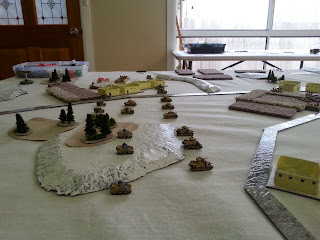
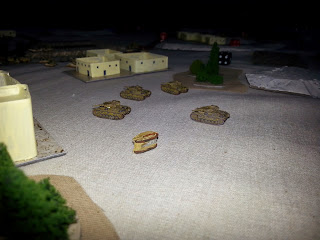
his force as close as possible to the front line in a well-spaced phalanx of
armour with the scout units out on the flanks and the motor platoon’s trucks in
the centre. The 25pdrs took up position on a nearby hill, ready to bombard the German
defenders.
 |
| The Allied assault line. |
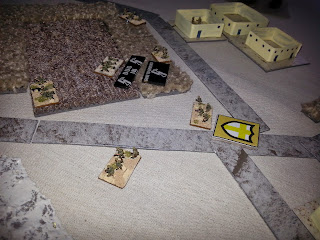
The Germans positioned the dismounted Schutzen platoon
around the forward objective (crossroads), the Nebelwefer battery on a hill at the
rear just in range of the crossroads objective (on a table as ‘big’ as this you
actually have to be careful with the ranges of your artillery!). The Panzer HQ
kept well hidden and the Panzer IV F2 platoon waited in ambush. The remainder
of the German force was held off in reserve.
 |
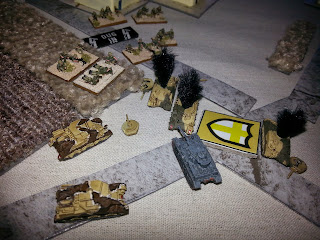
| Schutzen hold the crossroads objective (note homemade objective marker with 8th Army emblem). |
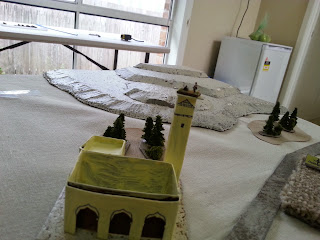
 |
| German observer in the minaret of my recently-built mosque (Weetbix boxes). |
First phase
The British launched straight into the attack, with the
motor platoon and artillery observer truck doubling up to the edge of the central
orchards and fields, eager to assault the crossroads objective next turn and
end this sorry affair no later than turn 3! The scout carriers and Stuart recon
moved out wide to clear cropland and buildings.
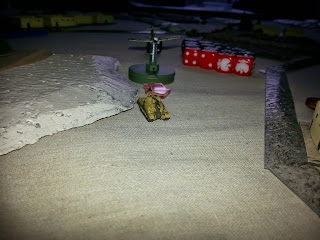
A devastating Nebelwerfer bombardment on the doubling trucks
caused casualties and pinning among the motor platoon while the Luftwaffe broke
through in strength to destroy two of the three Stuart light tanks, including the
platoon commander. Moments later, the Luftwaffe reappeared to eliminate the
British company command tank as it rushed to remobilise the remaining
leaderless Stuart (which remained useless and still for the rest of the game,
it’s nice new camo paint job going to waste). The big-gun-havin’ Panzer IVs
remained, ominously, hidden in ambush.
 |
| The first devastating Luftwaffe attack takes the Stuarts out of the game. |
 |
| The Luftwaffe sweeps in to eliminate the British commander. |
 |
| The motor platoon keep their heads down. |
Second phase
The Motor Platoon remained pinned where they’d dismounted under
fire from the Nebelwerfers. It was left to the massed tanks of the combat
platoons to try and peel the German infantry off the objective. In a series of
assaults and counter-assaults the German infantry were indeed peeled back away
from the objective, albeit at cost to the British tanks, some of which were
attempting to assault through buildings.
Just as a pair of Grant tanks closed in on the crossroads,
they were suddenly and explosively dispatched by a fusillade from behind – the Panzer
IV F2s had emerged from a nearby wooded hill and ambushed the British armour at
close range.
 |
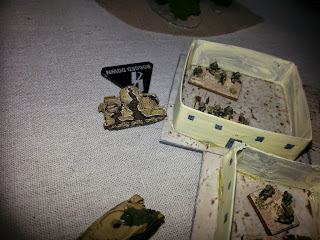
| British tanks assault German infantry in the buildings. |
With the game in the balance, the German command tank moved
in to contest the crossroads with remaining British tanks, trading shots at
close range. At the same time, the Bren carrier platoon, which had hitherto
been creeping along the British left flank making sure no Germans were hiding
in the fields out that way, turned and raced toward the rearward objective. In
just a few turns they would be there and with no German forces in the area, the
day would have been won for Britain.
Third phase
Just as things were looking precarious for the Afrika Korps,
the reinforcements started pouring in like sand into the petrol tank of the
British battle plan. Panzer IIIs burst onto the scene as the Bren carriers
drove at the second objective, destroying one. The Panzer IIs followed, eliminating
the rest of the Bren carriers who had gone from hero to zero in a few short
cannon bursts.
 |
| The Panzer IIIs catch the Bren carriers on the march. |
 |
| The Panzer IIIs, new and improved, sweep toward the objective. |
Although British tanks and artillery support wore down the
German infantry platoon and destroyed the Panzer IV F2s, the arrival of the
improved and reinforced Panzer IIIs proved too much for the British forces, and
the last of their tanks went up in smoke.
 |
| The German commander holds desperately to the objective. |
 |
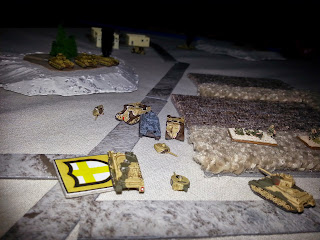
| The wrecks pile up as the battle winds to a conclusion. |
The game dragged on for a few more turns. The Allied air
force scored a Panzer II kill and the German motorcycle recon platoon roared
along the road like the Comancheros for no reason whatsoever, but otherwise the
situation did not change. The German position was no longer under any threat.
Did I forget to mention the motor platoon? Well, they were
still pinned for the whole game … from
that first artillery bombardment. They have some explaining to do.
Appraisal
This battle, like the campaign, was a very close run thing.
The fight could have gone either way at a couple of points. If the Bren
carriers had escaped the onslaught of the panzer reserve and reached their
objective, if the motor platoon had unpinned and been able to take part in the
assault at the crossroads, if the Stuarts had not been eliminated before they
had checked out that wooded hill …
German victory – 5:2
Campaign Scores:
DAK: 11
8th Army: 10
Lessons Learned
Moving at the double: it’s very tempting on the
large playing areas but it seems, in the absence of adequate cover your men had
better have balls of steel to do it (and the rest of them should be steel as
well).
Reconnaissance units: Recon units are also
probably best kept close to the flanks of a large-scale armoured advance to ward
off the close range ambushes which are most likely to be dangerous. Also, keep
likely placements of enemy ambush in mind and move recon units in to clear them
out before and during the dangerous moments for your main force armoured units.
It may be worth ensuring you have either the
mobility or the platoon numbers in your lists to cover all objectives on such
large maps. Leaving objectives undefended with enemy mechanised or motorised
units about is asking for a quick and embarrassing defeat.
Save your ambushes for the right moment if you
can. This really worked well for the Germans, tipping the scales in their
favour in the central tank showdown.
Try not to assault into buildings with tanks.
The Germans git an easy capture of a Grant tank and drove off an assaults they
should, by rights, have lost.
 |
| The Germans capture a bogged Grant tank. |
Where to from here?
I’ve started a few more 6mm projects, including a famous
Tiger I and some additional air support choices courtesy of I94/Raiden miniatures.
I think the Commonwealth forces could do with more infantry and artillery and I
wouldn’t mind grabbing a few AT guns as well. If I’m going to depict an Early War
DAK force then I’m going to need some regular artillery (no Nebs till mid-war).
We’re also looking at switching theatres for our next
campaign – another place where there are wide open spaces and lots of tanks!


