Showing posts with label Dave Graffam. Show all posts

Tuesday, 13 February 2024

British Army Loyalists counterattack SWoM 1 March 1938 - A Very British Civil War, Chain of Command

This battle was quite a while ago (last year), and was sitting in draft. Here it is, finally:

One of my usual gaming mates had not really played Chain of Command before (maybe once long ago). I kept going on and on and on about how good the ruleset is, so we finally decided to have a game. We played a scenario that would feed into my Very British Civil War campaign setting.

King Edward VIII's men get involved

My opponent took command of a force of British Regulars fighting for King Edward's Royalists, specifically a rifle platoon with some armoured support scraped together from local depots. I took command of an infantry column of the Sheffield Workers Militia (SWoM) with an FT-17 and a field medic.

SWoM riflemen exchanging fire with British Army regulars across the Salteye Brook (all human figures: Peter Pig Miniatures).

Counterattack at Peel Green

As the Manchester Commune's offensive to cut the Mersey Corridor has now commenced in earnest, Royalist regular army forces have moved to counterattack, striking at a gap in the leftists lines near the Peel Green cemetery just outside of the Manchester urban area. The Army unit was able to enter the Eccles neighbourhood and get in behind a SWoM column, which then had to send a reserve platoon back to remove the threat.

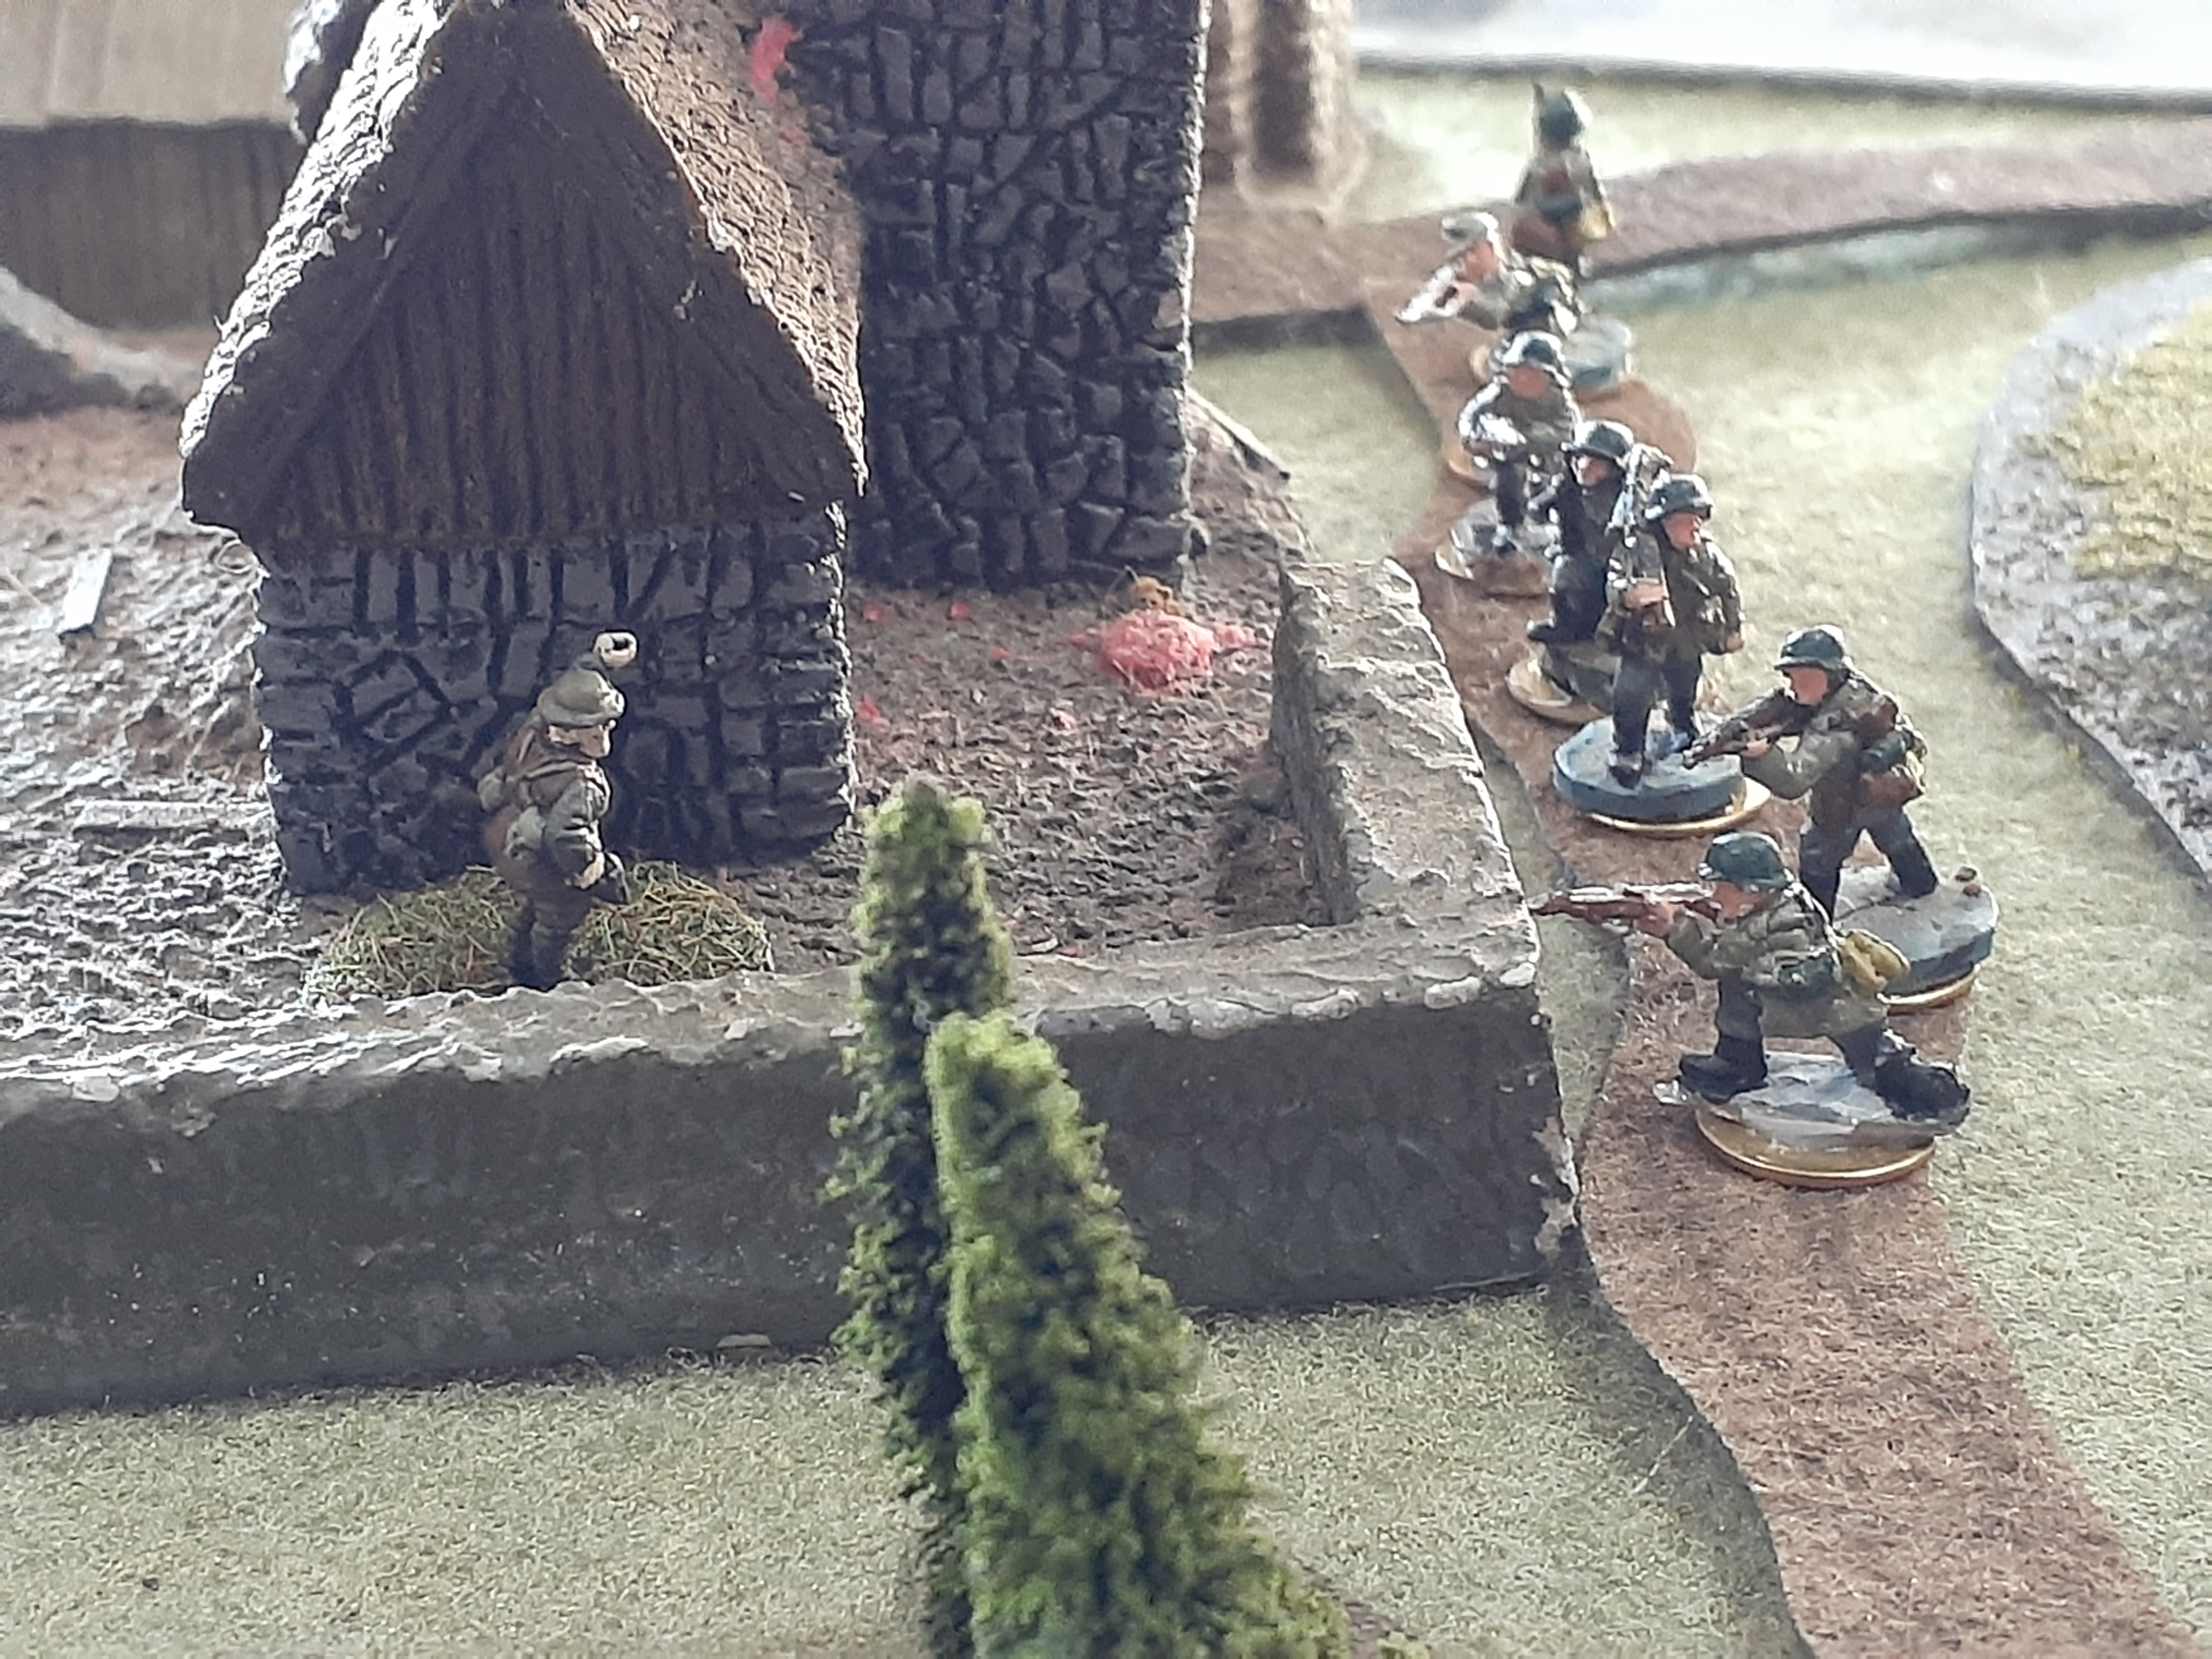
The fighting commenced when a section of SWoM riflemen opened effective fire on Army troops who had moved up to a tall garden hedge. Several men on both sides were hit. Taking the initiative, the Corporal of the Army rifle section took three men and attempted to cross the bridge to gain a better position, while the platoon's 2" mortar team attempted to cover the movement with smoke.


At that exact moment, a SWoM tank appeared, heading down the road towards them. ... And the 2" mortar smoke rounds landed off the mark.

(Battlefront miniatures FT-17).

Within seconds it had loosed a 37mm shell which flew directly into the unfortunate soldiers, killing both the lead man and the one behind him, stopping the crossing attempt as soon as it started.

(Paper buildings from Dave Graffam, Microtactix and Wargame Print - all through Wargames Vault).

Seeing a direct attack across the bridge presently unviable, the Army platoon commander instead brought the two other rifle sections and a Matilda I tank across Salteye Brook further downstream and moved these up to attack the SWoM left flank, which was held by more militia riflemen behind a wall.

SWoM militia hold the cemetery wall.

Spotting this movement, the SWoM section leader (who had a submachinegun and was keen on using it!) took one of his nine-man sub-sections and broke from the cover of the cemetery wall to attack the Army troops before they had a chance to emerge from the treeline.

SWoM rashly attempt an assault.

While the SWoM militiamen had the advantage of their leader's submachinegun, the Army troops had a Bren as a counter. In a hard-fought assault about five were killed and wounded on each side, and both section leaders were wounded. The Army were pushed back, but they had blunted the SWoM assault, and had another section plus a tank backing them up.

Badly beaten up in the assault: the British Army lead left flank section.

The remaining SWoM fighters pulled back to the cemetery wall, though in doing so they were fired upon and broken! As they ran back through the gate, they panicked the men of their other half-section, who started to believe they were about to be attacked by an overwhelming Army force. The SWoM section leader was too busy trying to bandage himself and run away at the same time to try to boost their confidence.

SWoM militiamen and their wounded commander flee through the cemetery gate, panicking their comrades.

Regular Army Matilda I (Zvezda miniatures) approaches from the west.

At the same time, an Army Vickers Medium II tank moved through the centre of the town to protect the first Army section and counter the SWoM FT-17. These two tanks met about 70 metres apart and commenced a duel during which they both sustained damage. (I can't remember what happened, but I think the Vickers Medium took a crew casualty but managed to drive off the FT-17).

Regular Army Vickers Medium II (QRF Miniatures) heads through the town to counter the SWoM tank.

A SWoM medic rushed through the gravestones to tend to the wounded left-flank section leader (he had just ran across from the right-flank section where he was providing first aid to that section's leader who'd also been wounded).

Medic Lionel runs through the gravestones, hoping to save his section leader from ending up beneath one (converted Peter Pig Home Guard officer and scratch-built gravestones).

It was too late though - the British Army infantry and Matilda I were able to inflict heavy casualties on the SWoM left flank section and they ran from their position as the little British Army tank crashed over and through the (obviously very lightly constructed) cemetery wall in pursuit.

"Time to get goin' lads!! Get up Jimmy! What'r ye doin'?"

British Army Victory

Somehow (due to very lucky rolls on the Bad Things Happen table) the badly-shot-up SWoM remnants on the right flank were able to hang on for quite some time after the collapse of their left flank, but they were inevitably going to lose, so we called it after a few more Phases.

The SWoM offensive on this part of the Mersey Corridor front is definitely in trouble now, with skilled and armour-equipped Royalist units in their rear. What are they going to do about that?

This was a fun and educational game (educational for me as it turned out), and really showed the impact of wounded leaders, the risks of advancing in the open without smoke cover, and the riskiness of assaulting undamaged sections which still have their section automatic weapons fully operational.

Wednesday, 8 November 2023

Operation Sun Tears - Force on Force 6mm

An elite military rescue team and an airmobile US Marine Corps platoon attempted to find and evacuate aid workers (and a CIA operative) trapped in a village in a war-torn province in southern Syrda.

Despite reservations, we decided to try Force on Force again in 6mm scale using my under-base erasable unit cards (as we have yet to find a better system to mark casualties in this scale). We were not disappointed with how it turned out. We had put together matched forces based on a few draft points systems available on the internet for Force on Force and then thought up a plausible scenario on the day. I took the Syrdan militia and regular forces, and my opponent took his airmobile US Marines.


The Mission

McCreedy ground his teeth and sweated as stared at his top-secret encoded communications device, waiting for the signal. It was only a few minutes but it seemed like an eternity cliche. Eventually the lights blinked in sequence, telling him what he needed to know and immediately boosting his spirits: the Marines were on the way - he was getting out of this dusty s***-hole. Oh, and the French, British and Italian aid workers among whom he was under cover - yeah, they'd be rescued too. He'd better go tell them to get their things and get ready to go.

We set up the table with the rural village laid out in the centre between some hills and sparse bush at the T-intersection of paved roads entering west, south and east. Two groups of Syrdan local militia, one in technicals and the other in a Syrdan army truck, would start the game entering randomly on two of the three roads.

In the village buildings and aid worker camp we set up six blinds - markers that would be revealed when a unit of either side moved onto them. Four blinds were dummies and two had a number of aid workers with them - including undercover CIA operative McCreedy.

USMC forces would enter on turn one in their choppers. Syrdan reinforcements in the form of a mechanised infantry platoon of the "Iberrani" - the 147th Auxiliary Infantry Brigade, Syrdan 'Foreign Legion' - in BTR-70s and two T-74 Asad tanks, would arrive randomly from the three road entry points using Flames of War reinforcement rules.

We were ready to rock.

My new African Sahel-style terrain, made by me, hastily and cheaply of course.

The shiny circular discs distributed throughout the village, aid worker camp and palm tree grove. I made the buildings from Weet-Bix boxes, vinyl tile, Selleys, house paint and pen.

Choppers Coming

Captain Ahmad got word over the radio: an American aerial incursion was heading this way, directly for the village! Higher command was right: the Americans must have a spy among the foreign aid workers that his unit had been sent to round up for interrogation and to keep them out of trouble. Ahmad cursed the westerners and their meddling, their infiltrators and their prying satellites that had no doubt all combined to tip off the American spy to the Syrdan unit's orders and the approach of their columns. It would take time for the mechanised units to assemble at the village, so the Captain radioed ahead to the local Patriotic Forces unit to mobilise - they had to get there before the Americans.

Three technicals each carrying four Patriotic Forces militiamen raced along the road toward the village. The whump sounds of approaching choppers rapidly intensifying as three of the American aircraft swept past low parallel to the road. With not a moment to spare, the militiamen turned their guns to their left and opened fire at the helicopters.

USMC helicopters race past the militia technicals to reach the village first. (GHQ miniatures).

The militiamen's fire was innacurate, but the return fire from the helicopters' door gunners was not. One technical swerved into a roadside ditch and overturned, bursting into flames with two casualties. Another had it's tyres punctured and slowed to a crawl. The militiamen turned off the road and dismounted into the better cover of the crop fields as the USMC helicopters continued on toward the village.

More Patriotic Force miltiamen, three teams, in a Syrdan army truck also approached from the east while the USMC CH-53 set down in a field north of the village and deployed a MUTT jeep - the Americans were very much aware of the likelihood of Syrdan Army tanks showing up before the extraction had been completed.

Syrdan army GAZ-66 truck on loan to the local Patriotic Forces militia. (CinC miniatures).

The two CH-46 Sea Knights risked accident by landing on the main street of the village so the Marine squads could fan out to search the buildings for the aid workers and provide overwatch at the intersection. The two CH-46s immediately took off to get out of range of Syrdan ground fire. The CH-53 stayed on the ground for now.

USMC helicopters land in the village and the squad disembarks and fans out.


Aid workers (and Agent McCreedy) located

"It's about time you ladies showed up! Sorry to interrupt your workouts." said McCreedy as he walked up to greet the special forces rescue team soldier. The SF soldier retorted and the two men engaged in a back-and-forth of tough guy razzing and wisecracks, with McCreedy making sure to establish his ex-special forces credentials with his 'rescuers' - hell he didn't need no rescuing!

The special forces rescue team had also jumped out of the CH-53 and immediately headed for the air worker camp to search for McCreedy and the other westerners. What do you know - they were right there outside their tents packing!

The officer leading the team was receiving reports through his earpiece from the Marines guarding the perimeter: enemy softskins and light armour was headed their way. Where were the other aid workers? McCreedy, eventually disengaged himself from his verbal battle with the SF team member and said they went off in 'that direction' but he wasn't sure. None of the aid workers seemed to have any idea where their fellows were and didn't seem to perceive the urgency of the situation as they packed their gear. "Hurry please," said the special forces officer.

McCreedy and the first lot of aid workers is located by the special forces rescue team. (GHQ miniatures, Dave Graffam paper model tents).

The gun battle

While all this was going on the militia in the technicals engaged in a long-range firefight with the marines covering the western entrance to the village, taking several further casualties and having to merge two of their teams. A Syrdan Iberrani 'Dushka' team in another technical and a motor rifle squad in a BTR-70 showed up to lend a hand in the firefight. The militia caused some near misses to the special forces rescue team as they shepherded the air workers into the CH-53. "I'm sayin'" said McCreedy, and stay he did. The Marines damaged the Syrdan Dushka and blew up the BTR-70 with an M72 LAW rocket (the squad escaping relatively unharmed). 

Militia and Iberrani motor rifle troops taking accurate fire from the Marines. (GHQ figures, CinC BTR and Heroics & Ros technicals).

The militia approaching from the east in the army truck went off-road to get closer to the Marines through some woods, while a couple of Syrdan army BTR-70s appeared on the road. These armoured vehicles were quickly dealt with by the Marines with M72 LAW rockets, but not before one was able to fire at and damage the CH-53 which had just taken off. The helicopter escaped with the air workers, taking them to the carrier, but would not be able to return to the battlefield. The motor rifle squads got out of their destroyed BTR-70s with minimal casualties and began to advance up a hill toward the village.

The other aid workers are caught by the Syrdans

The Syrdan motor rifle squad on the western side found the other aid workers upon entering a house nearby to the firefight. This presented the US Marines with a dilemma: they would now be hard-pressed to rescue all the aid worker personnel.

The Iberrani motor rifle squad find the rest of the western aid workers hiding in a house. The blue mark on the card behind the Syrdans indicates a casualty with a serious wound (GHQ miniatures).

To add to the American's troubles, two T-74 Asad tanks had now showed up, one on the western approach and another advancing alone up the road to the south. To even further compound the situation, the MUTT jeep's missile launcher was found to be faulty! (A Fog of War card drawn earlier in the game indicated this weapon was out of action due to incorrect maintenance, but my opponent suggested the crew should continue to act normally, as they are unaware of the fault until they attempt to fire).

As the MUTT weapon operator prepared to fire at the T-74 approaching from the south, his blood ran cold as he realised the weapon would not work! Just then a the Syrdan tank fired it's main gun, blowing the jeep and its crew to smithereens. The Marine fireteam overwatching the southern road fired their two LAW rockets at the tank in response and managed to put the tank's main gun out of action. The Marines were now out of LAWs. Things were now dire.

A Syrdan T-74 Asad tank (a mislabelled T-72M) advances alone into the village to wreak havoc on the lightly-armed Marines. (GHQ miniatures).

Luckily the Marines had a FAC with a flight of AV-8 Harriers on station to lend a hand. Unluckily, the Marine pilots suddenly and unexpectedly reported they were now unavailable to support the Marines and dropped off the coms net (another Fog of War card). What had happened? We don't know, but I suspect it might require a later game of AirWar C21 involving my opponent's Harriers and my Syrdan MiG-21s and SAM batteries to game it out.

Mohamed shows up

The Syrdan Iberrani motor rifle troops were pulling back out of the village with their captive aid workers and with the tanks showing up and the Marines taking casualties, the chances of affecting a rescue were getting slim. Just then McCreedy's contact, Mohamed, showed up with his truck, his cousins and their own Dushka.

Mohamed's technical drives up. (Heroics & Ros).

"Over there" McCreedy pointed out the enemy troops running across the crop fields several hundred metres away. Mohamed understood. He yelled to his cousin, who aimed and fired the 12.7mm at the Iberrani troops, knocking down several of the running men. Just then McCreedy saw the light-coloured uniforms of the medical personnel running with the group of enemy soldiers. "Cease fire! Cease fire!" he yelled to Mohamed and his cousins, frantically making the appropriate field signal. It was too late, though none of the Americans knew it yet: one of the aid workers was killed and another slightly wounded.

Iberrani motor riflemen and BTR-70 crew with the aid workers as they come under fire.

As this was going on the Marine GPMG team was taken out by a shot from the T-74 Asad and the other fireteams had started taking losses from the closing Iberrani motor rifle troops, the militia and the other T-74 with the disabled main gun. They had to get out ASAP. The Marines started to pull back toward the eastern side of the village and the platoon commander called in the CH-46s on the radio.

One of the T-74s and a militia gun truck pursue the retreating Marines (GHQ tank and Heroics & Ros truck).

The Rescue Team, McCreedy and Mohamad take the initiative

The special forces rescue team leader and McCreedy looked at one another - they had only one chance to rescue the aid workers and complete the mission. They knew what they had to do and they seized the initiative. McCreedy jumped in the passenger seat of the truck next to Mohamad and quickly explained the plan to him as the special forces soldiers mounted up. Within seconds they were moving, racing down the road toward the Syrdan militia and motor rifle squad, Mohamed's cousin holding his fire this time as ordered to avoid hitting the civilians. At the same time, the CH-46s struck down from above, door guns firing to distract the overwatching T-74, managing to slightly wound the tank commander.

The special forces rescue team, McCreedy, Mohamed and the CH-46 sweep in heroically to wipe out the enemy and save the remaining aid workers!

Mohamed steered his truck straight in between the militia and the Iberrani in the crop fields. His cousin opened fire at point-blank range with his Dushka at the militia to the right, away from the aid workers. Shocked, the Iberrani and militia were unable to bring their weapons to bear in time, as the special forces, together with McCreedy jumped clear of their slowing vehicle straight into a close quarters fight with the Iberrani motor riflemen. A moment of fire and fury later, and the mercenary motor riflemen and most of the militia lay dead, the skill of the special forces showing.

Under the direction of the special forces, the shocked and terrified aid workers got up to a crouch and were guided toward one of the CH-46s as it settled down into the crop field, the back ramp opening up.

Mohamed snapped McCreedy a casual salute and then, without further words, drove off in his bullet-damaged technical. McCreedy hoped his loyal contact would be able to evade the Syrdan authorities.

Sea Knight Down

As the Marines, special forces and aid workers were being extracted by one of the CH-46 Sea Knights, the other was engaging in a duel with the enemy T-74. At this moment the Sea Knight lost the duel and fire from the tank severely damaged the helicopter. Trailing smoke, the CH-46 shuddered away to crash behind a nearby hill. Miraculously, none of the three Marine crew aboard were seriously injured in the crash, and they were able to escape, putting plenty of distance between themselves and the crash site before the Syrdans showed up. The Americans will have to launch another rescue mission to get them back (though as my opponent pointed out, this is likely to need a skirmish-level ruleset to depict accurately, rather than a platoon-level one such as Force on Force).

Aftermath

The US Marines had achieved their mission and emerged victorious from the engagement, destroying three enemy BTR-70s and a couple of technicals, damaging a tank and inflicting heavy casualties on local militia and regular forces. However, the Marines had several men KIA and WIA, a MUTT jeep and helicopter destroyed, and one of the aid workers was killed. 

Furthermore, the Marine FAC was seriously wounded and was unable to be CASEVAC'd by his comrades before the enemy militia in the army truck threatened to overtake them and cut off their retreat. The Syrdans captured this man and he is now receiving treatment in the regional government hospital, under very heavy guard. Unless the Americans can also launch a rescue mission for this Marine, and assuming he survives his wounds, he will risk becoming the honoured guest of President El-Bad of Syrda!

The wounded US Marine FAC, left behind by his retreating comrades, is captured by the Syrdan Patriotic Forces militia.

Conclusion

Myself and my opponent really enjoyed this game, which had plenty of remarkable and tense moments - I was sure I would be able to retain the aid workers, but an inspired and daring action by the elite American rescue team, CIA assets and helicopters turned the tide at the last minute. The very cool narrative nature of Force on Force, including appropriate Fog of War cards, has produced plenty of ideas for follow-on games to sort out action that happened on the periphery or after the battle (air combats and rescue missions specifically).

Although there were sometimes issues with the small scale and group-basing of the miniatures (when the action got very close), overall Force on Force in 6mm is very fun and do-able.

I give it:

Many stars out of ten.

Tuesday, 5 September 2023

SWoM Flank Attack 29 February 1938 - A Very British Civil War, Chain of Command

Again, always write your battle reports while the events of the day are fresh in your mind. Otherwise you'll forget all the good details and have to write these extremely brief, shorthand accounts.

The Mersey Corridor Offensive, Day 1

Battle 3 of my Very British Civil War Chain of Command campaign took place on the morning of the first day of the offensive by the United Communes against the Royalist/Legitimist Front-held Mersey Corridor. The Sheffield Workers Militia (SWoM) attempted to outflank the Legitimist Front positions in Botany Bay Wood held by 13 Platoon of the Blackshorts Northern Legion (led by myself).

As it was the first day of the actual offensive, both sides would have heavier support options including mortars, plenty of automatic weapons and tanks. SWoM forces brought along an FT-17 with a 37mm gun, a Rolls Royce armoured car and a truck for one of their sections, while the defending Blackshorts were able to call upon the Vickers 6-ton tank 'Ceolwulf' from the BUF's C Heavy Column.

Deployment

The game was a good one, and allowed us to try out tank vs tank actions and a different sort of scenario. My Blackshorts held the village and woods near the intersection in the Patrol Phase while the SWoM advanced from the north with a rifle section in an old WWI-era Thornycroft J truck followed up by an equally-old FT-17, while from the west came another rifle section supported by a Rolls Royce armoured car.

This time the table wasn't laid out strictly per the period map, but rather resembled the general area in a vague sort of way.

A Blackshorts section guards the western side of the intersection with a Bren gun team in ambush in a warehouse.

Early misfortune for the Sheffield Workers Militia

The Blackshorts scored an early success when Bren and rifle fire from their 1 Section caused the driver of the SWoM truck to panic, duck and floor it, crashing the truck into the woods where the second Blackshorts section, emerging from cover, riddled the vehicle with bullets, killing most of the SWoM riflemen and driving off a handful of survivors.


A second BUF section deployed to the woods on the eastern side of the intersection and was able to ambush a SWoM truck, eliminating the rifle team being transported.

Flanking attack from the west

The SWoM western advance was able to avoid most of the Blackshorts' defensive fire, and they were into the village with few losses, a Rolls Royce armoured car providing them with cover as they advanced down the street.


The SWoM armoured car leads the advance into the village from the west, the Blackshorts having been outflanked to the north and west. (Armoured car from QRF miniatures).

Blackshorts pull back

A further SWoM rifle section advanced across the open fields to the north and was able to get into the village, while a fourth section provided some fire support. By this stage too the Commune's FT-17 had advanced down the road and began firing into the position held by Blackshorts 1 Section. This section was now in real danger of being surrounded and cut off, so under the cover of some very effective smoke dropped by 13 Platoon's mortar team, and wise use of a Chain of Command die to interrupt enemy fire, they ran across the street and into a safer building to hold out in.


SWoM militia in civilian clothes and armbands advance across a field to the north of the village. (Peter Pig miniatures Spanish Civil War range).

The Blackshorts' 2" mortar team was able to put down some very useful smoke to cover their rifle sections as they retreated through the village. (Peter Pig 8th Army figures).

At the height of the action, as the SWoM close in and the Blackshorts attempt to avoid being cut off and surrounded. Armoured support for both sides has arrived at this point. (The buildings are paper terrain sourced through Wargames Vault from makers including Dave Graffam/Wargame Print and Microtactix).

Final phases

The Blackshorts had taken some casualties by this point, and were facing superior numbers, but were in a fairly solid defensive position and were generally able to dominate the firefight, despite the enemy armoured vehicles' machine guns and cannon. The BUF's Vickers 6-ton tank finally emerged and engaged the SWoM FT-17 in a tank duel (that was unexpectedly a bit too evenly matched for my liking, as it turned out, although I didn't introduce the complexity of the FT-17 one-man-turret rule as I hadn't included it in the Arsenal list and couldn't just spring that on my opponent!). The Vickers 6-ton managed to hit the FT-17 several times but was unable to cause significant damage, whereas good shooting from the FT-17 managed to penetrate the Vickers 6-ton several times, causing damage, shock and killing the vehicle's driver.

Continuing effective fire from the Blackshorts infantry inflicted enough casualties on the advancing Sheffield riflemen that their Force Morale dropped to zero and they had to retreat. The Blackshorts were able to hold Botany Bay Wood on the first day of the Socialists' attack, although the BUF Heavy Column received a bloody nose in the process.

The Blackshorts' final positions.


The BUF Vickers 6-ton 'Ceolwulf' duels with the SWoM FT-17, which is off-screen. (The tank is a QRF miniature, the infantry are Peter Pig).

What's next?

What's next? Day 2 of the VBCW campaign of course.

Well, first we have a game of A World Aflame set in a 1930s alt-history civil war Australia (the 'A Right Bloody Mess' setting, more info found here: https://www.karwansaraypublishers.com/en-au/blogs/wss-news/a-right-bloody-mess). This will be using other guys' miniatures, terrain and rulesets.

After that, Day 2 of the VBCW campaign. I can hopefully obtain some Soviet-made tanks to give the Sheffield Workers Militia suitable equipment for their armoured assault, other than the WW1 relics.

Friday, 14 July 2023

Defence of Verneuil-Grand, France 1940 (Chain of Command)


Battle 3 of our Chain of Command France 1940 campaign happened the other day. Here is a report of the action. An attack on a town with two plus German platoons against two determined platoons of the Derwents was always going to be a bloodbath...

Unfortunately I didn't get anywhere near enough (barely presentable) pictures of the action, as I was too busy rolling dice.

The campaign map: progress so far.

The battle area according to Google Maps.

Deployment

Ze Germans

With almost no pause after overrunning 7 Platoon, the German Auflkarungs units assault the main British positions on the edge of the town of Verneuil-Grand. The Germans were able to call on up to two motorcycle reconnaissance platoons, a half-platoon of MG34 machine guns on tripods, and a single Sdkfz 222 armoured car. The German assault was also overseen directly by their company commander and his radiomen. (Note: We have house rules that the presence of a company commander or equivalent adds a Red Die to the Command dice and a radio allows a single Command Dice roll of '6' to be turned into a '5' and therefore converted to Chain of Command points).

Ze Tommys

9 Platoon of had been tasked with holding the eastern part of Verneuil-Grand and had been busy digging trenches, filling sandbags and fortifying a prominent building at the edge of the village as a strongpoint, or 'keep' which was to serve as the A Company HQ and a blockhouse against the German advance. Captain Remington was at this moment inspecting the work on the A Company keep and sharing his morning bottle of wine with the 2 Section lads working on the fortifications. Conversation immediately stopped as the lookout announced that 7 Platoon fellows were running into the position, pursued by a Jerry armoured car, with motorcycle troops following right behind!


Overall German scheme of manoeuvre and British defensive deployments.

A Company picked the three-story corner building to fortify as their HQ/keep as it offered good views of the village approaches. (Paper terrain buildings from Dave Graffam Models, Microtactix Battlelands Normandy and Wargame Paper Scenery).


The attack goes in

The German company commander observed his objective through binoculars from a nearby barn roof. Seeing the risk of moving directly down the main street of the town, he deployed his lead platoon to advance up the left of the main road toward the lightly wooded area near the ponds to flank the village, while the heavy machine gun platoon set up amongst some rocks and small trees on overwatch to cover the advance. The Sdkfz 222 proceeded cautiously down the road in support.

Captain Remington immediately had the 7 Platoon men organised into two sections, issued ammo top-ups and sent out to occupy first the right then the left flanks of the Company position while 9 Platoon got ready in the keep and the strongest of the nearby buildings.

The German lead section advances cautiously left of the road while 2 Section, 9 Platoon prepares to fire from the windows of their HQ keep.

Within seconds of the Germans coming into sight, 9 Platoon's men in the keep opened up a fusillade from their rifle and Lewis LMG. German return fire was accurate however, and young Private Oswald Mathers, who had been carelessly peering out the window, was hit in the hand and wounded.

The German machine gun platoon heard the shots and attempted to spot the origin of the fire as they set up their tripod, but just as they did so, several plumes of smoke began pouring from the field in front of them and obscuring the action: 9 Platoon's 2" mortar had spotted the danger and dropped some very precise smoke rounds. Well done Privates Mitchell and Tasker!

7 Platoon survivors defend the pond woods

Combined surviving effectives of 2 and 3 Sections, 7 Platoon (under CPL John Howse. CPL Warrick of 2 Section having gone to the rear for treatment for his wounds), appeared in the woods and gave the Germans a volley. Several Germans were seen to fall, but an additional motorcycle section came up in support and began laying down withering fire on the British, hitting several and inflicting a lot of shock. Additionally, the Vickers MMG on the top floor of the keep started up and attempted to cut down as many Germans in the open as possible. (Their aim was mostly poor, although they did manage to kill a German leader outright).

A Boys AT rifle suddenly appeared in one of the houses and managed to hit the Sdkfz 222 and force it to reverse. However, the armoured car's crew quickly recovered and it returned fire, taking out one of the AT rifle crew.

1 Section, 7 Platoon emerges from the treeline near the ponds and exchanges fire with the advancing Germans, but is soon outnumbered and out-shot.

[Helped by rolling plenty of '6's' on the Command Dice = retained phases] the Germans were able to get a third section into action to flank the keep and overwhelm CPL Howse and the boys with MG and rifle fire which they were simply unable to match. They were soon pinned. Seeing the German axis of attack and hoping to bolster the right flank, Captain Remington ran from the keep and over to help 2 Section, rallying shock. [However, a turn-end that unpinned the section was a double-edged sword. Being unpinned allowed them to get back up and lowered their level of cover just in time to be further machine-gunned by two or three enemy sections].

The Germans outflank the town to the south (the pond woods)

2/3 Section, now down to four effectives, promptly fled, leaving CAPT Remington sitting in some ruins, paralyzed with indecision [I forgot about him for a phase or two].

2/3 Section, outnumbered 3:1, is overwhelmed by enemy fire.

Seizing the opportunity, the German platoon advanced into the pond woods to take control of the British Jump-Off Point there. They also found CAPT Remington in the ruined building and killed him in close combat, though he was able to shoot one or two Germans with his Webley on the way down.

CAPT Remington's defiant last stand. (British WW1 LW Officer from Peter Pig, Germans from Battlefront (I think)).

By this stage, all three sections of 9 Platoon had appeared and all joined the Vickers MMG in the keep in firing at the worst-hit of the German motorcycle recon platoons to try and eliminate them. They did so, but this took longer than it should have due to poor marksmanship and the prudence and steadiness of the German platoon and section commanders [bad firepower dice rolls and successful German activations to remove shock meant it took almost my entire focus for several phases to wipe them out, and after all it only cost the Germans 1 Force Morale].

The north flank

Meanwhile, the second German platoon began charging across the open field to the north of town, where they spotted 1 Section of 7 Platoon in a trench. The German MG34s unfortunately managed to eliminate the 2" mortar team, killing PTE Mitchell and wounding PTE Tasker. Combined fire from the machine guns and the German's lead section on this flank also rapidly began whittling down 1 Section despite the protection of the trench.

1 Section, 7 Platoon, after running to occupy the left flank trench.

(Peter Pig miniatures).

The German's lead section, led by the remarkable Bavarian Faulk Baptiste (who has already come to the attention of his commanders), rapidly advanced into the assault, and in a round of short-range firing and close combat, wiped out the remaining members of 1 Section, wounding then killing CPL Archibald Scully and taking the severely wounded PTE MacDermod POW. The German section took a few casualties but came off lightly. In just one activation and turn-end, Faulk Baptiste managed to destroy a section and Junior Leader, capture a JOP, turn the British left flank, bring their Force Morale to 0 and win the game.

The Germans assault 1 Section's trench.

The Outcome

The Germans managed to achieve a double envelopment south then north of Verneuil-Grand. The relatively unscathed 9 Platoon managed to withdraw through the village and escape, but 7 Platoon, already hard-hit in the last battle, was devastated and is now down to a single section. The platoon lost three killed (including the two Archies: CPL Archibald Scully and PTE Archie MacGregor) and three severely wounded, including one captured. Several others were slightly wounded and sent to the rear.

As expected, the fight was a bloodbath, with the British losing 17 men and even the Germans losing 21.

A Company, 12th Derwents is now down to 2/3rds strength, has lost it's HQ keep and it's Company 2IC and is in full retreat - we are really in trouble here lads. The next battle will feature the German pursuit, and they may run into a surprise (there is a Maginot Line blockhouse overlooking the road behind Verneuil-Grand: hopefully the French are manning it...)

Tactically, this game demonstrated that British sections in the 1939 Regulation platoon are lacking in both numbers and firepower (we are using old Lewis guns instead of Brens too). I may look at upgrading to the 1940 Regulation platoon organisation and getting some proper Bren guns in the next campaign. The 23rd Division, a newly-raised formation, is also of course lacking in support and the Boys AT rifle was underwhelming (although fun to use). So with more German armoured platoons approaching, the CO is going to have to send up a request for proper anti-tank weapons, maybe some artillery or mortars.

And the request will be sent in writing. ... 

Because we still don't have radios or even a telephone!


Tuesday, 4 July 2023

Building Up An Area Part 1 - Bakery and House (Dave Graffam cardstock terrain)

Paper terrain buildings for 15mm games

I need a lot more 15mm or 1/100 scale buildings to fill out villages, towns and city blocks for Chain of Command. I favour paper terrain for structures for this scale of gaming for the usual reasons: cost, convenience, customisability. There are some great artists out there who create exquisite printable buildings. Among my favourites are Dave Graffam, who has this great range of buildings, often with customisable overlays and variants. I haven't bought and built all his stuff yet, but maybe one day I will complete the whole village. Although these buildings are mostly intended for Medieval/Fantasy settings, they won't look totally out of place in early-mid 20th century Europe.

Here's the latest one I've constructed, which is a Bakery and adjacent house, and a small wall for the yard.

I'll aim to post additional articles in this series with more paper terrain buildings as I make them.

The rear. (I probably should have better planned the position of the house chimney. Some smoke will probably leak into the bakery under the roof peak or eaves).

The Front.

I printed two copies of each building, and cut one copy smaller so the exteriors could be removed and miniatures placed inside. I also reinforced the taller building with matchsticks and added a piece of card glued to one wall and bent to form the floor of the second level, so more troops can fit in there.

See. The next step for this one might be either painting the interior a more realistic overall colour or adding wallpaper and flooring or something.

'Brits Having a Brew' miniatures by Peter Pig.