Monday, 5 December 2016

Condor Legion - a few little items

... Oh and another thing - let me just show some pictures of Condor Legion aircraft I've been working on:
Bf.109B (Miniature Raiden I-94, paints Vallejo, decals from Dom's decals).

1/600 Tumbling Dice Junkers Ju 52 also available from Dom's Decals. Hand-painted markings.

1/300 Heinkel He 51 from Heroics & Ros. Hand-painted markings.

AirWar C21 - Suez Canal Raid

This one's going to be a very short and to the point post as I've forgotten most of the battle details (I played this game in September and am only just now getting to posting it).

I solo-gamed an Israeli Air Force raid on two Egyptian bridgeheads over the Suez Canal, testing out SAMs. Let me tell you - SAMs can be deadly, especially volley-fired SA-6 Gainfuls. The Israeli aircraft clearly need more decoy dispensers if they're going to survive more of these bombing raids!


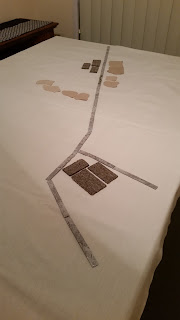
The set-up.
Following on from my last AirwWar C21 post, Major Pushkin, a Russian ace sent to assist the Egyptians, did in fact get a new wingman, the skilled but ill-fated Lt. Hosni Samy. The Israelis again had a pair of Mirage IIIs and a pair of A-4 Skyhawks loaded up with Mk 82s and hoping to smash the pontoon bridges and maybe any tanks or other vehicles moving across.

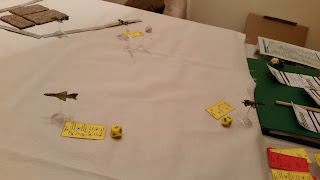
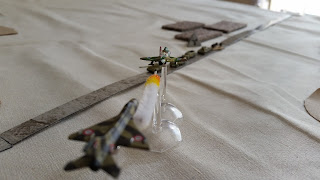
Close-in dogfight right over the northern bridge.
Shahak 1 flown by Capt Weiss shoots down Maj Pushkin.

Captain Weiss shot down Major Pushkin's MiG-21 with a Shafrir 2 heat-seeking missile after he failed yet another complex manoeuvre. He did not manage to eject. That's right - Major Yevgeni Pushkin, Soviet ace, connoisseur of vodka, dead at the age of 50-something.

Pushkin's wingman, Lt Samy, messed up a very tight low-altitude turn and hit the ground. KIA.
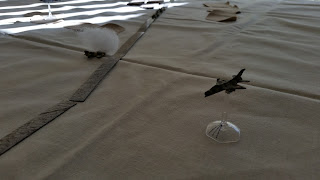
Mirages overfly the bridges, past a wrecked MiG.
Casualties for the Israelis were high too. While Capt Weiss got away with his kill his wingman
Lt Shmuel Zahav was hit by an SA-6 SAM. Lt Zahav was seen to safely eject but landed close to the Egyptian-held target area. He is now listed as Missing.
SAM! Dead ahead!
 The leader of the bomber flight Captain Sharbal Golan was killed instantly in a huge explosion when his loaded plane was hit by three SA-6s (total damage 12, and the Skyhawk only had 5 to begin with!)
Lt Moshe escapes a SAM after destroying the north bridge.
Hero of the day though was the wingman of the Skyhawk flight, Lt. Elias Moshe, who dodged MiG-21s, SAMs and ZSU gunfire to deliver his bombs right on target, destroying the northern bridge. and an SA-6 battery as well.

The results were pretty much a tie - Egyptian forces lost two fighters, two pilots, an SA-6 batter and one of the vital bridges. Israeli forces lost two planes, two pilots and failed to destroy the other bridge. Their enemy's advance into the Sinai will continue, but at a slower pace.

Lessons learned - SAMs are deadly and make it hard to line up for a bomb-run (you really want to be break-turning as well as dumping countermeasures).

Next time Israelis will take more precautions, and the Egyptians need some more planes (I have some MiG-17s and a Tu-16 Badger...)

SAMs floating past harmlessly, like clouds...

Thursday, 25 August 2016

AirWar C21 – the First Foray


 Okays its been a long time but here's a new blog post on a whole new game...

Background
In my quest to find a favourite aerial wargame for1/300 scale aircraft I’m giving AirWar C21 a go. Again, as I did with Check Your Six! I decided to try out the rules solo first to learn the system before introducing it to others in my gaming group.

AirWar C21 depicts post-1945 aerial combat, but I’m hoping, once I’ve learned the modern rules inside-an-out, to develop a version suitable for the Big One.

So I painted up some Egyptian and Israeli aircraft, put together some home-made accessories and had a game. Apologies in advance for the fairly poor photos - new and more ‘advanced’ phone and bad lighting


The scenario
I adapted the ‘Brave Sons of the Pharaoh’ scenario from the Check Your 6! Jet Age book to the AirWar C21 rules and my available miniatures – pairs of MiG-21s, Mirage IIIs and A-4 Skyhawks (one of each from Heroics & Ros and I-94/Raiden) and a handful of Heroics & Ros T-54s and BTR-152s, some GHQ Warsaw Pact infantry

Yom Kippur War, 1973: Israeli Skyhawks are attempting to interdict an Egyptian armoured/mechanised column moving through a pass in the Sinai. Two Mirage IIICJs are conducting a fighter sweep across the area. A pair of Egyptian Air Force MiG-21MF Fishbeds (one flown by an old Soviet ace on secondment) are also moving to intercept the Skyhawks.
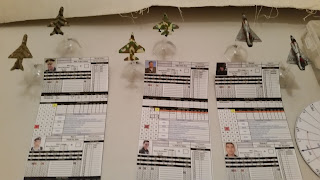
The Lineup - Heroics & Ros and I-94 Raiden miniatures (one from each manufacturer for each plane type). The stands are Games Workshop and the plane cards are downloadable from Boardgames Geek (more on that later)

The local terrain
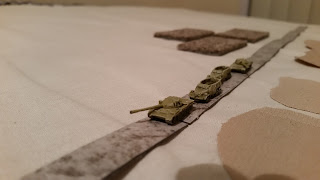
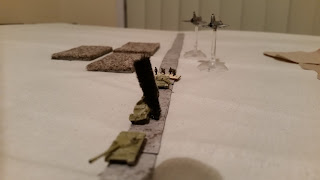
The target - advancing column of Egyptian T-55s and BTR-152s (Heroics & Ros)


The fight
Egyptian Air Force Pilot Officer (PltOff) Ali Adib spotted the Israeli A-4 Skyhawks first on his radar display and called it out to his flight leader, the Russian Major Yevgeni Pushkin. Maj Pushkin initiated the combat by unleashing both his R-3R (AA-2C Atoll) Semi-Active Radar-Homing missiles at the nearest Skyhawk (PltOff Adib’s MiG was only equipped with two IR-homing Atolls). A momentary lapse of concentration caused Pushkin to fail his manoeuvre and he promptly flew off the board. (Literally ace pilot, Turn 1… Switch on, Pushkin). The radar-homing Atolls, with no illuminated target, flew away harmlessly and Adib looked around in mild panic for his flight leader.
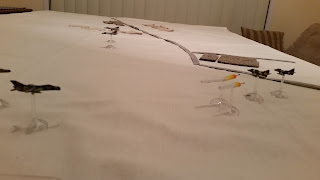
Maj Pushkin's opening salvo

Maj Pushkin departs the board while his wingman continues on


PltOff Adib continued on the fight by himself against one then the other of the Skyhawks as they attempted to manoeuvre as well as possible despite their bombload-induced high stall speed. The Mirages eventually figured out what was going on and joined in a swirling dogfight with the outnumbered Adib. Poor stick work and energy management all round resulted in numerous failed manoeuvres, overshoots and stalls, with the Mirages in particular failing to get missile lock, IR-homing Atolls flying wide and the MiG and Skyhawks trading a few cannon rounds to little effect.
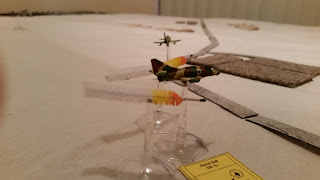
Radar-homing AA-2s pass by a Skyhawk
 
Suddenly, back into the fight rushed Maj Pushkin (I decided a 6 on a d6 at the start of each turn would let the Russian return). Darting past at high speed Pushkin launched an IR-homing missile and fired his guns at a Skyhawk flown by Lieutenant Gabriel Natan. Twisting to avoid the missile, Lt Natan was able to get in a shot at Pushkin’s MiG as it passed close by, damaging its gun. However Natan stalled his heavily-laden aircraft and was only just able to eject before it pancaked. Pushkin decided he would claim that one as a kill.
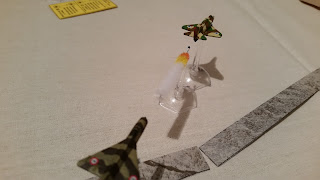
Maj Pushkin takes a shot with an IR-homing Attol

... gets hit by Skyhawk cannon after an overshoot

Natan loses control of his Skyhawk and stalls it

The Skyhawk crashes, Natan manages to eject

 PltOff Adib chased the remaining Skyhawk but was intercepted by a Mirage IIICJ flown by Captain Avraham Weiss. Weiss shredded Adib’s plane with cannon shells in a violent head-on gun pass. The burning MiG-21 plummeted to the ground. No ‘chute was seen.
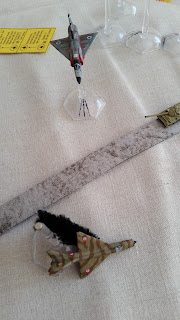
PltOff Adib is shot down by a Mirage
 
Meanwhile, the inexperienced Lt Shmuel Zahav, overflew the Egyptian armoured column in his Mirage IIICJ as he tried to set up for an intercept on the enemy MiGs, attracting an SA-7 Grail Surface to Air Missile (SAM) which he avoided easily.

Egyptian air defence takes an opportunity shot at a Mirage flyover

 The aforementioned remaining Skyhawk, piloted by Captain Gilad Alon, was now within sight of the enemy armoured column and lined up for a bomb-run. Immediately behind Alon was Maj Pushkin, who launched his last remaining IR-homing Atoll and forced Alon to break off his bomb run. Having used his last weapon, the Soviet pilot accelerated for home, leaving the Mirages in the dust.

Maj Pushkin foils the bomb run

Maj Pushkin's last missile misses, but Capt Alon has to break off his attack

 Capt Alon’s quick break-turn had allowed him to survive the AA-2 missile, but seconds later the Egyptians volley-fired three SA-7 SAMs at him. Alon skimmed over the mountains dumping flares but failed to pull off a sharp evasive manoeuvre. Two of the missiles struck, setting off a catastrophic ordnance explosion that obliterated plane and pilot.
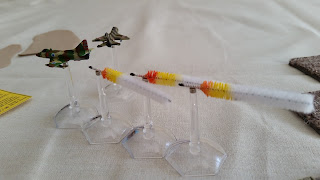
SA-7s chase Capt Alon's Skyhawk, while Maj Pushkin passes by, making his escape
 
Capt. Weiss and Lt Zahav in the Mirages used the last of their cannon ammunition shooting up a pair of BTR-152s in the Egyptian column before turning for home.
Lt Natan, who had safely ejected from his stalling Skyhawk, landed on the road. With nowhere to run he was captured by Egyptian troops.
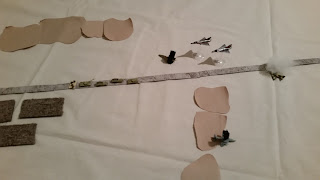

The Mirages strafe the Egyptian column

... destroying some BTR-152s

Conclusion
I thoroughly enjoyed this game and after a few turns things started to flow easily. The rules are fairly intuitive despite the degree of technical detail included for planes, missiles, bombs and the like. AirWar C21 represents altitude abstractly which greatly simplifies matters. Quick reference charts for each aircraft, where you note all relevant details including speed, weapons, countermeasures and damage, are a really good idea and are downloadable from here, as Boardgames Geek: https://boardgamegeek.com/boardgame/34413/airwar-c21-2nd-edition.

The only things that slowed down gameplay for me were remembering to check each aircraft’s reference sheet for its current speed when performing a manoeuvre and needing to note down the circumstances under which a missile was launched (e.g. with or without a lock, shorter than minimum range etc.) as the resolution of the attack is conducted in the Phase following the one in which the missile is launched.

Coming next
* Some random surprise mission maybe including a MiG-15 out of storage…
* Trolling SAM batteries
* Major Pushkin needs a new wingman.

Saturday, 12 March 2016

6mm Kursk – Building up for Operation Citadel


It has been months since my last update. Here’s the first of many (hopefully) on the same topic.
So we decided quite a while back to play a Flames of War Kursk campaign in 6mm, with the obvious intention of developing the campaign into a tank battle of gigantic proportions (in points terms rather than in physical terms).

I and my gaming comrade in this undertaking are building up the forces that will soon be rolling across the not-so-broad expanse of the steppes.
I’m putting together the German forces for the most part, but I’ve also got a bunch of Soviet miniatures to help my comrade out.

I think we’ll try the Axis of Attack Kursk campaign initially: http://www.flamesofwar.com/?tabid=109&art_id=308. My intention is to eventually play a Total War mission with some real masses.
 
Leading the way: BA-64 (GHQ)

Down by the river. BA-64s (GHQ)

T-34/76s moving up (GHQ)

Ilyushin Il-2 Sturmovik (Raiden/I94)
 

Tuesday, 25 August 2015

6mm Forces - Storage and Transport


Well, after a long period of experimentation and testing of various hardware, storage and tackle boxes and bits of tissue and foam I believe I have finally developed the perfect solution for storing and transporting my 6mm forces safely and conveniently.

Eureka.

 
So, how did I do it?

Obtaining the solidly-constructed and square-cornered plastic container was easy. It was also a simple matter to obtain the approximately centimetre-thick foam sections, the felt and the metal bracket sheets, nuts and bolts. Now for the hard part (a little bit harder).

Firstly, the metal sheets – these provide a platform for the storage of magnetized miniatures (all my based stuff such as infantry and artillery as well as aircraft). As you can see I screwed two metal bracket sheets together and added upward-pointing screws at corners and other vulnerable areas to provide overhead protection for the miniatures (prevents 'em from hitting their heads on the plastic box lid or other ceilings).


The foam trays took a bit longer. I used a chisel to cut out neat sections for the vehicles. It is a good idea to use different widths of chisels - fewer strokes = neater edges.

Oh, and before you start chiselling away, you ought to pre-measure and mark out the sections for your vehicles with a felt-tip pen or something. This will ensure accuracy and an efficient use of space.

I gave the cut foam a cardboard backing and reinforced it with cloth or electrical tape. I added small tab-like handles made of tape to make it easier to lift the foam trays out of the box.

Let the glue dry before putting your miniatures in the storage unit.


Some closing remarks – If you find you have more magnetic-based units than tanks (like, you’ve modelled the Strelkovy you always wanted to play but never wanted to paint up in 15mm) you can place two metal sheet sections on top of one another in the storage box.

If you’re placing a steel sheet section over the top of a foam tray, throw in a sheet of felt so the tank turrets will not ding against the steel sheet.

It can sometimes be fiddly to get the turrets out of the holes. It might be a good idea to leave a bit of extra foam in the holes to make such smaller items easier to reach and extract.

Alternatively, companies like GHQ and I94/Raiden have 6mm tank storage boxes for sale at a reasonable price. Still, I enjoyed customising my storage option!

Tuesday, 19 May 2015

House rules for 6mm Flames of War

So I and my friend have now play-tested Flames of War in 6mm scale and I think the rule set works quite well and the physical expansion of the battlefield provides games that are both visually appealing and tactically interesting. However, there are a few aspects of Flames of War Mission rules that I think may need some adjustment given a playing area that is approximately 1.7 times the size of a normal playing area.

Based on the learnings from the last three playtest games, here are a few house rules for the next round of 6mm Flames of War playtesting:

Distal Objectives
In all missions where each player places an objective in an objective zone, there will be a maximum distance between objectives:
  •             Encounter, Dust-up: 60cm
  •             No Retreat, Hold the Line, Pincer, Surrounded: 100cm
  •             Fighting Withdrawal, Hasty Attack: 110cm.
Note this rule does not change the maximum distance between objectives stated for the Free-For-All mission.
Rationale: The purpose behind this rule is to somewhat contain the main battle (hopefully not too much) and avoid situations where, for example, defensive forces are unable to cover all objectives simply due to units’ inability to cover the distance in the amount of time allowed.

Rushing in Reserves
Upon arrival from reserves, all mobile teams may make their initial move At the Double and still only count as moving for all purposes. Immobile teams may deploy 8cm in from their entry table edge.
Rationale: This rule is to ensure forces arriving from reserve are not prevented from playing a part in a battle by potentially much greater distances between entry points and the objectives.

Turns to End
In games where there is a turn limit, increased the limit stated in the mission rules by two. For example, where the mission rules refer to a battle ending ‘when the defender starts any of their turns from turn six with no attacking teams in the defender’s half of the table’ change this to ‘when the defender starts any of their turns from turn eight with no attacking teams in the defender’s half of the table.’
Rationale: This rule is to allow additional time for slower moving or more distant units to cover distance necessary to engage the enemy.

What’s this? New units coming off the production line in preparation for a new offensive?
12cm Granatenwerfers - excellent models I've newly acquired from Adler Miniatures. Other units nearby are GHQ heavy weapons teams, command and motorcycle sidecar.

The Bovington Tiger! (# 131) and an Opel Blitz (GHQ).
 

Thursday, 7 May 2015

After Action Report – Third Playtest of 6mm Flames of War

PINCER
For the final battle of our first 6mm Flames of War mini-campaign I expanded the company list points values to 2,000 points each and very efficiently painted up some new miniatures. I once again took control of the DAK Panzerkompanie and AR led the Commonwealth’s British Armoured Squadron.

Here are the expanded 2,000 point lists:

Panzerkompanie
HQ
2x Panzer IV F2
Combat Platoons
3x Panzer IV F2
4x Panzer III L (extra armour and a better 5cm gun)
3 Panzer II F
Divisional Support
Schutzen Spah Pl. (4xmotorcycle mounted MG teams)
Afrika Schutzen Pl. (with 6xMG teams and an 8cm mortar)
Nebelwerfer battery with 4x 15cm Nebelwefers
Priority Bf.109E

I pretty much chose the Panzer IIs because I wanted so badly to paint them up and the motorcycle recon platoon for no other reason than I wanted to see how mobile they would be.

Heavy Armoured Company
HQ
2x Sherman II
Combat Platoons
3x Sherman II (with .50cal AA MG)
3x Grant (with AA MG)
1 Sherman II and 2x Grant (with AA MG)
Weapons Platoons
3x Stuart with AA MG
Divisional Support
Motor Pl. (with light mortar and 2x AT Rifles and sticky bombs)
3x Scout Bren Carriers

Royal Horse Arty battery (4x 25pdr guns)
Limited Kittyhawk

My choices for the Commonwealth forces were constrained mainly by time and available miniatures. I’d probably prefer to have additional artillery but tanks were faster to prepare.

Let’s get on with the …
Battle Summary
Deployment
AR went onto the offensive with his Heavy Armoured Squadron while my Panzerkompanie switched to the defensive, with reinforcements coming in from the left and right flanks of my position (forming a kind of pincer-like effect..)
The battlefield.

The central crossroads and some particularly valuable cropland by the roadside were selected as the objective locations. AR deployed his force as close as possible to the front line in a well-spaced phalanx of armour with the scout units out on the flanks and the motor platoon’s trucks in the centre. The 25pdrs took up position on a nearby hill, ready to bombard the German defenders.
The Allied assault line.

The Germans positioned the dismounted Schutzen platoon around the forward objective (crossroads), the Nebelwefer battery on a hill at the rear just in range of the crossroads objective (on a table as ‘big’ as this you actually have to be careful with the ranges of your artillery!). The Panzer HQ kept well hidden and the Panzer IV F2 platoon waited in ambush. The remainder of the German force was held off in reserve.
Schutzen hold the crossroads objective (note homemade objective marker with 8th Army emblem).

German observer in the minaret of my recently-built mosque (Weetbix boxes).

First phase
The British launched straight into the attack, with the motor platoon and artillery observer truck doubling up to the edge of the central orchards and fields, eager to assault the crossroads objective next turn and end this sorry affair no later than turn 3! The scout carriers and Stuart recon moved out wide to clear cropland and buildings.

A devastating Nebelwerfer bombardment on the doubling trucks caused casualties and pinning among the motor platoon while the Luftwaffe broke through in strength to destroy two of the three Stuart light tanks, including the platoon commander. Moments later, the Luftwaffe reappeared to eliminate the British company command tank as it rushed to remobilise the remaining leaderless Stuart (which remained useless and still for the rest of the game, it’s nice new camo paint job going to waste). The big-gun-havin’ Panzer IVs remained, ominously, hidden in ambush.
The first devastating Luftwaffe attack takes the Stuarts out of the game.
 
The Luftwaffe sweeps in to eliminate the British commander.
 

The motor platoon keep their heads down.

Second phase
The Motor Platoon remained pinned where they’d dismounted under fire from the Nebelwerfers. It was left to the massed tanks of the combat platoons to try and peel the German infantry off the objective. In a series of assaults and counter-assaults the German infantry were indeed peeled back away from the objective, albeit at cost to the British tanks, some of which were attempting to assault through buildings.

 
Just as a pair of Grant tanks closed in on the crossroads, they were suddenly and explosively dispatched by a fusillade from behind – the Panzer IV F2s had emerged from a nearby wooded hill and ambushed the British armour at close range.
British tanks assault German infantry in the buildings.
With the game in the balance, the German command tank moved in to contest the crossroads with remaining British tanks, trading shots at close range. At the same time, the Bren carrier platoon, which had hitherto been creeping along the British left flank making sure no Germans were hiding in the fields out that way, turned and raced toward the rearward objective. In just a few turns they would be there and with no German forces in the area, the day would have been won for Britain.

Third phase
Just as things were looking precarious for the Afrika Korps, the reinforcements started pouring in like sand into the petrol tank of the British battle plan. Panzer IIIs burst onto the scene as the Bren carriers drove at the second objective, destroying one. The Panzer IIs followed, eliminating the rest of the Bren carriers who had gone from hero to zero in a few short cannon bursts.
The Panzer IIIs catch the Bren carriers on the march.


The Panzer IIIs, new and improved, sweep toward the objective.
 

Although British tanks and artillery support wore down the German infantry platoon and destroyed the Panzer IV F2s, the arrival of the improved and reinforced Panzer IIIs proved too much for the British forces, and the last of their tanks went up in smoke.
The German commander holds desperately to the objective.

The wrecks pile up as the battle winds to a conclusion.

The game dragged on for a few more turns. The Allied air force scored a Panzer II kill and the German motorcycle recon platoon roared along the road like the Comancheros for no reason whatsoever, but otherwise the situation did not change. The German position was no longer under any threat.

Did I forget to mention the motor platoon? Well, they were still pinned  for the whole game … from that first artillery bombardment. They have some explaining to do.

Appraisal
This battle, like the campaign, was a very close run thing. The fight could have gone either way at a couple of points. If the Bren carriers had escaped the onslaught of the panzer reserve and reached their objective, if the motor platoon had unpinned and been able to take part in the assault at the crossroads, if the Stuarts had not been eliminated before they had checked out that wooded hill …
 

German victory – 5:2
Campaign Scores:
DAK:                      11
8th Army:             10

Lessons Learned
  • Moving at the double: it’s very tempting on the large playing areas but it seems, in the absence of adequate cover your men had better have balls of steel to do it (and the rest of them should be steel as well).
  • Reconnaissance units: Recon units are also probably best kept close to the flanks of a large-scale armoured advance to ward off the close range ambushes which are most likely to be dangerous. Also, keep likely placements of enemy ambush in mind and move recon units in to clear them out before and during the dangerous moments for your main force armoured units.
  • It may be worth ensuring you have either the mobility or the platoon numbers in your lists to cover all objectives on such large maps. Leaving objectives undefended with enemy mechanised or motorised units about is asking for a quick and embarrassing defeat.
  • Save your ambushes for the right moment if you can. This really worked well for the Germans, tipping the scales in their favour in the central tank showdown.
  • Try not to assault into buildings with tanks. The Germans git an easy capture of a Grant tank and drove off an assaults they should, by rights, have lost.


The Germans capture a bogged Grant tank.

Where to from here?
I’ve started a few more 6mm projects, including a famous Tiger I and some additional air support choices courtesy of I94/Raiden miniatures. I think the Commonwealth forces could do with more infantry and artillery and I wouldn’t mind grabbing a few AT guns as well. If I’m going to depict an Early War DAK force then I’m going to need some regular artillery (no Nebs till mid-war).

We’re also looking at switching theatres for our next campaign – another place where there are wide open spaces and lots of tanks!