Friday, 9 June 2023

Patrol West of Ecouviez - Chain of Command, France 1940 Campaign Battle Report

We are embarking on an ambitious project: fight WW2 in the 'west' all the way through (well, mostly all the way) from May 1940 to May 1945 at the small-unit level using Chain of Command. The grand campaign will be broken down into smaller, normal-sized campaigns of about six battles.

I'm starting out running A Company, 12th Battalion, the Derwent Light Infantry (referencing the Durham Light Infantry, which had battalions active throughout the war), part of 23rd (Northumbrian) Division. The '12th Derwents' are a British Territorial infantry unit that arrived in France a few months ago has been getting in whatever training it could between digging entrenchments for 'frontline' units further north and trying to sort out its supply situation. The brigade of which the Derwents are a part has been separated from the division, being deployed to the French Secteur Fortifie de Montmedy. The division's artillery was left behind in Britain, in any case, and there are no Carriers, radios and mortars. The unit has about a third the establishment number of Bren guns, and few lorries. The only tanks they'll likely get will be the Renault FTs of the local French forces, if they're lucky.

My opponent is leading the Auflkarungskompanie of 10. Panzer Division, a well-trained, well-motivated and fast-moving unit. They're likely to be fewer in number, but they'll have armoured cars, machine guns, plentiful motor transport, artillery support and maybe even armour.

In preparation for this campaign, we had a lot of fun with random name generators and rolling on tables using the campaign supplements Platoon Forward (Joseph Legan) and At the Sharp End (Too Fat Lardies), developing a company-sized unit of named men and leaders with personalities. I cannot recommend these supplements enough, having also used Squadron Forward (also by Joseph Legan) years ago for my Staffelvorwarts campaign.

Campaign Chapter 1, Battle 1

Setup

We've now departed from our timeline with our first battle of the first campaign chapter: a Patrol mission with a platoon of the Derwents seeking to locate the German forward positions and running into the advancing spearhead of 10. Panzer just west of Ecouviez in a broad valley.

Company commander Major Sloan tapped 8 Platoon's newly-promoted leader 2nd Lieutenant George Preston Stephens to lead the reconnaissance toward the town of Ecouviez after reports the Germans had crossed into France in the area. 7 and 9 Platoons were kept back digging trenches for future possible use between Ecouviez and the battalion HQ at Montmedy.

In game terms, 8 Platoon is a 1939 Regulation platoon of Average skill level, but which has not yet received Bren guns, having to make do with old Lewis guns (I didn't have enough Bren-toting miniatures with the right helmets). This conferred the disadvantage of being unable to use the British National Characteristic associated with the particular accuracy of that weapon. Support for 8 Platoon's patrol included a 'Drinks Cabinet', an antique Vickers machine gun left over from the last time the regiment was in France during the first big show, a Thompson gun for one of the section commanders and two extra men brought to crew a Boys AT rifle.

"All care should be taken to avoid frightening or otherwise causing disrupting the local civilians. If food or wine is offered, the men are to refuse politely: drinks will be available upon return to the lines." - Excerpt from A Company, 12th Derwents OPORD. The 'Drinks Cabinet'

Opening moves

German motorcycle recon rider.

The Germans made the first moves, paralleling the stream on their motorcycles and establishing jump off points at the edge of the town and behind a barn to the north, deploying a squad in one of the closer buildings and a 60mm mortar in the backyard of another.

8 Platoon's lead section (3 Section, under LCPL Hedley) deployed into and around a log cabin at the edge of the woods on the British southern flank while 2 Section under CPL Dustin Jack took up a position on the crest of a hill on the northern flank along with Sergeant Haight. Both sections immediately opened an enfilade on the German section killing several including the German Gefreiter - First blood in the campaign to the British.

3 Section take up position at the cabin. They didn't have time to change out of the garrison uniform before the patrol. The Derwents were going to be renamed the 1st Derwent Scottish but this did not eventuate in the campaign timeline (Peter Pig miniatures WW1 Scottish).


Cpl Jack deploys 2 Section on the ridgeline to the north and enfilades the Germans (Peter Pig miniatures WW1 Early War). Note: The Tyne and Tees JOP marker was made when the Derwents were going to be in 50th Division, but they ended up in the 23rd.

The Germans charge

The Germans brought up a second squad and they charged across the stream in the open. The surprised 3 Section poured shots at the Germans as they ran on, and more shots arced over from 2 Section on the hill. The German squad halted in the open and went prone, firing back at 3 Section and starting to gain the advantage in the firefight, causing several casualties, including wounding LCPL Hedley. The German Feldwebel crossed the stream too and started motivating the shock away and the 60mm mortar rounds started to land on the British troops.

Lieutenant Stephens, seeing 3 Section in trouble, rushed into the firing line, shouting to the men to keep firing. He shot his first German at that moment with his service revolver. CPL Pritchard's 1 Section arrived behind the Lieutenant, rapidly filing out to the right and joining in the battle with the Germans in the open.

LT Stephens rushes into the firing line to rally 3 Section and downs a German with his revolver. 3 Section's LCPL Hedley lies wounded, but still firing, at the log cabin.


More Germans arrive, and the British are in trouble

An additional German squad appeared behind the barn on their right flank and started shooting at 2 Section on the ridgeline, who began to take losses. 2 Section stayed focused and maintained the crossfire on the German section in the open, but their rifle team had to switch targets as the Germans moved to where a hedgerow partially shielded them. Nevertheless, the Germans in the open were gradually being whittled down.

The German section charges into the open and fires at the Brits in the treeline.

An Sdkfz.221, 'Das Fox' then arrived and drove down the road and began adding it's MG into the mix. With the appearance of the German armoured car, Sergeant Haight saw the moment and brought forward 8 Platoon orderly Private Russell Waller and his friend Johnny Coburn from 7 Platoon and with them the Boys AT rifle. Waller aimed and fired at Das Fox but due to the range and intervening bushes, he missed.

'Das Fox' arrives at the scene.

Heavy fire from the remaining Germans in the open (which still included an MG34) cut down the last of 3 Section right in front of their leader LCP Hedley, who lay wounded. The heavy fire hit 1 Section too, and they broke and fled (almost to the board edge). LT Stephens ran with them, attempting to bring them back.

8 Platoon strikes back - the British can still win this if they just hold fast...

Just as it looked like two British Jump-Off Points lay open to the Germans, the Company HQ men arrived at the log cabin with the old Vickers! Rapidly bringing the MMG into action, they hammered the Germans in the open, driving them off and leaving the German Feldwebel standing alone on the western side of the stream. At this moment, LT Stephens was able to bring 1 Section under control and, while CPL Pritchard got them organised, he ran back to the log cabin to help the wounded 3 Section men and LCL Hedley.

The HQ section men bring up the old Vickers MMG and drive off the German squad. (Old Glory miniatures).


The German platoon commander stands alone by the stream as his men rout around him. Just for a moment, he is the German who is the furthest into France. No doubt sensing the awkwardness as he stood there, he decided to head back across the river and into the town to command the rest of his platoon.

[This was a good phase for me: my first 1s on the Command Dice meant the Vickers MMG could show up and break the Germans in the open field. The Boys AT rifle also arrived and took it's shot, I used Drinks Cabinet to rally enough shock to revert 1 Section to 'Pinned', had Stephens rally enough extra shock to ensure they unpinned, then used my Chain of Command dice to end the turn, doing just that and also routing the remains of the battered German section off the table. I still had most of two sections and an MMG, and a 2" mortar still to deploy. The Germans were down one section and one Junior Leader: perhaps I could still win?...].

... but they cannot ...

The Germans had plenty of shots left though, and they used them to lay down a heavy fire on 2 Section on the ridgeline. With two German MG squads and an armoured car firing at them, the Derwents on the ridgeline were broken. Private Johnny Coburn was killed and Waller fled, carrying the Boys AT rifle with him. Despite the efforts of SGT Haight, the men could not be turned around. [British Force Morale totally collapsed with the breaking of 2 Section and routing of the AT rifle team].

The fight was over.

LT Stephens ordered the Vickers crew back to the lines and had the mortarmen carry the wounded 3 Section men who could be saved, himself assisting the wounded LCP Hedley.

8 Platoon's left flank just before it was driven back (Peter Pig miniatures).
The battlefield at the end, with explanatory overlay of the action.


The aftermath

8 Platoon was hit extremely hard, and arguably stayed in the fight longer than it should have once it was clear the Germans gained fire superiority. However, LT Stephens was not going to give in easily. Company HQ was not impressed, and neither were the men [their opinions of Stephens are both at -2, so one more setback and he might be in trouble].

Only 11 of the over 30 men engaged escaped unwounded. Seven were killed, including Coburn from 7 Platoon, Greenwood and Frazier from 2 Section, and Fields, McNabb, 'Spike' Jeffries and Seward from 3 Section. Private Foster from 2 Section was badly wounded and will not return. Four more men were wounded and sent to the RAP and a few have minor wounds and are staying in the line. 3 Section is down to two wounded men (Winthrop and Bell) and LCP Hedley, who is wounded and now understandably despondent.

The next battle will be a few hundred metres back, as the Germans attack the British forward defences. 8 Platoon is too battered to hold so the defence will fall to the other platoons.

Tuesday, 6 June 2023

Fight for the Bridges: Team Yankee 6mm (with experimental rules modifications)

Don't get me wrong: Battlefront's Team Yankee is a great game and we've had a lot of fun with it. But there are some aspects that could be, from my perspective, improved. In the ongoing quest to find my perfect set of company-level modern rules, I reworked the game with a bit of homebrewing and we play tested some of these ideas just the other day.

What were the rules modifications?

The two most important things I'm looking for in a wargame at the moment are, firstly, meaningful decision making with limited knowledge in an uncertain tactical situation; and secondly enough interactivity of gameplay that keeps both players involved to the greatest extent throughout the game.
  • To create the uncertain tactical situation I wrote a system of numbered counters, or blinds, with spotting distances that took into account movement rates and concealment. I decided against allowing players to have dummies because gamers are all too old for that.
  • To improve the game's interactiveness (which isn't a word apparently, though 'interactivity' is), I borrowed most of the action-reaction system from Ambush Alley's Force on Force platoon-level modern combat rules. Players still took turns to move and fire with their units, but the 'non-initiative' player's units could react to their opponent's actions.
Further rules modifications included units and formations being 'not in Good Spirits' at half-strength, infantry not being allowed to dig in during the game (trenches being terrain features deployed with units instead), artillery held off-board but still able to be hit in counter-battery fire and air strikes, and the removal of the entire Movement Orders section of the rules (they are mostly substituted by units able to react and fire at any point in their movement).


The Battle

Me and a mate play-tested the rules modifications in an 80 point meeting engagement, with his US Marines and my National Volksarmee attempting to seize objectives at table edges on opposite ends of two roads crossing a wide and impassable north-south oriented river. We each started with two blinds on the board with the rest arriving on standard Team Yankee Reserve rolls each turn. I took up position on two treed hills overlooking both bridges while my opponent charged his counters boldly toward the bridges.

The lead two units were reconnaissance jeeps. I brought out three BRDM-2s on a hill overlooking both bridges and three T-55AM2 on another hill overlooking only the southern bridge. The Marine jeep team on the southern bridge, confronted with armour unsurprisingly ran off the road and hid behind an embankment, frantically raidioing for support. At the northern bridge, 'Team Hasselhoff', the Marine jeep unit on the northern autobahn bridge raced across, while savaging the BRDM-2s with .50 cal and 40mm fire (I had foolishly deployed AT-5 Spandrel-armed vehicles, hoping to get shots off at Marine armour).

While a a trio of Marine M60s came to the rescue of the battered Marine jeeps at the southern bridge, Team Hasselhoff's rush was stopped by the arrival of a BMP-1 recon platoon. Team Hasselhoff was able to take out a BMP with the 40mm but, seeing the road to the objective blocked and with more Communist forces approaching, decided to pull back across the river. While two jeeps high-tailed it for their own side, one chose to hold and cover the retreat. This heroism cost the jeep crew their lives, but ensured the escape of their comrades. Before they went down they managed to destroy a second BMP before being raked with MG fire from the third (which promptly withdrew from the battle itself). Team Hasselhoff had destroyed or driven off three BRDM-2 Spandrels and three recon BMP-1s at the cost of one jeep.
Team Hasselhoff runs into East German armoured recon but give the enemy a bloody nose (BMP-1s from CinC miniatures, roads from Wargame Print via Wargames Vault).

One of the jeep crews fights a courageous rearguard action to allow his teammates to escape.


By now, two Marine M60s (having lost one to a T-55AM2) had crossed the bridge and found themselves isolated in a small village, exchanging fire with an additional two platoons of T-55AM2s that appeared on another hill, and a Motorschutzen platoon on the nearest hill. After a desperate fight, during which they destroyed about five of the enemy tanks and two BMPs, they lost a second M60. The remaining crew, outnumbered, surrounded and with enemy infantry advancing toward them, abandoned their tank, dropping a thermite grenade down the hatch, and then found a good house to hide in.
T-55AM2s destroy an M60 while it crosses the bridge (GHQ miniatures).

Marine M60s advance across the southern bridge while recon jeep crews hunker down and call in artillery strikes (GHQ miniatures, 3D printed German buildings).

The M60s get cut off on the opposite bank and fight for their lives (M60s are GHQ, the buildings Scotia Grendel).

North of the bridges, the river bifurcated into smaller, fordable waterways amongst forested hills. This is where I decided to make full use of my hidden movement blinds by pushing up a T-72M company and a second Motorschutzen platoon. As the T-72Ms crossed the first river however, I realised I'd made a mistake leading with the T-72Ms in close terrain, especially with the 'action-reaction' rule changes I'd made and my units' tendency to fail reaction tests. One T-72M was destroyed by an anti-tank missile as it crossed the river. Suddenly about 50 Marines came charging through the trees on all sides firing SMAWs and destroying or capturing the remaining five T-72Ms in a close assault. The supporting Motorschutzen platoon attempted to counterattack but was bloodily beaten off, pursued and annihilated by the unstoppable Marines.
Marines assault the T-72Ms (GHQ miniatures, Battlefront Ranged In marker).

The Marines cross the river and smash the enemy infantry counterattack (GHQ infantry and CinC BMP-1s).

The battle looked pretty bad for my East Germans - I'd lost six T-72Ms and a lot of motorised infantry for basically no hits in return, and several T-55AM2s, BRDMs and BMPs in return for a few M60s and jeeps. I still had something up my sleeve: a few more tanks and an open autobahn bridge. I rushed a trio of T-72Ms across the bridge toward the objective: if I could grab it I could win the game and force the Marines to fall back. However, the advance was stopped cold by accurate man-portable AT missile fire.

At the same time, several enemy helicopters unexpectedly landed a full Marine platoon behind my lines directly on the southern road objective. It would be game over next turn if I couldn't turn my remaining Motorschutzen around and break the Marines. I hit them with everything I had: an artillery bombardment, tank fire, and a ferocious and victorious assault by my remaining Motorschutzen platoon. My T-55AM2s failed their cross checks and could only offer fire support. Despite everything I threw at them, enough Marines survived to hold the objective and win the game.
Marines land by helicopter behind NVA lines to capture the objective...

... despite an immediate response and successful assault from nearby NVA Motorschutzen.


Bitter homebrew: Thoughts on the rules modifications

Overall the homebrew modifications to the Team Yankee rules and borrowings from other wargames worked well enough and gave a fun, believable and challenging game. Reaction fire made every turn deadly and decisive and felt pretty realistic, though evidently needs work with regard to assaults, somehow avoiding confusing reaction-chains, and possibly being a bit fairer on lower-skilled WARPAC who are already easy to hit (It might have been just bad luck, but my NVA failed probably every reaction test they took and were hit hard by enemy fire even in their own turn).

Movement using blinds worked better than the action-reaction system and created the uncertain tactical situation I wanted to see. Next time though I will simplify spotting distances and restrict movement to a standard (probably 10") regardless of actual unit movement.

The offboard artillery and counter-battery fire got very limited testing and the infantry Digging In rules didn't make an appearance because of the nature of the battle. Things to focus on next time.

Tuesday, 30 May 2023

(Totally Not) Brecourt Manor

Day of Days: The 101st Airborne Division dropped in the early hours to capture key objectives to support the landings and disrupt German defences.

Soon after arriving at Company HQ in the first hour of daylight, Lieutenant Rich Summers was instructed to take as many men as he'd been able to gather from his and other platoons and take out a battery of German '105s' (which tuned out to be 15cm heavy artillery) that could be heard just a few hundred yards away shelling the exits to the landing beaches. Summers was a few men short of a regulation platoon, but he headed out nonetheless, with reliable comrades Lieutenant 'Stag' Crampton, Staff Sergeant Teas, and Sergeant Guardiner leading one of the squads, as well as a few French Resistance explosive enthusiasts and a lost British medic.

The assault that followed would, however, not be taught at staff colleges or infantry schools for decades to come as a textbook example of tactics and small unit leadership, nor would it become a focal point for TV series' and video games. At best it would enter the regimental history as a short note about some hard fighting that was done.

The Mission

Thanks Google Maps and MS Paint. (The actual terrain differed somewhat from the map above of course, as you will see).

I took command of my US paratroopers, and my opponent commanded the regular German infantry platoon. The American paratroopers had to advance out of the hedgerows and into the German trenches before the defenders could react. The image above explains the scenario and victory conditions.

Deployment

The German defender had pushed his JOPs pretty far up the position to guard two of the four guns and the HQ dugout as well as manning the covering weapon pit. The paratroopers had most of their JOPs back on the board edge but at least got one in a hedge near the first gun.

The first phases of the action.

Initial break-in

Anticipating a German machine gun covering the open field behind the artillery position, SGT Guardiner first positioned his MG team to cover south down the trench line and moved his squad up close to the first gun. They then threw smoke grenades out behind the gun pit, rushed the crew and took the gun. The other squad also moved through a stand of trees to likewise cover the trench and got into a heavy firefight with a German squad moving up toward them. With the German section leader directing his squad's MG fire, the paratroopers had the worse of the exchange, and lost a couple of men - first blood to the Germans.

LT Summers established the 60mm mortar to start bringing down fire, and then sprinted toward the action, while S/SGT Tees set up in some bushes to snipe at the Germans near the HQ bunker. All his shots went horrendously wide though - possibly his sights got knocked out of alignment during the previous night's jump. He was much shamed by jeers of "jeep jockey!" from nearby paratroopers, who didn't know who they were paying out.

SGT Guardiner's squad rushes the first gun (15cm gun and crew from Old Glory miniatures).


Guardiner's squad attacks down the trench

With SGT Guardiner busy demolishing the first gun. LT Crampton kept Guardiner's rifle team moving and hurling grenades, and kept the MG team firing down the trench. The firepower of two belt-fed machine guns started to tell against the Germans, and their platoon leader, who had been bringing down the shock levels and keeping his men in the fight, was wounded.

Right then, for some reason a Panzerschreck rocket projectile sailed past the Americans and landed somewhere behind them.

When a second German squad got out of the trench behind their own smoke grenade screen, SGT Guardiner realised it was now or never and took his squad charging down the trench into a close assault against the weakened first.

The hard fighting bloodied both sides, but in the end Gardiner's squad was forced to fall back from the trench and get behind the hedgerows, having lost several men. Guardiner spent the rest of the fight sorting his guys out [i.e. bringing down their shock levels so they didn't rout]. The German squad broke immediately afterward though, as a lucky 60mm mortar round landed near enough to shock the men. At this point the German platoon commander, who was certainly a grizzled veteran of many battles, rose to his feet despite his wound and directed the second German squad to hop back into the trench and hold the line. [The German player took the tough decision to use a Chain of Command die to end the Turn - this led the battered and broken first squad to rout from the table, but removed the wounded status from his platoon commander and getting this hardcore fellow back into the action. The Turn End also let the smoke dissipate and gave his tripod MG42 a clear shot at all the Americans].

Guardiner's squad assaults down the trench line.

(Truck miniature from Plastic Soldier Company).


LT Summers takes the second gun

With the attack falling apart, LT Summers, by himself, rushed forward and plunged into the trench. Seeing this, the three Resistance members, who had accompanied the paratroopers to bring explosives [a Demolition team support choice], followed him in. LT Crampton directed the two MGs to Summers' rush very commendably, but while Summers ran down toward the second gun a fusillade of MG42 fire peppered the lip of the trench. Sadly one of the Resistance fighters, Old Jean, was hit and killed as he followed the charging American.

Old Jean and the Resistance fighters follow LT Summers into the trench. (Left two are Peter Pig. Old Jean on the right is from Eureka miniatures).

With enemy troops beginning to move up toward him, LT Summers quickly spiked the second gun and readied himself for a close assault. However, realising how far behind were his fellow paratroopers and with the fire from multiple MG42s not letting up, LT Summers prudently took the remaining two Frenchmen and pulled back.

A poor and blurry photo not doing justice to the heroic LT Summers destroying the second German gun.

Outcome

With two guns destroyed the American paratroopers got 2 VPs while the Germans retained 2 VPs for the surviving guns. No American got close enough to take a look at any classified maps on the table in the HQ dugout. American casualties were seven killed and wounded, plus one French Resistance fighter, while German casualties were about the same. Both platoons started with 11 Force Morale. While the Paratroopers' morale stayed high despite setbacks, the Germans were hit hard and brought down to five by a combination of a wounded Senior Leader, and a broken and routed squad and Junior Leader.

It might have been possible for me to carry on the fight to attempt to break the German Force Morale or at least push them back from the HQ dugout. I still had six Command Dice to my opponent's three, could have rallied Guardiner's squad (which was still five men plus an MG team), and charged back toward the trench, together with the remaining second squad and four (potentially) heroic SMG-armed leaders. However, it could also have gone very badly due to German fire superiority (five MG42s against my two M191A2s). With losses high and lessons learned, we decided to call it.

German MVPs were their platoon commander, who overcame wounds to keep his men together and fighting, and first squad, who bore the brunt of the combat, including defeating US paras in a close assault.

On the American side, medals will likely be awarded for LTs Summers for single-handedly taking out the second gun, and SGT Guardiner for his aggressiveness in attack and for destroying the first gun.

The German platoon commander directing the action, while first squad's squad leader signals across the open field to third section and their MG42. (Battlefront miniatures).

Commentary on the Scenario and Rules

I based the game on the Chain of Command scenario 'Brecourt Manor' written by one William Thorpe, but simplified it in several ways, including allowing each force to take their standard platoons, plus five points of support. To represent their already being in the position, the Germans were given D6 free initial moves with their patrol markers. On this occasion they got three, and occupied the positions of all but one gun. I, leading the US paratroopers, did not use their Patrol Markers all that effectively although it was probably good enough and actually led to deployment similar to what appears to have happened at Brecourt Manor.

Overall the scenario worked well, giving us a fun and challenging game that could easily have gone either way. The only thing I'd change would be perhaps give the Germans fewer support points than the Americans, as they already have the advantage of being the defenders, and start with a large extant network of trenches and weapons pits.


Sunday, 28 May 2023

Additional Armaments for A Very British Civil War Chain of Command

More tanks

Even before getting to use my existing armoured vehicles in my Chain of Command - A Very British Civil War project, I have painted up a couple more, just in case (I had them built and basecoated already so I needed to get them off the painting production line).

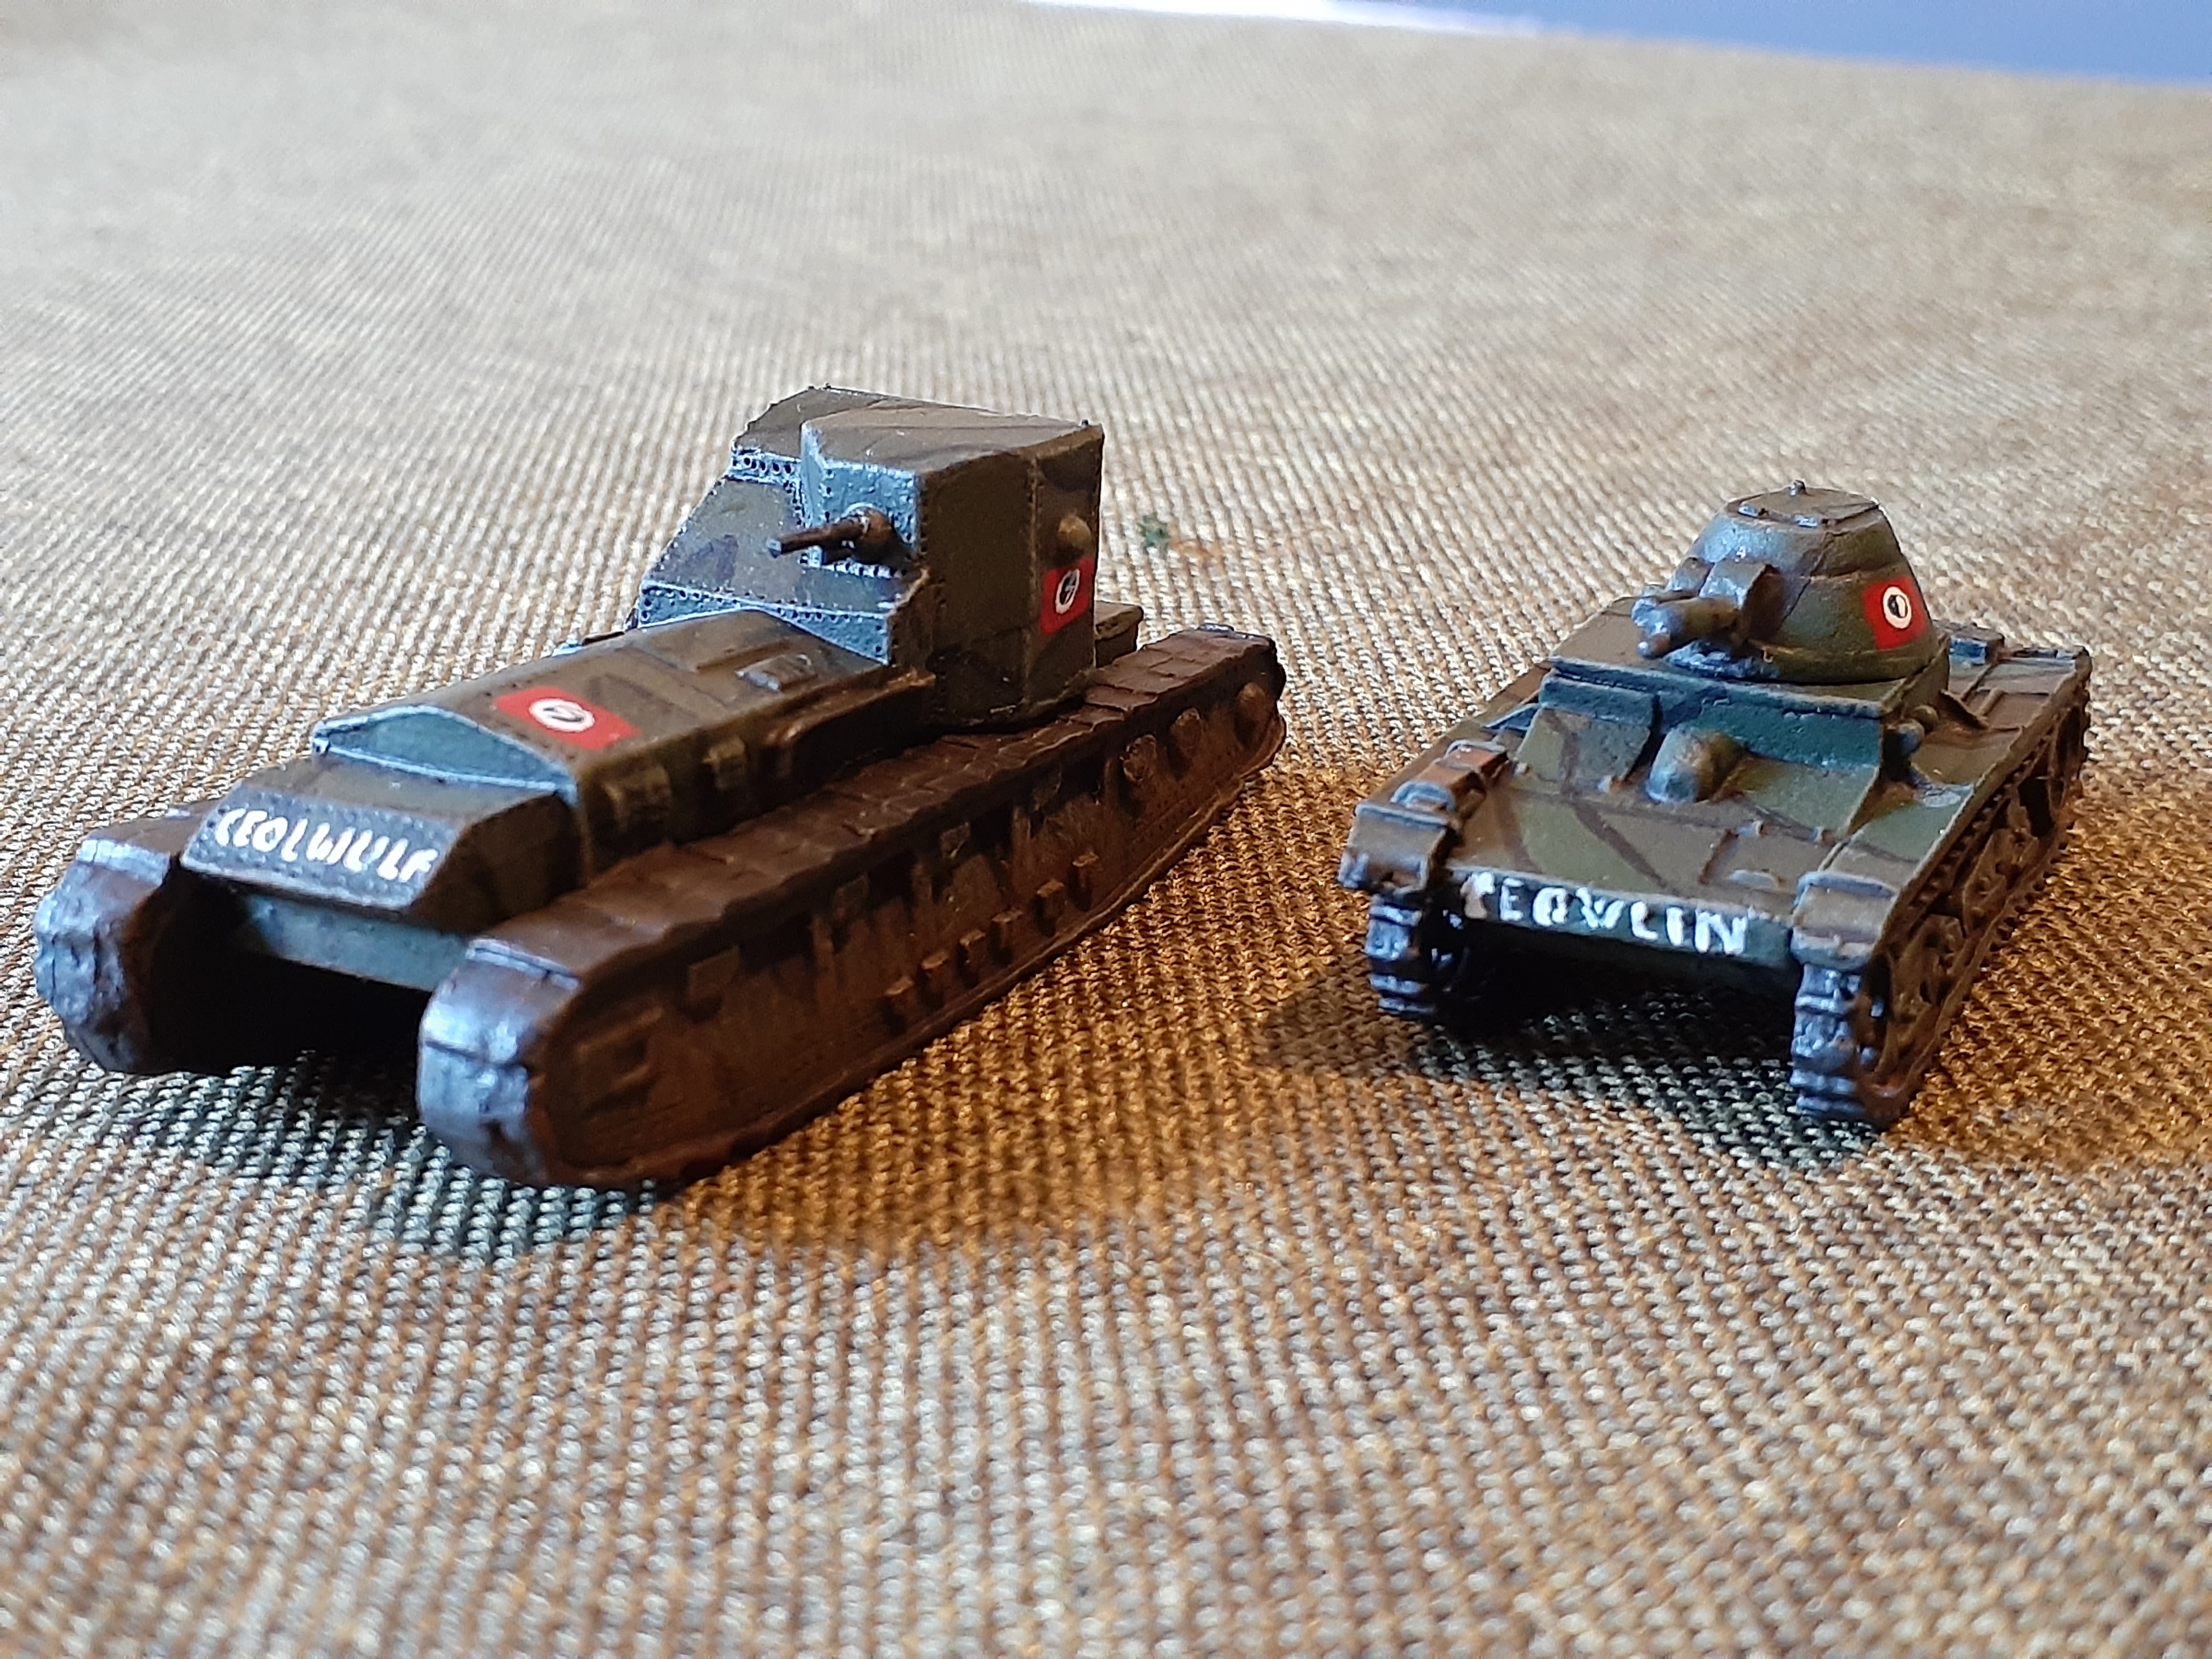
Vickers 6-Ton Type B and Vickers Medium Mark II (QRF Miniatures).

(Paper terrain via Wargames Vault).

I wanted a more modern but still British-made tank to support the Blackshorts, so the Vickers 6-Ton Type B was given their armoured vehicle paint scheme, markings, and the name 'Ceowlin'. So now there is Ceolwulf and Ceowlin in C Troop, BUF Heavy Column. Since it may be hard to distinguish the names clearly over the radio (the 'ceo' is pronounced like 'cheo', they will have to be callsigned 'Wulf' and 'Lin.' I have plans to add a third BUF tank to complete the troop but have no miniature as yet.

Two tanks of C Troop, BUF Heavy Column. Just one more tank and I've got this unit complete. 

The left-wing faction (the Manchester Commune and Sheffield Workers' militia) will be supported by Soviet-suppled armoured vehicles when I can actually find some appropriate vehicles (hopefully a Zvezda T-26 1933 model and a BT-2 but I may have to go with whatever is in shops). The newer Zvezda T-26 is a little too late for the period of our campaign. I could go with a T-35 but it would seem a rather inefficient use of smuggling resources for the Communes to ship it in leading up to the war. I guess there are enough factories and works in Sheffield and Manchester that they could produce one domestically using blueprints supplied by their external allies? Plus it might be cool to see on the table. When else am I going to use one?

The Vickers Medium Mark II is painted in the standard interwar colour scheme and will be assigned by the Regular Army to support the defence of the Mersey Corridor.

Model modifications

On both the Vickers 6-ton and the Medium Mark II, which were QRF miniatures, I did some work with Gren Stuff and balsa wood. A blob or ring of Gren Stuff is used on the base of the turret stem to keep the turret in place but still rotatable (these turrets won't be exploding into the sky when the vehicles are hit) and the balsa wood was used to form the lower hull half of the Vickers 6-ton (which is modelled with an upper hull only, which would be fine for tabletop use but I'll need it looking more realistic for close-up photos). Both these modifications were quite easy, the balsa being hardest as it needed to be cut to size and then shaved into shape with sandpaper.

Balsa wood lower hull on the Vickers 6-Ton.

Direct fire artillery

This Ordnance QF 18 pounder field gun, crewed by trained Regular Army personnel could be assigned to support either Blackshorts or Commune forces. I'm looking forward to seeing how a field gun works on the Chain of Command battlefield.


As they will be seen in action: QF 18 pdr Field Gun (QRF Miniatures).

The gun itself is a QRF miniature, the crew are Old Glory and the base is Flames of War. The limber is also Old Glory, from their OQF 25 pounder guns. Each crew figure is mounted separately on a small metal washer, is held in place by a bit of blu-tack and can therefore be removed easily when/if the gun crew sustains casualties.

The crew come off the base if they get hit.

Assembling the QF 18 pounder can be a bit tricky due to the number of parts, their fineness and the angles. I used blu-tack on a wooden base to hold the wheels in place while the glue set them to the carriage.

A considerable increase in firepower for the platoons, and a 'motivational speaker'

Until this point almost all the combatants in our Very British Civil War game have been limited to bolt action rifles and the occasional Bren or Lewis gun. Only one Thompson submachine gun has been brought along (by a certain kilt-wearing Blackshorts NCO) and he didn't really get any use from it. I'm hoping to change this with the new shipment of Bergmans and Thompsons that arrived recently - just in time for the big offensive. Additionally, the Peoples' forces on this front have had the fortune to be assigned political officers. These incredibly dedicated men (and women) expect the same dedication from the fighters under their guidance and have a licence to summarily execute those who would turn traitor to the people.

Sheffield Workers Militia platoon leader and section leader with Bergman submachine guns leading some riflemen). (Peter Pig Spanish Civil War Assault Guards NCOs and Mexican Civil War riflemen miniatures).

Blackshorts officers and NCOs with their new Thompson submachine guns ready to take the fight to the foe. (Peter Pig miniatures).

The Sergeant in helmet at left is the only one of these three I didn't convert. (Peter Pig British 8th Army miniatures).
The political officer of the Sheffield Workers Militia, Commissar Barrett Brigham Ruff, ready to prevent routs. (Peter Pig Spanish Civil War Assault Guards NCO). His rank marking is supposed to be a sickle but unfortunately ended up resembling a question mark, Ironic - "No questioning orders!")


Tuesday, 23 May 2023

Miniature painting hacks - The Spray Undercoating Gauntlet

I've always found I can never get the angles right for spray can undercoats (or basecoats? Is there a difference idk?) to cover all the underside recesses of miniatures. This means I've usually had to hand paint the undersides, which is annoying and wastes time.

Introducing the solution

It get's full coverage with minimal wastage of paint and time, and it's totally safe (if you're in full control of your spray can). Don't wear your good shirt or wristwatch when using the Gauntlet. Make sure the models are secured with blu-tack or something.

Flames of War/Battlefront Germans, a base and a 28mm sniper from Ex Manus (an Australian sculptor).


The Band of Breth'ren, be they ne'er so vile

Hold your manhoods cheap fellas: It's that 'Happy Few', that 'Band of Breth'ren', the 101st Airborne.

Since I'm getting into Chain of Command and looking for games with others (rather than just solo) I have expanded my forces to cover a broader range of battlefields and scenarios, including WW2 mid- to late-war. This was the perfect opportunity to actually finish painting up the last remaining miniatures from the Flames of War Open Fire! starter set I bought around ten years ago: the plastic US Paratrooper platoon. These had been the lowest priority in my Flames of War gaming all those years ago as I went first for Late War British and then Germans. American forces never really appealed to me for some reason, but it's time to give them a go and put these miniatures into action - to fulfil their destiny - their day of days - on the tabletop - and there I'll be with the mobile phone camera, to tell the story like a one-man HBO. (And yes I re-watched Band of Brothers to get ideas and paint schemes. I had originally painted those large American flag patches on the first guys but after some brief reading it seems there is no consensus on whether the 101st Airborne had the patches on D-Day. I left them off for simplicity.

I understand that Battlefront now has new plastic US paratroopers out, but I might as well use the miniatures I already have. Their rifle barrels are a bit fine and fragile but they are really nice models and were fun and fast to paint. The sprue is a few riflemen and mortar crew short of the platoon numbers in the Chain of Command rulebook, and I'm asking around the Flames of War community to see if I can get a few extras people don't want anymore. If I can't get any in time it's no big deal and anyway, when have paratroopers ever gone into combat at full strength? I'd assume probably never.

1st Platoon, Easy Company, 506th PIR, 101st Airborne Division assembled for combat (or something like that). The discs with Screaming Eagles on them are the Jumping-off Points.

Sweeping forward.


The mortar has a '5' (representing number of crew) pasted under a bit of cellotape so I can write over it if they take casualties. The crew can also be removed too if it comes to that.

S/SGT Teas and radio operator.

"Why is there a fence here? There's not supposed to be a fence here." LT Rich Summers channelling the spirit of his former C.O.

2nd Squad, with SGT 'Stag' Crampton leading the men, at right.

PVTs Wyatt and Lippman bring up the .30 cal to throw down some fire.

Phobos Acquisitions (Special Tasks Division)

15mm Sci-Fi Miniatures

We picked up some Maschinen Kreiger 15mm sci-fi miniatures as they were superb designs and were fun and different to paint. We used them to try out the Rogue Planet simple sci-fi/fantasy rules, which were fun, although we only got in two games before I started to think about house rules. I wrote the following to give context to our sci-fi miniature painting and gaming and decided to record it here.

Martian Enterprises

Some years after the first manned missions to Mars opened the planet up economically, extensive efforts were made by several corporations to set up mining and energy production operations. However, strong competition and hazy application of earth laws lead some corporations having to 'go kinetic.' Security and defence systems were hastily adapted to the hostile environmental conditions on Mars and deployed by these corporations to defend and expand their resource leases and protect the peace of mind of their shareholders.

Phobos Acquisitions

Phobos Acquisitions is an enterprise that is really going places (to Mars), and is at the forefront of extraplanetary resource development. Phobos Acquisitions is proud of its Special Tasks Division, which is at the cutting edge of security technology and goal-oriented strategy in non- or semi-atmospheric and low-to-zero gravity environments and employing a diverse workforce. Shareholders can be assured that their investments are in safe hands with Phobos Acquisitions.

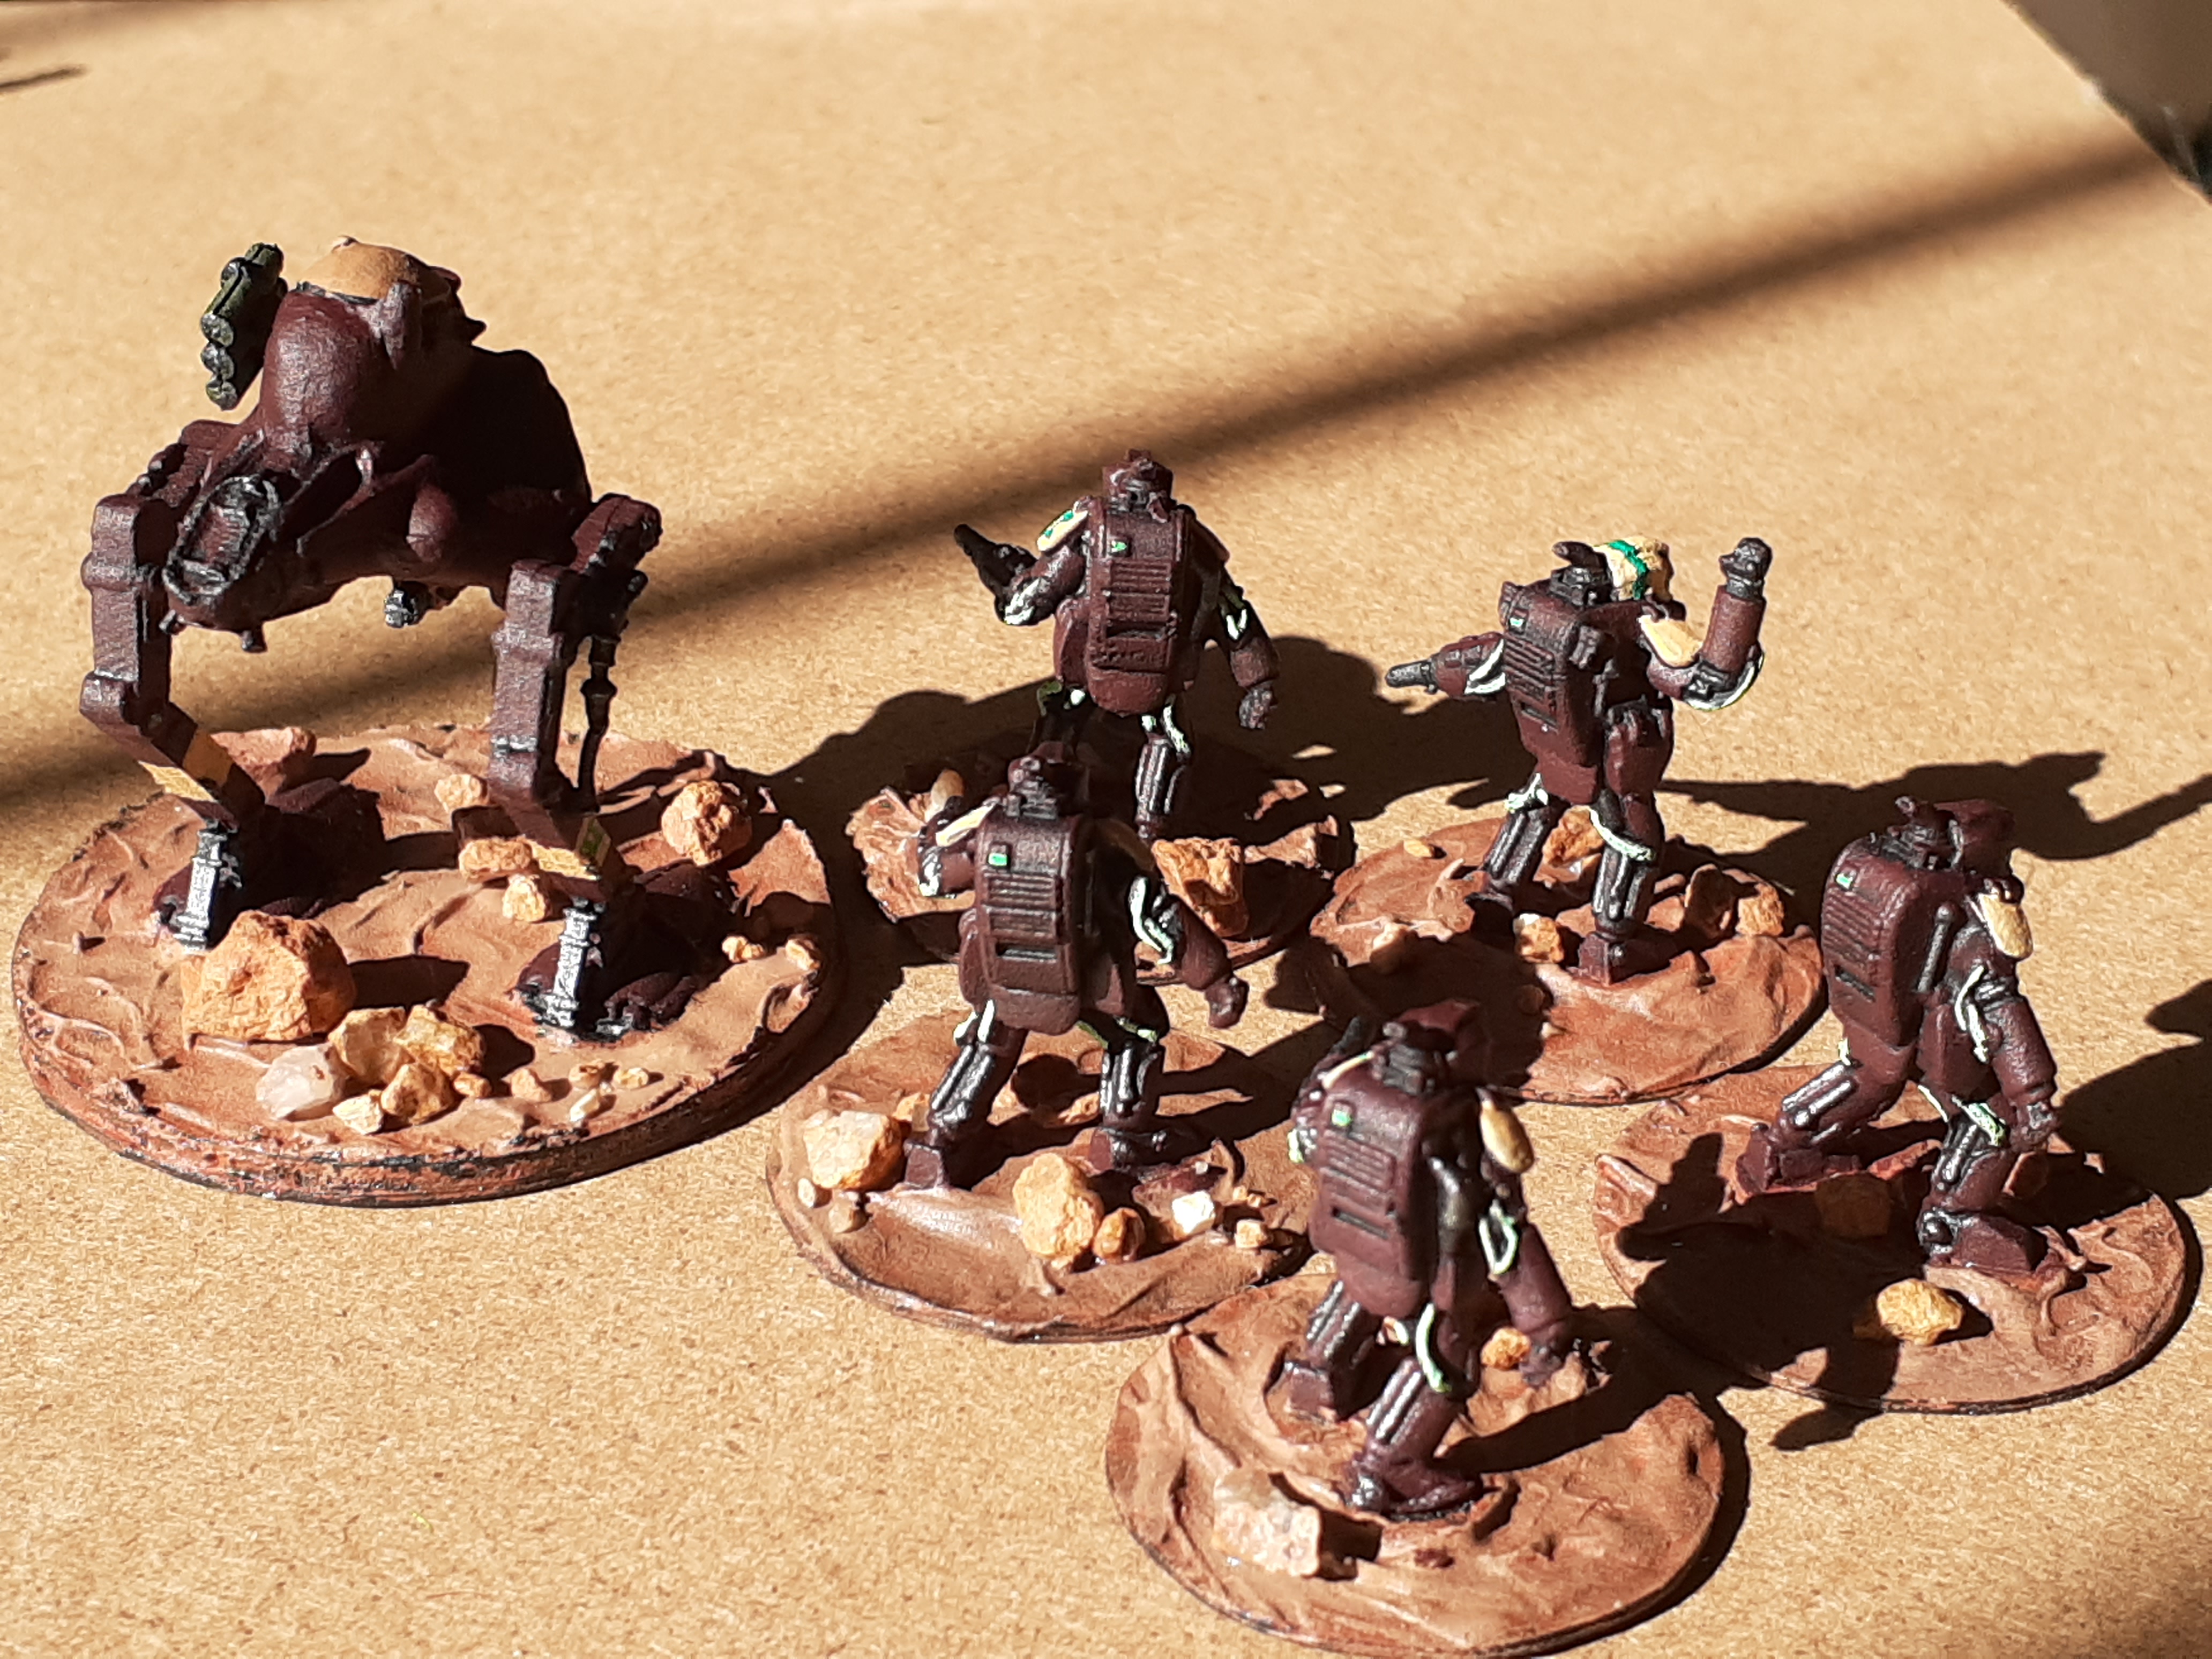
Phobos Acquisitions Operational Security Team (Ma.K IMA AFS Mk.1 suits and Goblin Walker from Slave 2 Gaming - a local Australian company).

Rear detail.


Phobos Acquisitions Artificial Intelligence Armoured Column (15mm sci-fi armoured vehicles from the Armoured Digital game (a great and innovative game in itself and with some incredibly inventive miniatures. Armoured Digital was also created locally in Australia).


The larger vehicle second from lead is the Armoured Digital mobile command centre. The next vehicle along is a supply vehicle and the last is a self-propelled artillery piece.