Thursday, 2 November 2023

Ex Manus Miniatures: Characterful 28mm Sci-Fi and Fantasy Miniatures Sculpted in Australia

UPDATE: As promised I have now completed my other two Ex Manus miniatures. The article has now been updated to include all the Ex Manus I own.

Being used to much smaller scales (6mm or 15mm), I found it challenging to get enthusiastic about painting 28mm. Hence the below miniatures took an inordinate amount of time to progress along the hobby conveyor belt, having sat with a basecoat or partial paint job for months or even years at a time.

However, the quality of the sculpts by Ex Manus (an Australian miniature maker) motivated me to complete them. Here are my takes on each of these miniatures.


Martian Crusader, c.25th Millennium

At some point between Phobos Acquisitions corporation and the Tech-Priests of the Mechanicum, are some tens of thousands of years, populated presumably by generations of Martian humans with their own stories, conflicts, armour and power weapons, acclimatised or acclimatising to the planet's conditions.


Markswoman

This exceptional and sinister markswoman may be particularly suited to games of Infinity, providing long-range fire support for the Ariadna Merovingians I have stored somewhere. I converted her slightly to hold the hyper-modernised Dragunov differently (the sculpt has it over her shoulder), with a sling made from Green Stuff to help brace it. I went for a very simple paint scheme with a limited palette. Her coat is just black with Black-Grey highlights, which I selected instead of camouflage as she would need to better blend in with the civilian throng (after stashing the Dragunov of course, maybe in a cello case).


Eloi Resistance Fighter

I had some trouble figuring out what to call this one. Officially she is 'Novice Militant Gunner'. I wanted to use some static grass tufts and a green (but no camo) theme. I settled on this figure representing a militant Eloi who has taken up arms to break free of the Morlocks.


Spaceman

I'm just calling this figure 'spaceman' to be different, though the name on the label was, I think, 'Void Suit Explorer' or similar, which sounded much cooler. I painted this one very basically, though I figure he'd be up on the moonbase.


Sunday, 1 October 2023

Strength & Honour - A Short Look at Vast Battles with 2mm Ancients

For this weekend's game, we played a pickup game of the grand-scale ancients wargame Strength & Honour from Mark Backhouse's Reisswitz Press (part of the Too Fat Lardies operation). I don't usually post on this blog that exclusively feature other peoples' miniatures, but my mate's 2mm MDF ancient miniatures from the Australian-based LaserCast workshop were pretty cool and the Strength & Honour rules were so good I thought I'd do a short article. Also I'm struggling to finish another Chain of Command battle report, so this post is a quick win for October.

Gallic warlord writes a Manoeuvre Check his army can't match (Okay that was a stretch and was terrible. Sorry.)

I chose to command a Gallic warband army and my opponent (who's miniatures, terrain and rulebook we were using) selected a Pontic army for a head-to-head clash. In Strength & Honour, players take turns deploying units one-by-one and generally each unit must be placed in contact wit the last unit you placed to simulate each army marching out and forming up into battle array. Gallic warbands are strong when grouped together, one unit behind the other, going straight forward at the enemy, with as little manoeuvring as possible. Knowing this, the Gallic warlord (i.e. me) decided to attempt a brilliant checkerboard deployment in a anti-clockwise snailshell manner to cleverly wrongfoot the Pontic phalanxes, outmanoeuvre their light cavalry archers, sweep around the enemy and seize their fortified camp, and develop a strong right hook with supported battle-line through a breath-taking display of tactical brilliance with series of obliques, pivots and evolutions worthy of well-drilled professionals under an orderly and disciplined command structure ... 

Approximate positions of the Pontic and Gallic armies at the beginning of the day.

... and you can imagine where it went from there.

About mid-way through the battle, with the Pontic cavalry and lighter infantry having totally outflanked the Gallic warbands (mostly top-right of picture, with enemy horse archers behind them). The Gauls are only just beginning to get themselves untangled from their own formation.

Cutting apart the Gaulian Knot (Did I really write that? This is getting worse.)

Only with advice from my opponent about movement options and the favour of the Gaulish god of fortune Improbulus on a few lucky defence rolls at critical moments were the Gauls able to hang on and avert total catastrophe.

The disordered Gaul warbands manage to about-face just in time to face the Pontic cavalry (the bases of tiny 2mm miniatures show swirling columns of horse archers wheeling and firing).

With some likewise lucky manoeuvre rolls to cut through the knot they'd gotten themselves into, the warlord and his core warriors swung around just in time to counterattack the Pontic flanking force that had them surrounded. In concert with a rear-guard of Gallic elite cavalry that arrived just in time to charge in on the enemy flanking force's own flank (ironic), the Gauls were able to rout the lighter Pontic formations.

Pontic light cavalry (with yellow Disorder marker) about to rout from the table, past a unit of Pontic soldiers who are about to be smashed into by Gallic cavalry (just off to the lower-right). My plan worked insofar as we were able to avoid the deadly Pontic phalanxes (being pointed to at top-left).

The Gauls did manage to get in their right hook with other Gallic cavalry.  On this flank the Gallic elite cavalry drove back a formation of Pontic infantry in successive turns and eventually drove them off, but at the same time our supporting light cavalry was eliminated by arrow fire. Two foot warbands went to pillage the Pontic camp, hoping to force the enemy to draw a 'Disaster Card' (that's a bad thing) but the camp proved too well-defended.

The phalanxes are bearing down on the Gauls, but too late. (In the distance at the top you can see the two warbands I sent off to try to take the enemy camp).

After several hefty victories of warbands and elite cavalry over lighter Pontic units, I called 'Humonculus' (whereby the enemy checks his score of facedown Setback and Disaster Cards to see if their total exceeds his Army Break Point). The Pontic army did indeed break and flee the battlefield! In fact, my opponent's bad luck had carried over into the Cards, and his army would have broken some turns ago if I'd called Humonculus earlier (he'd somehow drawn something like 43 points against a 17 Break Point Army). Upon checking my own Setback and Disaster Cards it turned out my army would have been ready to break and flee some turns previous as well, so it was a very close run thing.

The Pontic medium cavalry (foreground) and skirmishers giving trouble to the Gallic warlord's band, but to no avail, as he gets in a 'Humonculus' first.


Manoeuvres during the battle.

Strength & Honour as a ruleset, and 2mm as a scale

Strength & Honour, especially when played with these cleverly designed 2mm miniatures, really gives the feel of a mass battle in the days of Ancient Rome. Having a workable battle plan is important (but evidently not everything), complicated manoeuvre is challenging for less skilled forces, and can result in disaster if they come unstuck, the forces are similar enough to be easy to understand but have subtle and not-so-subtle nuances that the movement, combat and morale systems bring to the fore. At first I disliked how difficult it seemed to manoeuvre units but after this, my second game, I now understand and am ok with this as a key aspect to battles of the era.

Speaking of this being my second game - the rules are easy enough for me to learn in a couple of hours' gaming from just the QRS and direct experience. The rules are absolutely worth buying, learning and exploring. I believe they will be perfect for a multiplayer map-based campaign: they fit the politico-military circumstances of the period (empires, warring tribal confederations, civil wars and shifting alliances), the importance of terrain and deployment is evident on the battle, and they will lend themselves to an efficient campaign due to the decisiveness of the large battles.

Also 2mm miniatures are ideal for representing these battles. The LaserCast miniatures look the part on the table, with orderly formations, numerous masses, wheeling horse archers, shining heavy cavalry, pike blocks, skirmishers and even elephants and chariots all distinguishable though the simple and neat style, with a bit of care in the painting of dots (helmets, coats and shields). Most formation bases are flexible enough to represent a variety of armies and the miniatures, as well as the simple 'zoomed out' terrain required, are remarkably efficient to store and transport. You could carry everything you need for a large battle in a suitcase.

Strength & Honour, as with so many Lardies' (and Lard-adjacent) products, are just great.


Tuesday, 5 September 2023

SWoM Flank Attack 29 February 1938 - A Very British Civil War, Chain of Command

Again, always write your battle reports while the events of the day are fresh in your mind. Otherwise you'll forget all the good details and have to write these extremely brief, shorthand accounts.

The Mersey Corridor Offensive, Day 1

Battle 3 of my Very British Civil War Chain of Command campaign took place on the morning of the first day of the offensive by the United Communes against the Royalist/Legitimist Front-held Mersey Corridor. The Sheffield Workers Militia (SWoM) attempted to outflank the Legitimist Front positions in Botany Bay Wood held by 13 Platoon of the Blackshorts Northern Legion (led by myself).

As it was the first day of the actual offensive, both sides would have heavier support options including mortars, plenty of automatic weapons and tanks. SWoM forces brought along an FT-17 with a 37mm gun, a Rolls Royce armoured car and a truck for one of their sections, while the defending Blackshorts were able to call upon the Vickers 6-ton tank 'Ceolwulf' from the BUF's C Heavy Column.

Deployment

The game was a good one, and allowed us to try out tank vs tank actions and a different sort of scenario. My Blackshorts held the village and woods near the intersection in the Patrol Phase while the SWoM advanced from the north with a rifle section in an old WWI-era Thornycroft J truck followed up by an equally-old FT-17, while from the west came another rifle section supported by a Rolls Royce armoured car.

This time the table wasn't laid out strictly per the period map, but rather resembled the general area in a vague sort of way.

A Blackshorts section guards the western side of the intersection with a Bren gun team in ambush in a warehouse.

Early misfortune for the Sheffield Workers Militia

The Blackshorts scored an early success when Bren and rifle fire from their 1 Section caused the driver of the SWoM truck to panic, duck and floor it, crashing the truck into the woods where the second Blackshorts section, emerging from cover, riddled the vehicle with bullets, killing most of the SWoM riflemen and driving off a handful of survivors.


A second BUF section deployed to the woods on the eastern side of the intersection and was able to ambush a SWoM truck, eliminating the rifle team being transported.

Flanking attack from the west

The SWoM western advance was able to avoid most of the Blackshorts' defensive fire, and they were into the village with few losses, a Rolls Royce armoured car providing them with cover as they advanced down the street.


The SWoM armoured car leads the advance into the village from the west, the Blackshorts having been outflanked to the north and west. (Armoured car from QRF miniatures).

Blackshorts pull back

A further SWoM rifle section advanced across the open fields to the north and was able to get into the village, while a fourth section provided some fire support. By this stage too the Commune's FT-17 had advanced down the road and began firing into the position held by Blackshorts 1 Section. This section was now in real danger of being surrounded and cut off, so under the cover of some very effective smoke dropped by 13 Platoon's mortar team, and wise use of a Chain of Command die to interrupt enemy fire, they ran across the street and into a safer building to hold out in.


SWoM militia in civilian clothes and armbands advance across a field to the north of the village. (Peter Pig miniatures Spanish Civil War range).

The Blackshorts' 2" mortar team was able to put down some very useful smoke to cover their rifle sections as they retreated through the village. (Peter Pig 8th Army figures).

At the height of the action, as the SWoM close in and the Blackshorts attempt to avoid being cut off and surrounded. Armoured support for both sides has arrived at this point. (The buildings are paper terrain sourced through Wargames Vault from makers including Dave Graffam/Wargame Print and Microtactix).

Final phases

The Blackshorts had taken some casualties by this point, and were facing superior numbers, but were in a fairly solid defensive position and were generally able to dominate the firefight, despite the enemy armoured vehicles' machine guns and cannon. The BUF's Vickers 6-ton tank finally emerged and engaged the SWoM FT-17 in a tank duel (that was unexpectedly a bit too evenly matched for my liking, as it turned out, although I didn't introduce the complexity of the FT-17 one-man-turret rule as I hadn't included it in the Arsenal list and couldn't just spring that on my opponent!). The Vickers 6-ton managed to hit the FT-17 several times but was unable to cause significant damage, whereas good shooting from the FT-17 managed to penetrate the Vickers 6-ton several times, causing damage, shock and killing the vehicle's driver.

Continuing effective fire from the Blackshorts infantry inflicted enough casualties on the advancing Sheffield riflemen that their Force Morale dropped to zero and they had to retreat. The Blackshorts were able to hold Botany Bay Wood on the first day of the Socialists' attack, although the BUF Heavy Column received a bloody nose in the process.

The Blackshorts' final positions.


The BUF Vickers 6-ton 'Ceolwulf' duels with the SWoM FT-17, which is off-screen. (The tank is a QRF miniature, the infantry are Peter Pig).

What's next?

What's next? Day 2 of the VBCW campaign of course.

Well, first we have a game of A World Aflame set in a 1930s alt-history civil war Australia (the 'A Right Bloody Mess' setting, more info found here: https://www.karwansaraypublishers.com/en-au/blogs/wss-news/a-right-bloody-mess). This will be using other guys' miniatures, terrain and rulesets.

After that, Day 2 of the VBCW campaign. I can hopefully obtain some Soviet-made tanks to give the Sheffield Workers Militia suitable equipment for their armoured assault, other than the WW1 relics.

The Rail Bridges - Battle of France 1940 Chain of Command

You should complete the writeup soon after, preferably the day of, the game. Unfortunately weeks have passed and a lot has happened since we played this penultimate battle of our Chain of Command Montmedy campaign, so I've forgotten exactly what happened. However, I do remember it was a great game, a great challenge and a learning experience.

The Mission

In the immediate aftermath of A Company's retreat from Verneuil-Grand in the face of 90. Aufklarungs' rapid advance, 11 Platoon, B Company of the 12th Derwents was tasked with holding the railway overpass and the bridge over the River Chiers while engineers from 5 Platoon could arrange their demolition. The railway line enters Montmedy, and the Derwents have been ordered to defend the town. However, considering the speed of the German advance, the higher-ups expect the town to fall, so demolishing the rail line at these points is considered important to slow any German rail movements into Montmedy.

We played the 'Going Out With A Bang' scenario from the Blitzkrieg 1940 handbook, with slight modifications to fit the map positions of the 'culverts' to be blown.

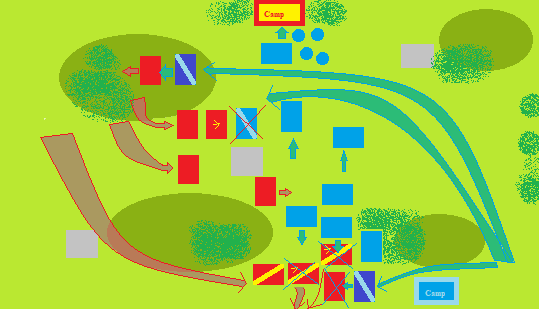
The mission map (Google Maps plus edits in MS Paint).

11 Platoon, I decided, would be a bit more representative of a hastily-raised and -trained Territorial Army formation, which the 12th Derwents (kind of) are. Therefore 11 Platoon, under the leadership of Sergeant-Major Silvester Victor, are a green-level LOC Platoon, but hey, at least they have a (single) Bren gun. In support I brought two Engineer Demolition Teams (required to blow the rail bridges), a Vickers MMG and an extra couple of guys with an AT Rifle.

The Battle

The Germans had the first turn, so coming down the road were a section of a motorcycle recon platoon and a full platoon of armoured cars.

First turn. The bypassed Maginot casemate is on-table but was not part of the battle.

The first Brits on the table were an Engineer Demolition team at the river bridge, who got to work immediately under the direction of Sgt-Maj Victor (no photos unfortunately), and a section to the north of the road to warn the Germans off too rapid an advance.

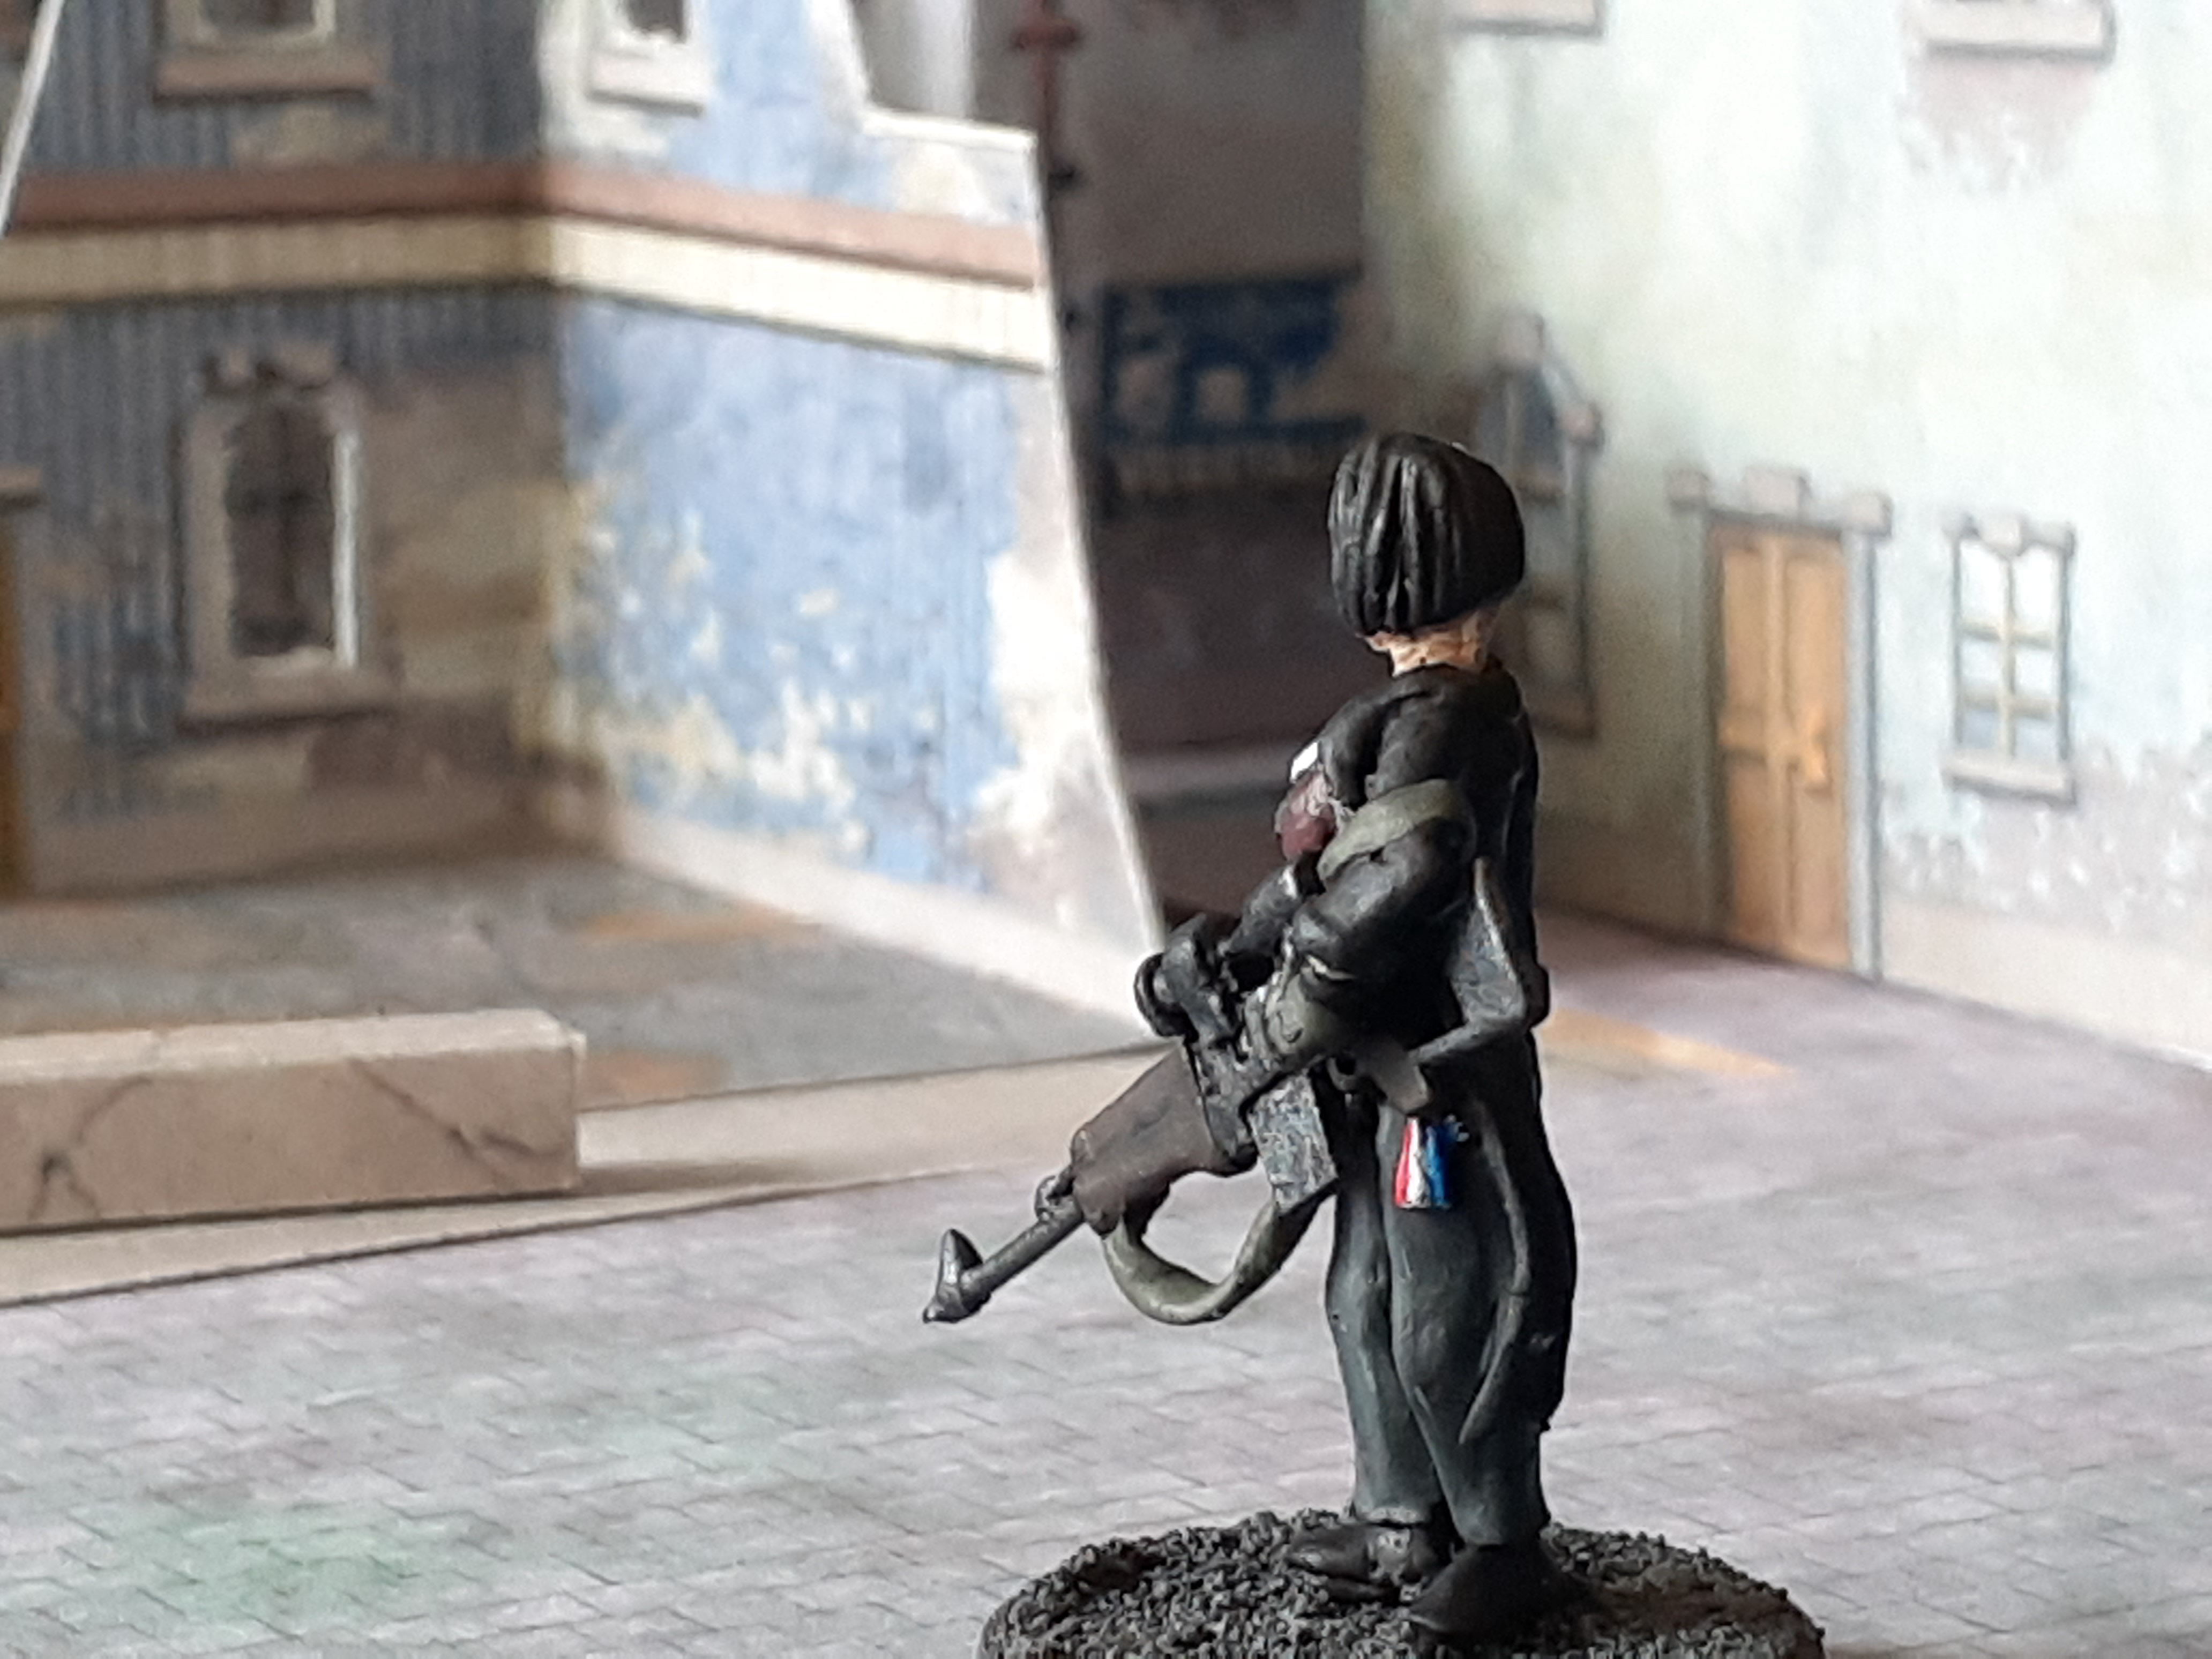
British rifle sections, with 2 Section in foreground, deploy to hold the rail overpass. (Peter Pig miniatures).

3 Section, in kilts, took a real battering but held the bend in the road (until they were whittled down and broken near the end of the game).


The Vickers MMG deployed to the hill and initially laid down some effective fire on advancing German motorcycle infantry. However, the Germans rapidly concentrated on, and broke them with fire from the motorcycle infantry and armoured cars.


A German armoured car leads the advance.

The British concentrated fire on an understrength motorcycle recon section on the road and wiped it out before it had a chance to deploy, inflicting some damage to the Germans' Force Morale. 2 Section contributed the most to this success, as Corporal Jerrold 'Napoleon' Hunnicut (no idea why, but the random name generator gave him that nickname) effectively used 'Five Rounds Rapid' to boost the section's firepower.

An understrength motorcycle recon section is destroyed on the road, as the German commander drives onward.

Ready ... NOW!

Meanwhile, the priority was always demolishing the rail bridges/overpasses. The engineers had rigged the rail bridge over the Chiers to blow and pulled back to the other side, just as a dismounted German motorcycle recon section arrived. I needed a full Chain of Command die to push the plunger, which I luckily already had - it was all in place - time to blow the bridge (and hopefully take out some Germans with it...)


... click

Nothing happened. There was no explosion.

I rolled to detonate the charges on the bridge and rolled a malfunction, meaning the charges had to be rigged again. Since the Germans were already on the bridge in strength and had started to remove the explosives, and with no second Chain of Command die in sight, I realised I had no choice but to concentrate on trying to get the second objective - the overpass - rigged to blow.

With two Engineer teams on the job it did not take long to get the explosives (almost) ready. However, getting a second Chain of Command die was just not happening (the downside of taking a Green LOC Platoon with only four Command Dice).

The explosives are 95% complete on the second demolition objective, but where is the plunger!?

The Second Objective

Also, German firepower was starting to tell, and 11 Platoon's Force Morale began to plummet as 1 and 3 Section (newly arrived on the hill) were driven off, and 2 Section was hit hard, even CPL Napoleon (I mean, CPL Hunnicut), was wounded. I was down to just two Command Dice at this point and barely a 5 was seen. With no way to blow the rail overpass, 11 Platoon had to retreat, leaving a few men behind as POWs and quite a few more dead.


11 Platoon is beaten. Check out all the shock!

After taking about 65-75% casualties, 11 Platoon is pretty well lost, though a few characters might be brought back for the next battle. Several of the 5 Platoon engineers were killed or wounded too, and of course the objectives were not met.

The next battle, Battle 6 of the campaign, is coming up in the near future. It is expected to be a big one, as the Germans assault the town of Montmedy directly, and the 12th Derwents will throw whatever they can into the fight!

Sunday, 13 August 2023

Mitsubishi A6M2 Zero flight - 6mm

A recently completed side project: a flight of three 6mm (1/285 scale) Mitsubishi A6M2 Zero fighters from Raiden/I94 miniatures which had been sitting, basecoated and magnetised, in my to-do box for literally years at this point. These were among the first planes I got intended for 'The Swede' introductory scenario in the Check Your 6! rulebook. One day they might fulfil this purpose if I find an opponent or get motivated to go solo. Until I get to play CY6! again, they'll be sitting in the display case: both the actual one and this online one.

The Raiden/I94 miniatures Zero seems to be the nicest and most accurate of the 6mm Zero miniatures out there (although I've never tried any GHQ aircraft). Raiden are a little larger than most of my other planes (Heroics & Ros and Scotia Grendel), though it's not usually obvious to me at tabletop distances.

These Zeroes were a very easy, quick and enjoyable item completed in between the more challenging 15 and 28mm projects. They represent a Chutai-Cho and two wingmen from the fighter Hikokitai (aircraft group) aboard the carrier Hiryu through 1941-42 (at Pearl Harbour, several island operationss, the bombing of Darwin and eventually Midway where the carrier was destroyed). The colour I used, Vallejo Silvergrey, is consistent with that shown in most colour plates I've seen of early Zeros in history books and modelling materials. Specifically, I used as references a painting in an old Take Off magazine and another depiction of the very same aircraft in Wheeler, B.C. The Hamlyn Guide to Military Aircraft Markings.

Colour realism and possible lack thereof

Historically, according to authoritative authorities, most (maybe all?) Japanese carrier planes at this stage of the war were actually a pale green-grey or blue-grey colour. However, there were probably variations, a lack of standardisation and the effects of fading which might account for the almost white appearance of Imperial Japanese Navy aircraft. Also I didn't want to mix paints for the perfect colour while wasting paint only to forget the 'recipe' in future if I paint more IJN carrier planes.

Hand-eye-co-ord failed me on the squadron and aircraft numbers: they're the red scrawling on the tail. The leader is supposed to be BII-144, if you can see it (you can't). A short-hair brush would probably have worked, but mine perished recently from overwork (a phenomenon called 'Karoshi' in Japanese).

For the first time ever I tried out a gloss varnish, which worked pretty well (make sure to keep the coats thin and prevent pooling in recesses). Historically the carrier planes were glossy.

Mitsubishi A6M2 Zero (Raiden/I94 miniatures, Vallejo paints, Dom's Decals).