Okays its been a long time but here's a new blog post on a whole new game...
Background
In my quest to
find a favourite aerial wargame for1/300 scale aircraft I’m giving
AirWar C21 a go. Again, as I did with Check Your Six! I decided to try
out the rules solo first to learn the system before introducing it to
others in my gaming group.
AirWar C21 depicts post-1945 aerial
combat, but I’m hoping, once I’ve learned the modern rules
inside-an-out, to develop a version suitable for the
Big One.
So I
painted up some Egyptian and Israeli aircraft, put together some
home-made accessories and had a game. Apologies in advance for the
fairly poor photos - new and more ‘advanced’ phone and bad lighting
The scenario
I adapted the ‘Brave Sons of the Pharaoh’
scenario from the Check Your 6! Jet Age book to the AirWar C21 rules and
my available miniatures – pairs of MiG-21s, Mirage IIIs and A-4
Skyhawks (one of each from Heroics & Ros and I-94/Raiden) and a
handful of Heroics & Ros T-54s and BTR-152s, some GHQ Warsaw Pact
infantry
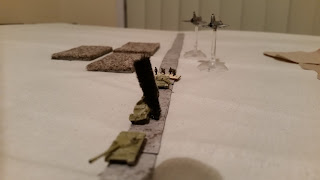
Yom Kippur War, 1973: Israeli Skyhawks are attempting
to interdict an Egyptian armoured/mechanised column moving through a
pass in the Sinai. Two Mirage IIICJs are conducting a fighter sweep
across the area. A pair of Egyptian Air Force MiG-21MF Fishbeds (one
flown by an old Soviet ace on secondment) are also moving to intercept
the Skyhawks.
 |
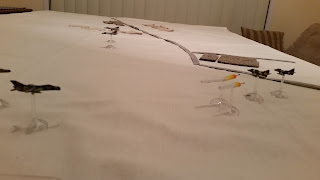
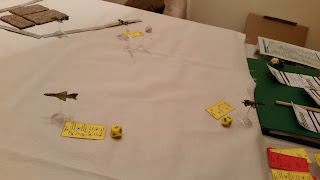
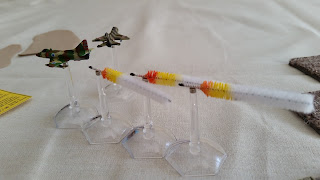
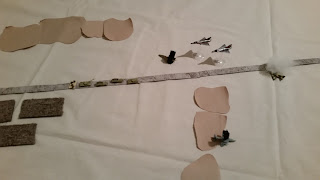
| The Lineup - Heroics & Ros and I-94 Raiden miniatures (one from each manufacturer for each plane type). The stands are Games Workshop and the plane cards are downloadable from Boardgames Geek (more on that later) |
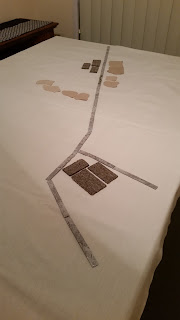 |
| The local terrain |
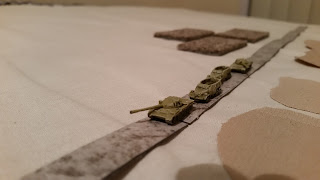 |
| The target - advancing column of Egyptian T-55s and BTR-152s (Heroics & Ros) |
The fight
Egyptian Air Force Pilot Officer (PltOff) Ali Adib
spotted the Israeli A-4 Skyhawks first on his radar display and called
it out to his flight leader, the Russian Major Yevgeni Pushkin. Maj
Pushkin initiated the combat by unleashing both his R-3R (AA-2C Atoll)
Semi-Active Radar-Homing missiles at the nearest Skyhawk (PltOff Adib’s
MiG was only equipped with two IR-homing Atolls). A momentary lapse of
concentration caused Pushkin to fail his manoeuvre and he promptly flew
off the board. (Literally ace pilot, Turn 1… Switch on, Pushkin). The
radar-homing Atolls, with no illuminated target, flew away harmlessly
and Adib looked around in mild panic for his flight leader.
 |
| Maj Pushkin's opening salvo |
 |
| Maj Pushkin departs the board while his wingman continues on |
PltOff
Adib continued on the fight by himself against one then the other of
the Skyhawks as they attempted to manoeuvre as well as possible despite
their bombload-induced high stall speed. The Mirages eventually figured
out what was going on and joined in a swirling dogfight with the
outnumbered Adib. Poor stick work and energy management all round
resulted in numerous failed manoeuvres, overshoots and stalls, with the
Mirages in particular failing to get missile lock, IR-homing Atolls
flying wide and the MiG and Skyhawks trading a few cannon rounds to
little effect.
 |
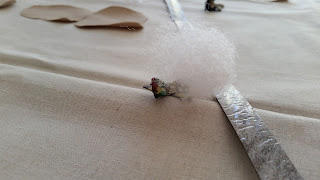
| Radar-homing AA-2s pass by a Skyhawk |
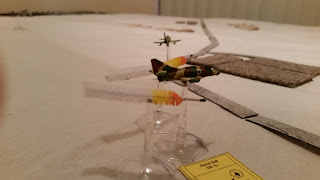
Suddenly, back into the fight rushed Maj Pushkin
(I decided a 6 on a d6 at the start of each turn would let the Russian
return). Darting past at high speed Pushkin launched an IR-homing
missile and fired his guns at a Skyhawk flown by Lieutenant Gabriel
Natan. Twisting to avoid the missile, Lt Natan was able to get in a shot
at Pushkin’s MiG as it passed close by, damaging its gun. However Natan
stalled his heavily-laden aircraft and was only just able to eject
before it pancaked. Pushkin decided he would claim that one as a kill.
 |
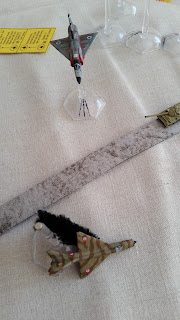
| Maj Pushkin takes a shot with an IR-homing Attol |
 |
| ... gets hit by Skyhawk cannon after an overshoot |
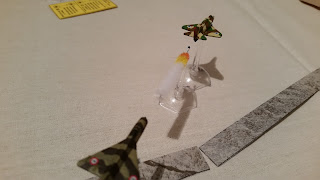
 |
| Natan loses control of his Skyhawk and stalls it |
 |
| The Skyhawk crashes, Natan manages to eject |
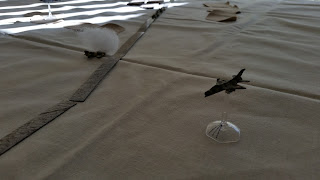
PltOff Adib chased the remaining Skyhawk but was intercepted by a
Mirage IIICJ flown by Captain Avraham Weiss. Weiss shredded Adib’s plane
with cannon shells in a violent head-on gun pass. The burning MiG-21
plummeted to the ground. No ‘chute was seen.
 |
| PltOff Adib is shot down by a Mirage |
Meanwhile, the
inexperienced Lt Shmuel Zahav, overflew the Egyptian armoured column in
his Mirage IIICJ as he tried to set up for an intercept on the enemy
MiGs, attracting an SA-7 Grail Surface to Air Missile (SAM) which he
avoided easily.
 |
| Egyptian air defence takes an opportunity shot at a Mirage flyover |
The aforementioned remaining Skyhawk, piloted by
Captain Gilad Alon, was now within sight of the enemy armoured column
and lined up for a bomb-run. Immediately behind Alon was Maj Pushkin,
who launched his last remaining IR-homing Atoll and forced Alon to break
off his bomb run. Having used his last weapon, the Soviet pilot
accelerated for home, leaving the Mirages in the dust.
 |
| Maj Pushkin foils the bomb run |
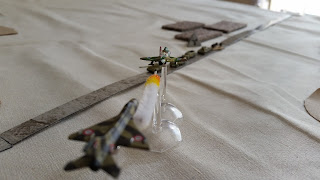 |
| Maj Pushkin's last missile misses, but Capt Alon has to break off his attack |
Capt
Alon’s quick break-turn had allowed him to survive the AA-2 missile, but
seconds later the Egyptians volley-fired three SA-7 SAMs at him. Alon
skimmed over the mountains dumping flares but failed to pull off a sharp
evasive manoeuvre. Two of the missiles struck, setting off a
catastrophic ordnance explosion that obliterated plane and pilot.
 |
| SA-7s chase Capt Alon's Skyhawk, while Maj Pushkin passes by, making his escape |
Capt.
Weiss and Lt Zahav in the Mirages used the last of their cannon
ammunition shooting up a pair of BTR-152s in the Egyptian column before
turning for home.
Lt Natan, who had safely ejected from his
stalling Skyhawk, landed on the road. With nowhere to run he was
captured by Egyptian troops.
 |
| The Mirages strafe the Egyptian column |
 |
| ... destroying some BTR-152s |
Conclusion
I thoroughly
enjoyed this game and after a few turns things started to flow easily.
The rules are fairly intuitive despite the degree of technical detail
included for planes, missiles, bombs and the like. AirWar C21 represents
altitude abstractly which greatly simplifies matters. Quick reference
charts for each aircraft, where you note all relevant details including
speed, weapons, countermeasures and damage, are a really good idea and
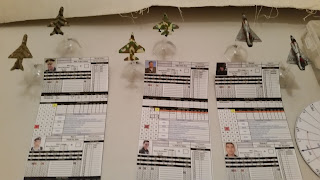
are downloadable from here, as Boardgames Geek: https://boardgamegeek.com/boardgame/34413/airwar-c21-2nd-edition.
The only
things that slowed down gameplay for me were remembering to check each
aircraft’s reference sheet for its current speed when performing a
manoeuvre and needing to note down the circumstances under which a
missile was launched (e.g. with or without a lock, shorter than minimum
range etc.) as the resolution of the attack is conducted in the Phase
following the one in which the missile is launched.
Coming next
* Some random surprise mission maybe including a MiG-15 out of storage…
* Trolling SAM batteries
* Major Pushkin needs a new wingman.


