Saturday, 6 July 2024

High Elves in the Age of Magic VI - The Battle of The Haunting

A more recent game - we continued our campaign of High Elves versus Undead in the foggy uplands with a large 7 point SAGA - Age of Magic battle. This battle may be the last of our campaign (these battles are loosely peripheral to a friend's more organised campaign of the Forces of Good versus the Undead, the final battle of which is scheduled later this month).

The Warbands Assemble in the Foggy Morning Dark

In a huge battle just prior to the events of this blog entry, the Undead band of ghouls were slaughtered - their King and other leaders lying dead (or deader), the last survivors scattering in the darkness, maybe caught and torn apart by wolves or other predators, maybe still lurking out there in the mountains, but no longer a major threat to the Great Kingdoms.

But the struggle for the foggy uplands was not over. Far from it. For another evil force appeared to take the place of the ghouls: a horde of skeletons, including an undead giant and skeletal cavalry had seemingly risen from the very soil.

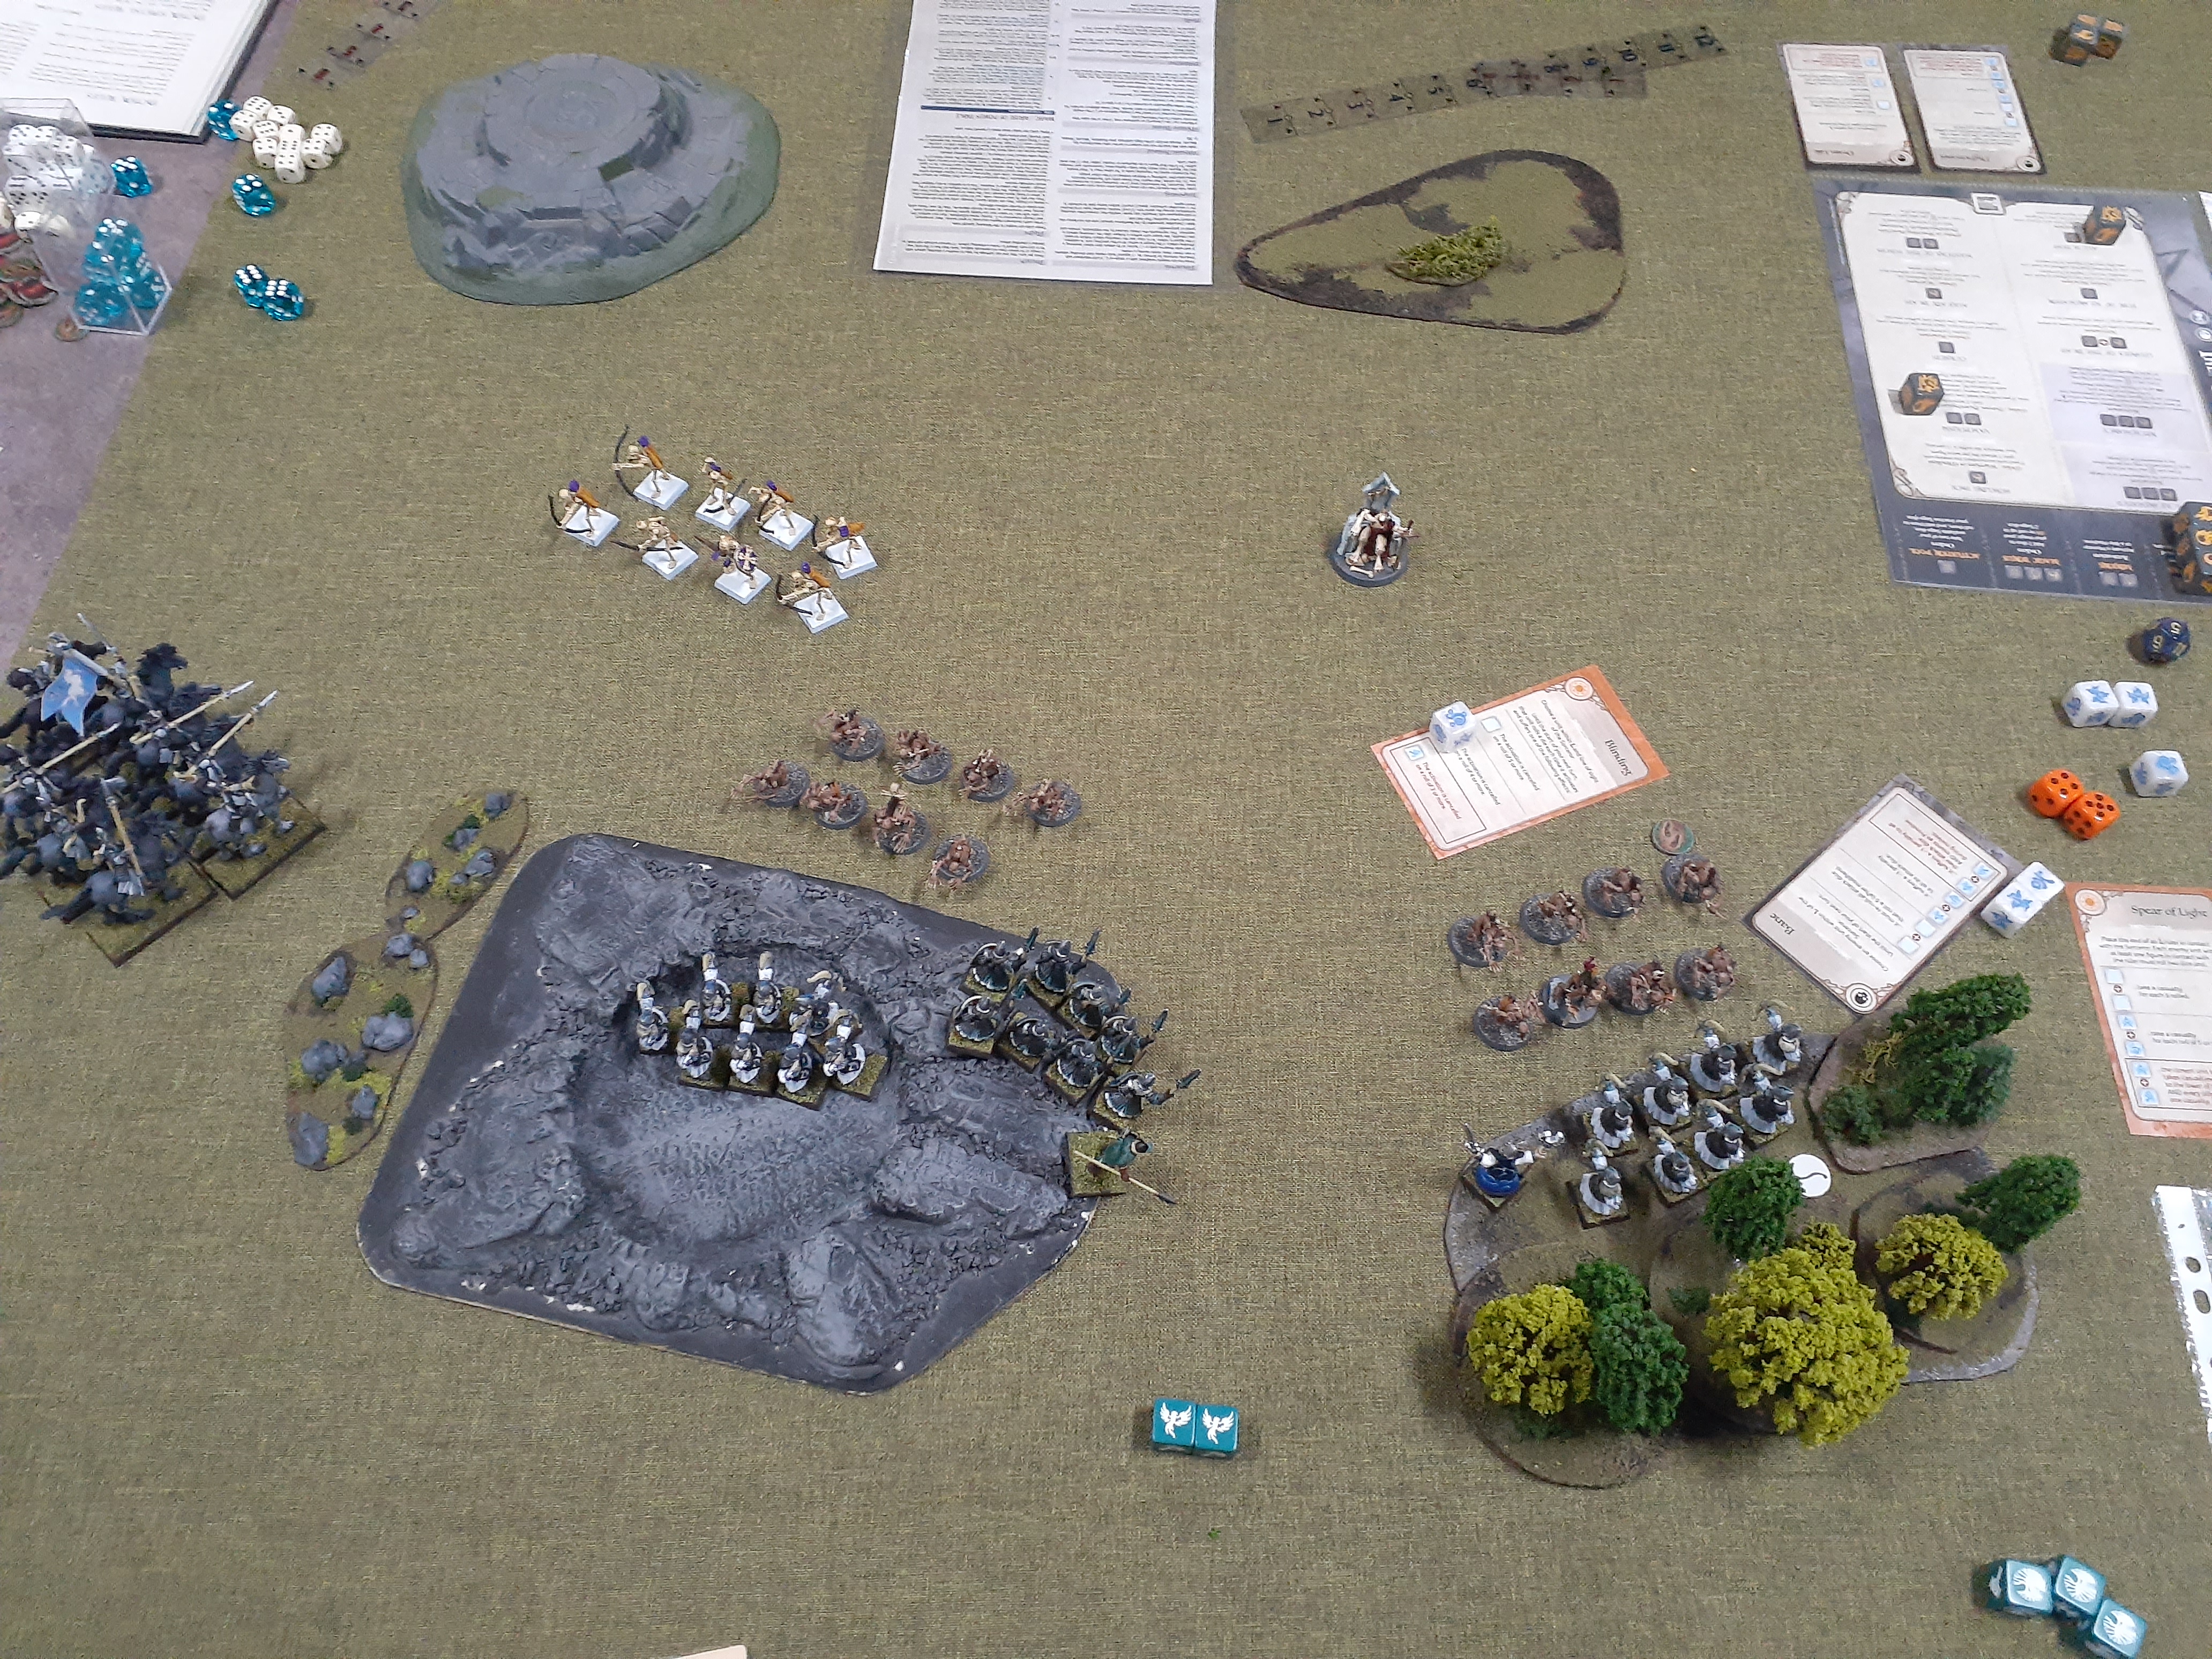
Practically the entire High Elf host was assembled for this battle. Because of the darkness and fog, units had to deploy within short distance of each other. This factor negatively impacted the Elves because of a nasty surprise the Undead would spring (Citadel miniatures).

The skeleton army, with a catapult.

View from the perspective of the Undead commanders: a Crypt Captain and Vampire sorceress.


The Spectral Haunting

The nasty surprise that had followed the army of skeletons turned out to be the ephemeral forms of the dead: a legendary group of ghosts. These would float back and forth across the Elven army in the unnerving darkness, scaring the less stout-hearted elves, causing fatigue, and even scaring an Elven archer to death!

The ghosts.

The Skeletons Attack

The darkness and fog limited the effectiveness of the missile units and magic users on both sides. The Skeleton cavalry commenced the action, attacking and driving back an unprepared unit of Elven archers who had attempted to take cover in rocky ground. I had a number of defensive battleboard abilities that I should have used to try to save the archers, but I neglected to do so.

A short-range volley from the Elven left-flank archers, a bolt of light spell from the Elven mage and a sharp, lone counterattack by the Elven paladin wiped out the skeleton cavalry.

The vampire sorceress used a spell to confer the benefit of flight to undead units, and my opponent used this cleverly to move his unit of skeleton archers right over to my board edge to claim Victory Points for a scenario-specific victory condition. The same spell was also used to move up a unit of skeleton spearmen to threaten the Elves and then levitate the massive undead giant into combat with the Elven lord: crushing him in combat.

The undead giant kills the Elven leader (Citadel miniatures elves).

However, the Elven lord was able to inflict severe damage to the undead behemoth, and shortly after, the Elven left-flank archers (the emerald regiment) under command of a Captain (a Great Kingdoms hero type that has the We Obey special rule) took the opportunity to finish off the giant.

The archers avenge the death of their lord.

And then what happened?

After this I forgot to take any more photos as it was a really intense battle. The ghosts flew back and forth inflicting fatigue on the Elves and almost leading to the death of the Elven paladin, killing an Elven archer. The Elven mage became exhausted by the ghosts swirling around him, and having to run back and forth casting spells. He was eventually hit by a long-range skull-shaped projectile from the undead catapult and killed outright, but not before he was able to slow the Undead Crypt Captain with a spell.

The vampire sorceress continued to cast wither spells to inflict more fatigue, but the Elves were able to invest large numbers of SAGA dice to rest ('dispelling fears'). The Elves also managed to use two phoenix SAGA dice on good defensive and offensive abilities that made any attack on their spearmen units too daunting a prospect for the skeleton spearmen, who merely demonstrated in fron of the Elven right flank.

Three of the four ghosts expended their frightfulness and dissipated (the ghosts counted as hearthguard for victory points, and were a legendary unit, so their loss was a major blow to the Undead).

The Conclusion

Meanwhile, the Elven Reavers charged the skeleton archers (who had recently fired on them) and smashed many to the ground. The Elves were able to inflict enough casualties and hold on long enough to claim a fairly narrow victory. The vampire and remaining skeletons retreated to save themselves for another day.

This was a great, close game. I thought my Elves were doomed by Turn 3 due to the haunting exhaustion and loss of their leader. But they managed to turn it around by being conservative with their SAGA dice and defensive abilities. The mage should have taken the protective spell 'Laying On Hands' to deal with fatigue - as unexpected fatigue on heroes makes it unwise to use several Great Kingdoms battleboard abilities, in addition to slowing and weakening your units generally. I also should have used my SAGA dice more efficiently, and probably only won the game because of some luck phoenix rolls that scared my opponent.

High Elves in the Age of Magic Part V - Final Judgement

Some weeks ago, we continued our series of linked battles, as a High Elf expedition skirmished with a band of ghouls and other undead in a foggy uplands area using the SAGA - Age of Magic rules.

Setting Up The Battle

SAGA is a really impressive and fun game on so many levels. There is a random battle-generation system, along with themed terrain generation (representing the commanders' choice of battlefield). This can be done by rolling on a table in the Book of Battles, but another way is by drawing cards for different categories.

I think there are usually five categories of cards.

Confrontation At The Ancient Monument

Both sides raced to reach the Ancient Monument, each for their own purposes.

My opponent's ghoul band.

My High Elves (Citadel Miniatures)

The Ghoulish Leaders Scheme Up A Plan

The Ghoul Sorceror-Judge (my opponent's painted miniature).

The Ghoul King and his musician and standard bearer (hearthguard).

The Warbands Clash

The ghouls reached the monument first, with the Elves holding their line.

Judge Ghoul cursed the Elven archers, a spearman is withered, and a pair of horrifying ghoul-hounds race forwards to maul the Elves. On the other side: the Elven Lord and Reavers charge the Ogre Ghouls and a nearby group of smaller ones.

Combats on the Left Flank

A great deal of effort went into attacking this one unit of ghouls: volleys of arrows, magic, and an attack by the Elven lord. The Reavers moved up to shield their exhausted lord.

Combats on the Right Flank

More ghouls fall to Elven arrow and spear, but will it be enough?

A Surprise Attack

The Elves were hard-pressed, and not performing particularly well in combat against their enemy: they were killing ghouls, but it was taking an inordinate amount of effort, and their own casualties were mounting. The Elves were also losing the clash of magic: Judge Ghoul was clearly more careful or powerful than the Ghoul King's previous magic-user (who was destroyed by his own spell).

The Ghoul King had an idea too. Suddenly and unexpectedly, the ghoul-hounds changed focus and ran over to attack the weakened Elven centre, slaughtering the Elven Lord, tearing into a unit of archers, and then finally the fatigued Elven sorcerer.

The ghoul-hounds attack, while the last surviving ghoul of their right-flank group flees.

The terrifying attack.

The End

The High Elves were defeated, with heavy losses, including the loss of both their heroes. They had killed plenty of ghouls, including the ogre-ghouls. However, they notably failed to wipe out the units of ordinary ghouls, and seemingly could do nothing to stop the ghoul-hounds, which were terrifyingly quick, able to shed fatigue rapidly, and were used to maximal efficiency by my opponent. A good, fun game as always.

The Unfinished - Confederate Command - 10mm Pendraken

Sometimes we get into a project because everyone else is doing it. We fully intend to complete the project, but circumstances get in the way and by the time they are sorted, everyone's pretty much moved on from the project. This type of thing is quite common in wargaming because there are so many worthwhile games, so many eclectic interests, and little time to do them all. Some projects never even get to gather dust on the shelf.

Quite a few of my local gaming group decided to do Regimental Fire & Fury (American Civil War)* using British maker Pendraken's excellent 10mm miniatures. While various people got full armies (brigades, really, at this scale), I thought I'd just try out the game and provide a bit of support with a single large infantry regiment. Although I really enjoyed painting the miniatures (10mm is a 'sweet-spot' between sculpting detail, scale and overall unit appearance at tabletop distance), the colour palette I chose did not seem right. So I stripped the minis with Dettol and re-undercoated them in preparation for a repainting. After many unrelated issues, time went by and the gaming group moved on. So I've decided to let the regiment go to a good owner.

*On later consideration too, I realised Fire & Fury is the wrong ruleset for my plan of just joining in as a junior team member of one side with a single unit: the shooting for instance is resolved by grouping the firepower of all units shooting at an enemy. Therefore I'd rarely have got the opportunity to roll the shooting dice myself, unless my single regiment was off alone on a flank or something.

But before they go, just a few last photos of the regiment's command elements (which I did not repaint).

Leading the charge (Pendraken miniatures).

The regiment's Colonel.


March of the Behemoth - Multi-turreted Monster Tank for Chain of Command, VBCW

It's been a while since I've posted anything on the blog, so I thought I'd just ease back into it with some pictures of miniatures I painted a while ago.

The Hammer of the Workers

The Sheffield Workers Militia (SWoM) have received the heavy Soviet-made armour they were promised to spearhead the assault across the fields of the Mersey Corridor. Testing the limits of the British railway and road network, the massive multi-turreted T-35, under the control of the Peoples' Assault Columns, will provide the offensive power needed to break through the Fascist and Royalist lines. It has a range of weapons to deal with all threats: heavy guns to bust fortifications, excellent anti-tank weapons, and plenty of machineguns to fight off infantry from all angles. In support is a fast and handy BT-5 light tank, which will be able to cover the T-35 and help it out in a tight spot.

The Heavy Breakthrough Tank Platoon moves into position prior to the Mersey Corridor Offensive.
(Zvezda miniatures T-35).

Mould-lines evident unfortunately. Too late now - the paint is on.

The BT-5 escort tank (Zvezda miniatures).


The platoon together. The markings around the turret top are for the combined Communes, while the gold and red diamond badge on the turret side is the worker bee of Manchester - for whom this element of the People's Assault Columns are fighting).

How should a multi-turreted tank fight in Chain of Command?

A multi-turreted tank adds some complexity to the rules for vehicles and leaders in Chain of Command. After some consultation and though, I decided to make the T-35 (plus the BT-5 or another lighter support tank) into its own 'platoon.' If included as a Support Choice, such a powerful and complicated unit would inevitably become the focus of the action. I also envisioned that, thematically, these tanks would often operate on their own - they're going to be the tip of the spear of any attempted breakthrough, and early VBCW tactical commanders are unlikely to know exactly how they should employ them: they probably think the big tank is invincible (it's not - the armour is not great).

So anyway, I wrote up a CoC platoon document for the 'Heavy Breakthrough Tank Platoon.' I intend to test the platoon in at least one two-player battle in future to see if the special rules and structure work.

I'll blog about it once this is done.


Thursday, 9 May 2024

High Elves in the Age of Magic Part IV - Tracking the Ghouls

We had a short pick-up game of SAGA - Age of Magic, which I consider vaguely themed as a prelude to a mate's upcoming multi-player battle between the Forces of Good and the Undead. My High Elves took on another mate's ghoul warband (plus skeletons). The purpose of the game was really just to better learn the relevant battleboards, and generally 'git gud' at SAGA.

Opening

A band of elves under a ranger captain were tracking a particularly clever and dangerous group of ghouls that had been preying upon the human settlements in the region. After many days of challenging pursuit of the evasive band of monsters across the rugged hill country, the elves finally caught up with their quarry in a heavy morning fog.

The Reavers' horn signals to the ranger band to form up. (Citadel Miniatures).

Knowing the enemy were near, and discerning their direction, the elf troopers formed up in a semi-circular formation to pen up the expected ghoul charge. They anchored themselves in difficult terrain: a rocky area with a small crater and a wood, to slow any enemy charge.

In the darkness beyond the impenetrable mist, the gibbering and cackling of the approaching ghouls could be heard: the monstrous band had turned about to attack their pursuers. The elves waited, knocked their bows, and loaded up their battleboard with defensive Saga abilities (I was able to roll many phoenixes and decided not to move to attack, but rather let the enemy come to me).


The Ranger Captain (as the warlord) and elf sorcerer in the centre of the formation with bows left and right, spears in the middle and cavalry on the most open flank. (Citadel Miniatures and North Star).

The Ghouls Emerge from the Fog

The gibbering began to turn to gurgling growls and almost-human teeth-gnashing outbursts as the horde approached. Suddenly, shrieking ghouls emerged from the mist and attacked. Leading them were a pair of gigantic ghouls later identified as ogre ghouls. This initial assault was beaten back with no losses to the elves, and the ogre ghouls were riddled with arrows. (All this due to a loaded battleboard and some incredible early luck with the attack and defence dice).


Ogre-ghouls lead the charge of the other ghouls in my opponent's warband, while his albino ghoul king looks on.


As the fog lifted, the elf archers unleashed volleys of arrows and killed one of the ogre-ghouls. The elf sorcerer unleashed a lightning bolt (to little effect) but followed this up with spells to drive off and blind the ghouls. This worked to put more space between the elves and the charging ghouls, to give the elves more chances with their arrows. A necromancer approached the elf line, placing curses on them and raising some of the fallen ghouls, while the last ogre-ghoul attempted once more to break the line but fell to an elven sword.

As luck began to swing in favour of the ghouls, they were able to drive back the elves right-flank, killing several archers and threatening the elf sorcerer. Furthermore, a group of skeletal archers approached the elven cavalry and killed three of them with arrows - harrowing losses despite the elves' use of the 'Last Defence' Saga ability (I rolled a lot of 1s on saves).

Curses and spells of confusion were exchanged, but disaster once again struck the ghouls as their necromancer tried too hard with a curse and exploded in a shower of filth and dark, congealed blood. However, the elven archers had become primitives and could no longer benefit from advanced saga abilities.


The ghouls drive back the elven archers in the treeline, with curses on both units.

The elven sorcerer again pushed back the attacking ghouls and the elven troops held their line. Shouting 'Banish Evil!' the elven spearmen charged out of their cratered rocky ground and attempted to drive the ghouls before them, but they were soundly beaten and fell back, having lost three elves for little result.

Elven archers hold the mysterious crater, while the spearmen prepare to charge downhill at the ghouls.

At this point the battle ended, and the ghouls, having taken some critical losses, slunk away. They're still out there in the wilderness though, lurking. And the elves, despite having won a decisive victory and with all their units still intact, had suffered quite a few losses of their own.

Analysis

This was a good experience that taught me a lot about the relevant SAGA - Age of Magic battleboards, as well as helping to improve my familiarity with SAGA. Some radically bad dice rolls disadvantaged my opponent early on, though luck swung back a bit in the last two turns. With the loss of the ogre-ghouls and necromancer, and the game ending suddenly, the luck improvement came too late for the ghouls.

I ended up doing nothing with my Reaver light cavalry, and realise I should probably have manoeuvred with them to get them out of danger before the skeletons shot them. I should also have moved my warlord out further to defend the elf sorcerer, which, had the game lasted one more turn, could have caused his death.

The scenario (which was based on drawing five random cards) was supposed to encourage the elves to attack the ghouls early on, which perhaps I could have done. However, the Great Kingdoms battleboard is very strong in defence, and the fog would have hampered my shooting, potentially putting the whole elven ranger band in jeopardy.

The ranger captain exhorts his troopers (North Star miniatures - and yes, painting eyes is always a risk).


Thursday, 18 April 2024

NIMITZ - 1:2400 Scale WW2 Naval Wargaming

I had my first couple of games to learn the new NIMITZ WWII naval wargaming ruleset by Sam Mustafa (Honor Games), trying out my small (57 point) French fleet again various German forces.

The French Fleet and its Opponents

This was just a learning game for me, so my opponent was not really trying to win - just give a sense of how the rules mechanics worked.

I only took these photos of my French fleet's first battle against a Kriegsmarine force consisting of the battleship Bismarck and several destroyers. Against this, I could field my own battleship, the Strasbourg, with the cruiser Jean Di Vienne and supported by five Le Hardi-class destroyers. The French battleship has all it's big gun turrets forward and all it's light guns rearward, so I always tried to manoeuvre to be pointing at the enemy. I kept everything at high-speed to make the ships difficult targets (the one time I slowed my battleship down, it took a telling hit).

The Marine Nationale got the upper hand quickly by eliminating the outnumbered German destroyers, losing one of their own in the process. The Bismarck then began its duel, surrounded by French ships. The Bismarck's armour was proof against most French weapons, and it was able to sink another destroyer and severely damage the Jean Di Vienne before both sides broke off.

The Bismarck surrounded by French ships (CinC French miniatures and 3D printed German).


The second battle involved the French and Japanese allied together against a combined German fleet. Both sides used their destroyers recklessly as 'shell-magnets' and to get off early torpedo volleys (all agreed this was probably not the way to use destroyers). The action finished before a decisive result, but the Germans were probably winning, because although they lost all their destroyers and had at least one crippled capital ship, they had damaged several enemy and sunk two Japanese light cruisers plus some destroyers.


Rules Discussion

Overall, the surface engagement rules (the Nimitz component) were very good, and everything you expect from a Sam Mustafa game: easy to learn, simple to play, very efficiently and cleanly designed. Everyone had fun and never once needed to check the rulebook. Nimitz was more my style than General Quarters III I previously tried, mainly because of the simple movement mechanics (in GQIII you have to account for every knot of speed and 5 degrees of turn angle).

There are some things that players used to more intricate naval wargames won't like (specifically, Nimitz eliminates fine details of things like ranging-in, spotting/distinguishing fall of shot from multiple firers, and hit location and damage, and it completely ignores anything to do with command and control). However, it is easy to see how these can be eliminated in the interests of speed and simplicity of play while ensuring that the battle still proceeds plausibly (e.g. do ranging shots really matter, when a full volley will almost inevitably follow in a pretty reasonable timeframe?)

The Halsey campaign game

The Halsey component we have yet to try out but it looks very promising. It is a 'campaign' game with a zoomed-out map to cover searching over large distances, aircraft, aircraft carriers, submarines, and all the missions that naval engagements are really fought about, such as convoys, amphibious operations etc. I think an operational-level campaign could easily be accomplished using Nimitz (and Halsey) for the naval and air components and Rommel for the land components, so I will begin to develop some ideas.

Would I house-rule Nimitz? (In short: No (But I might try to write my own system too))

Having played only two games and having done limited research on WWII naval combat, I think it would be greatly premature and unwise for me to actually implement any changes to the rules at this stage. The only things I could think of that I might possibly change would be 1) adding some command & control mechanic (and a 'bridge' critical hit), 2) a negative modifier for multiple ships firing similar calibre guns at the same target (fall-of-shot confusion) and maybe 3) making critical hits to secondary turrets a bit more effectual (it seems unlikely in any given engagement that a ship would ever lose more than one turret - given the very decisive damage results, ships are likely to be sunk well before their combat effectiveness is reduced in this specific way).

Having said all that, I have for a long time had an idea to make something akin to the Mikawa quick battle system, though I was considering using the underrated Axis & Allies War at Sea rules as the basis. My idea would basically be a glorified game of the class Battleships. I will see what I can develop. However, in the mean time, I will be trying to play a lot more Nimitz (and Halsey).

Sunday, 7 April 2024

Rommel in 6mm - Ruweisat Ridge

We had our first game of Sam Mustafa's Rommel wargame using my 6mm Afrika Korps (DAK) and British 8th Army minis, trying out the Ruweisat Ridge scenario from the online compendium of Rommel scenarios. I commanded the Allied forces and my opponent, whose first game this was, chose the DAK.

The scenario

Ruweisat Ridge runs roughly east-west and is key terrain for the El Alamein battlefield. The battle takes place 1 July 1942 as part of the First Battle of El Alamein. To win, the DAK must capture the objective on Ruweisat Ridge and at least two other objectives and hold them until day's end, in order to open up the Allied flank south of the El Alamein box. The British must simply to prevent this from happening.

The scenario map I made using the map editor function in the Panzer Corps computer game and LibreOffice Draw. Obviously we use hexes rather than squares.

The forces

DAK has three very much weakened but nevertheless balanced division elements: 15 Panzer Division to the north of the ridge, 21 Panzer to the south, and 90 Light Division, coming on from reserve from the north. 8th Army has two infantry brigades (18th Indian and 1st South African), and two armoured brigades (one of which, 4th Armoured, comes on from reserve) and some army assets including Robcol (elite infantry) and 25 pounders. Being short one Panzer III model, I substituted a StuG IIID (5. Kompanie, Sonderverband 288) for 90 Light Division. I couldn't find an Order of Battle for 22nd Armoured that matched the scenario, so I subbed in 23rd Armoured.

The German attack

15 Panzer moved toward the northern hill objective while relentlessly attacking 18th Indian Infantry Brigade's northern sector (11th Sikhs), using their Pioneer infantry to good effect eliminating entrenched positions. 21 Panzer's infantry cautiously skirted the minefield and positioned itself to attack 18th Indian's southern sector held by the 3rd Gurkha Rifles, while the division's armoured component raced west to engage in a swirling series of tank battles with 23rd Armoured. The Luftwaffe was called in and bombed the Allied troops in their trenches. A sneaky use of the Intercepted Signals event caused the 18th Indian's artillery (157th Field Regiment) to think they were retreating and move out into the open desert to the southwest - putting them out of position and at risk to 21 Panzer's armour for the rest of the game.

The British respond

1st South African Brigade raced into position to shore up the Allied northern flank, with the Natal Carbineers taking up a strong defensive position on the northern hill and the Transvaal Scottish with supporting Matilda IIs holding off 15 Panzer on the flat ground. 11th Sikhs attempted a counterattack against 15 Panzer, but this was beaten back. 23rd Armoured inflicted heavy losses on 21 Panzer's armour but were eventually destroyed, along with the aforementioned 157th Field Regiment, which had been tricked by German sigint into retreating to a vulnerable location. Allied P-40s and Hurricanes tore up the German tank columns, helping to weaken their further attacks.

GHQ miniatures on vinyl tile bases with printed paper unit cards, cellotaped to allow use of whiteboard markers. The smoke is where an M3 Grant unit used to be (they were wiped out).

Panzerregiment 5 defeats 23rd Armoured after a tough tank-on-tank engagement.

15 Panzer and 21 Panzer assault 18th Indian Brigade in their trenches, bending back their line to the north and inflicting very heavy losses. (The 's/f' tokens are for tipped units, and the black smoke is from the flamethrowers of the German pioneers). The minefield is visible at left (small lumps of Selleys on vinyl tile and painted).

Reinforcements arrive, and the Germans gain the upper hand

4th Armoured Brigade eventually arrived to reinforce the Allied northern flank, but ended up spending much of it's time driving back and forth trying to protect the Allied MSR from the tanks of 21 Panzer, which had broken through. However, they did help 1st South African Brigade counter 90 Light Division with Sonderverband 288, which arrived at the same time from the north.

The infantry and tanks of 15 Panzer eventually succeeded pushing back the 11th Sikh Regiment to the foot of Ruweisat Ridge, while also dealing with the 1st Transvaal Scottish, which fought well but not well enough. The last of the infantry's Matilda II support was destroyed in this series of attacks.

21 Panzer's infantry finally overwhelmed the hitherto sturdy 3rd Gurkha Rifles and took the central objective, moving forward along the southern edge of Ruweisat Ridge.

The Sikhs, Gurkhas and Transvaal Scottish are pushed back to the ridge.

The Natal Carbineers and Duke of Edinburgh's Own managed to hold off repeated uphill assaults by the infantry of 90 Light Division, now to be known as 'Carbineer's Kopje.'

The South Africans, almost surrounded, hold Carbineer Kopje.


Late afternoon on 1 July - the Germans have broken through in the south and advanced in the centre, while the British still hold the northern hill and Ruweisat Ridge itself. Tanks from 4th Armoured (right of picture) desperately attempt to keep the British MSR open to prevent the whole force from being outflanked and cut off.

Final assaults at dusk

With the sun going down and just 2 turns remaining (and game time running out IRL, both I and my DAK opponent realised the main objective, Ruweisat Ridge, was still not taken. Without the ridge objective, the Germans could not win. Therefore they rushed into attack Robcol, which was now reinforced by the Transvaal Scottish. Using the Their Finest Hour tactic, and with the aid of favourable dice rolls, Robcol and the South Africans managed to hold off flanking attacks and bring the game to a close draw, though an operational defeat for the Germans, as they would not be able to outflank the Alamein box.

If the battle had continued for a second day it is very likely that the encircled and worn down Allied troops would have been defeated. However, it would greatly depend on the relative supply and reinforcement situation. The Germans were short of both, and had taken substantial losses to their best units, while the Allies had more troops and fuelled-up vehicles on the way. This outcome was satisfactorily close to the real history of the battle.


Positions at dusk: the Germans attempt but fail to take the ridge, and Carbineer Kopje still remains in Allied hands.
                                        
General scheme of the battle, including final positions of units.


Schutzen Regiment 200, which already wrested the central objective from the Gurkhas, attempts to take the ridge but is beaten back by Robcol and the Transvaal Scottish.

At the end of the day, with Robcol and the South Africans surrounded, 4th Armoured in turn surrounds the very worn out Jager Regiment 155.

Discussion

The game showcased the Rommel ruleset and really demonstrated the need for commanders to focus on the key objectives while retaining a broader situational awareness to win the game. There were also some great moments of heroism and tactical skill be various formations, which I think indicates the value of including unit names on the cards and gives a hint as to how great Rommel could be for campaign games.

My opponent really enjoyed the game - he was inspired by the Little Wars TV Peleliu campaign to try out bigger games - grand tactical or operational. I will now be looking into various hex and counter wargames set in the North African theatre to find material to create a Rommel campaign with the miniatures I have available.

I do wonder though about different ways to handle the Tactics and Events in Rommel - whether cards would work better, and whether there should be more instances of particular tactics or more variety of effects than just combat value increase and shifts up or down. I'm sure all alternatives were play-tested, but I'm always thinking adjustments, expansions and house rules anyway.


The losses taken by both sides. (One of the tanks fell of its base, but no worries, it's safe).